July 2017
Our Reliant Sabre Six GT was dispatched from the factory in March 1964 to dealer Auto Sales Ltd, Bilston, Staffordshire.The car's first owner was Mark Joseland who bought the car in September 1964. He was a very active motor sport enthusiast, being a long-time member of the Midland Auto Club (MAC) based at Shelsley Walsh hillclimb and Captain of the Frazer Nash Club from 1975 to 1978. Sadly he was killed in a road car accident in June 2009. A family friend and fellow car enthusiast, Martin Cowell, bought the car in 2010 but made very little use of it, selling it to us in July 2017.
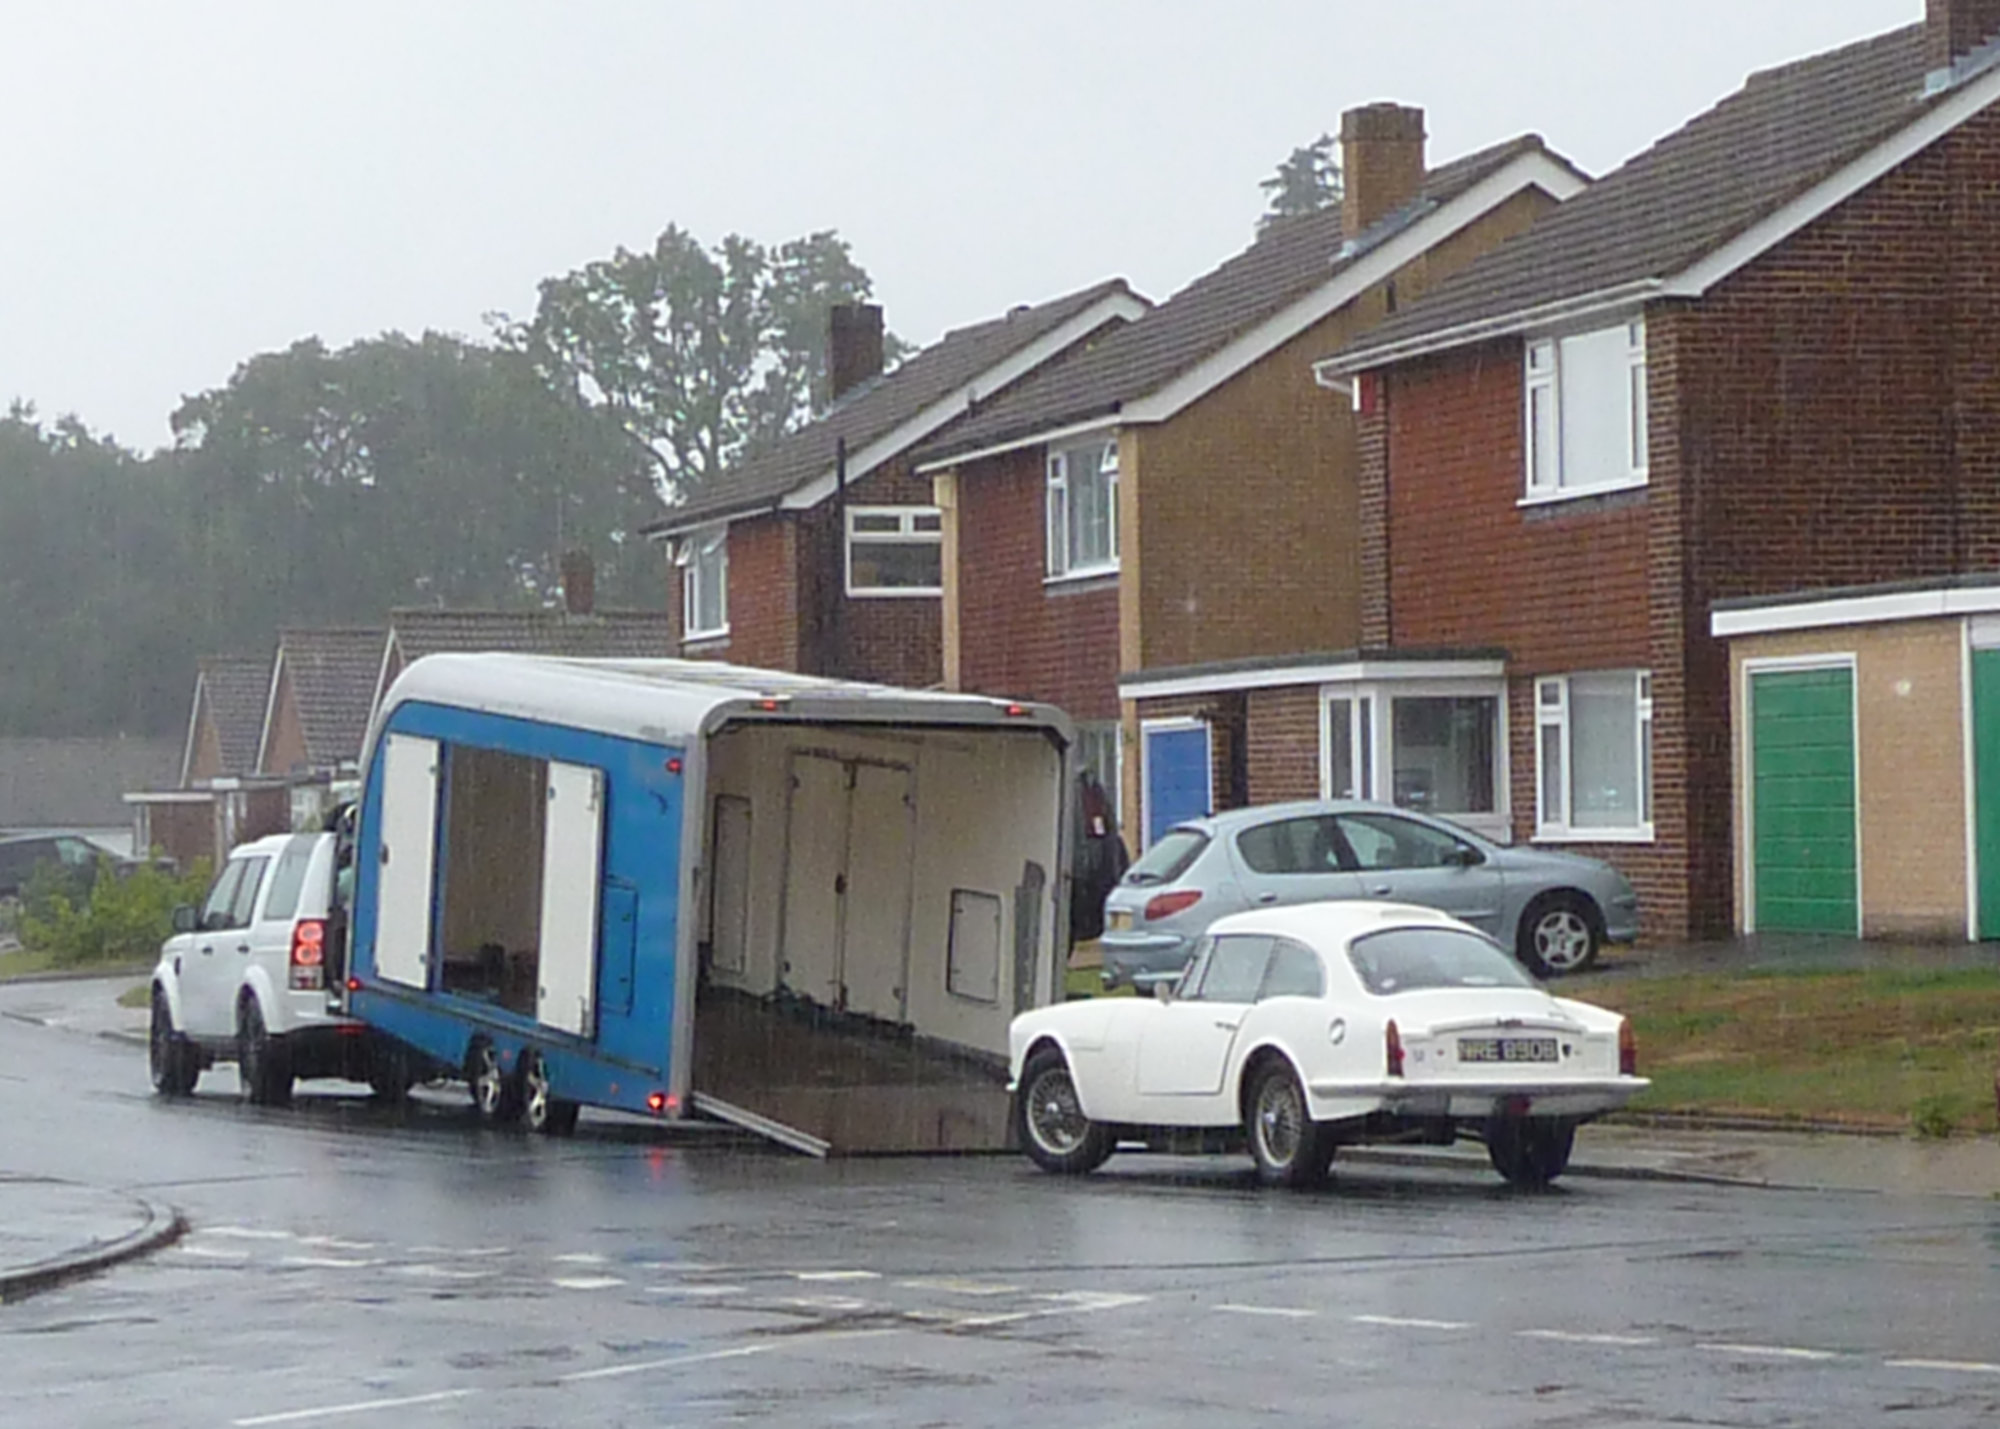
The car started its life British Racing Green but at some time in its life, late 70s/early 80s, was re-paintd white. Mark's motor sport exploits in the Sabre were documented from time to time in Slice (the Magazine of the Reliant Sabre and Scimitar Owners' Club). The car came to us with many performance modificaxtion including a "fast road" engine (strengthened bottom end, Raymond May aluminium 12-port cylinder head, "277" camshaft, twin SU carburettors, free flow exhaust), front anti-roll bar and remote oil cooler.
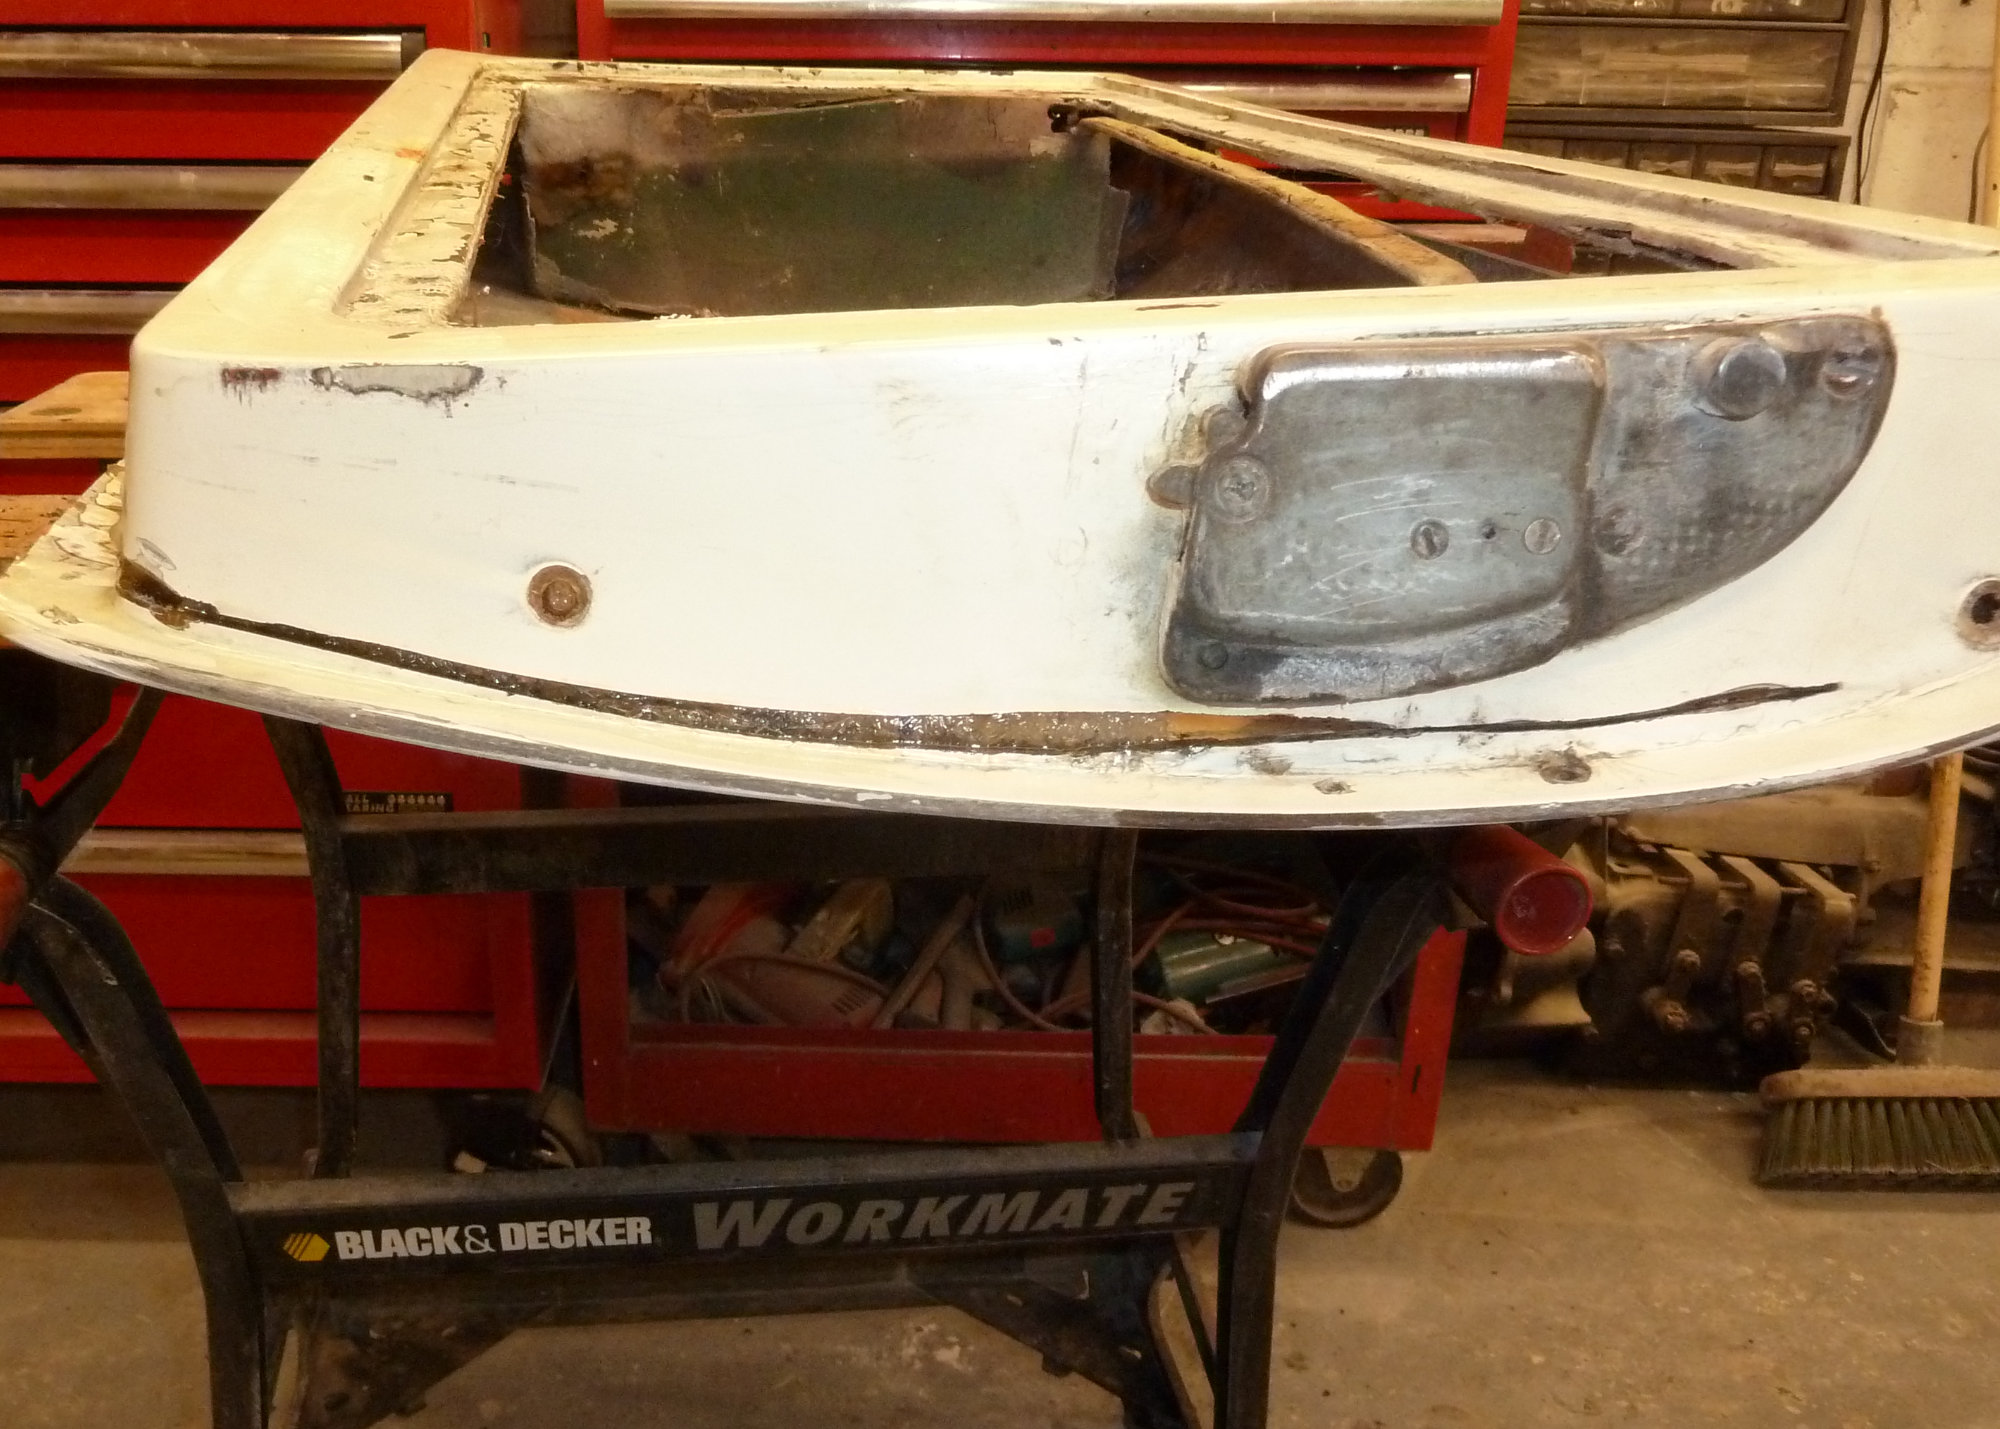
The car had been taxed and MoT'd all its life and appeared to be in fair overall condition. The biggest problem appeard to be bad paint blistering at the rear of the car. Our plan was to carry out a light re-commission and use it pretty much as it was - a good companion to our near-concours white Sabre Six Convertible. It didn't quite work out like that!!

It soon became apparent that all was not well with the engine. It ran very roughly and was inclined to backfire and splutter. I carried out the usual checks including ignition timing and valve clearances and replaced all the ignition components including changing to a Powermax electronic ignition system and rebuilt the carburettors with new gaskets and jets and balanced and tuned them as best as I could. A compression test revealed no issues.
December 2017
Then the exhaust manifold developed a massive leak and as the rest of the system was in very poor condition I decided to get a new replacement system. As you can imagine these don’t come “off the shelf” for Sabres so I went to Fast Road Conversions in Ashford, Kent and a couple of weeks later I collected the car. But the 35 mile drive home confirmed that this had not cured the running problem.

September 2018
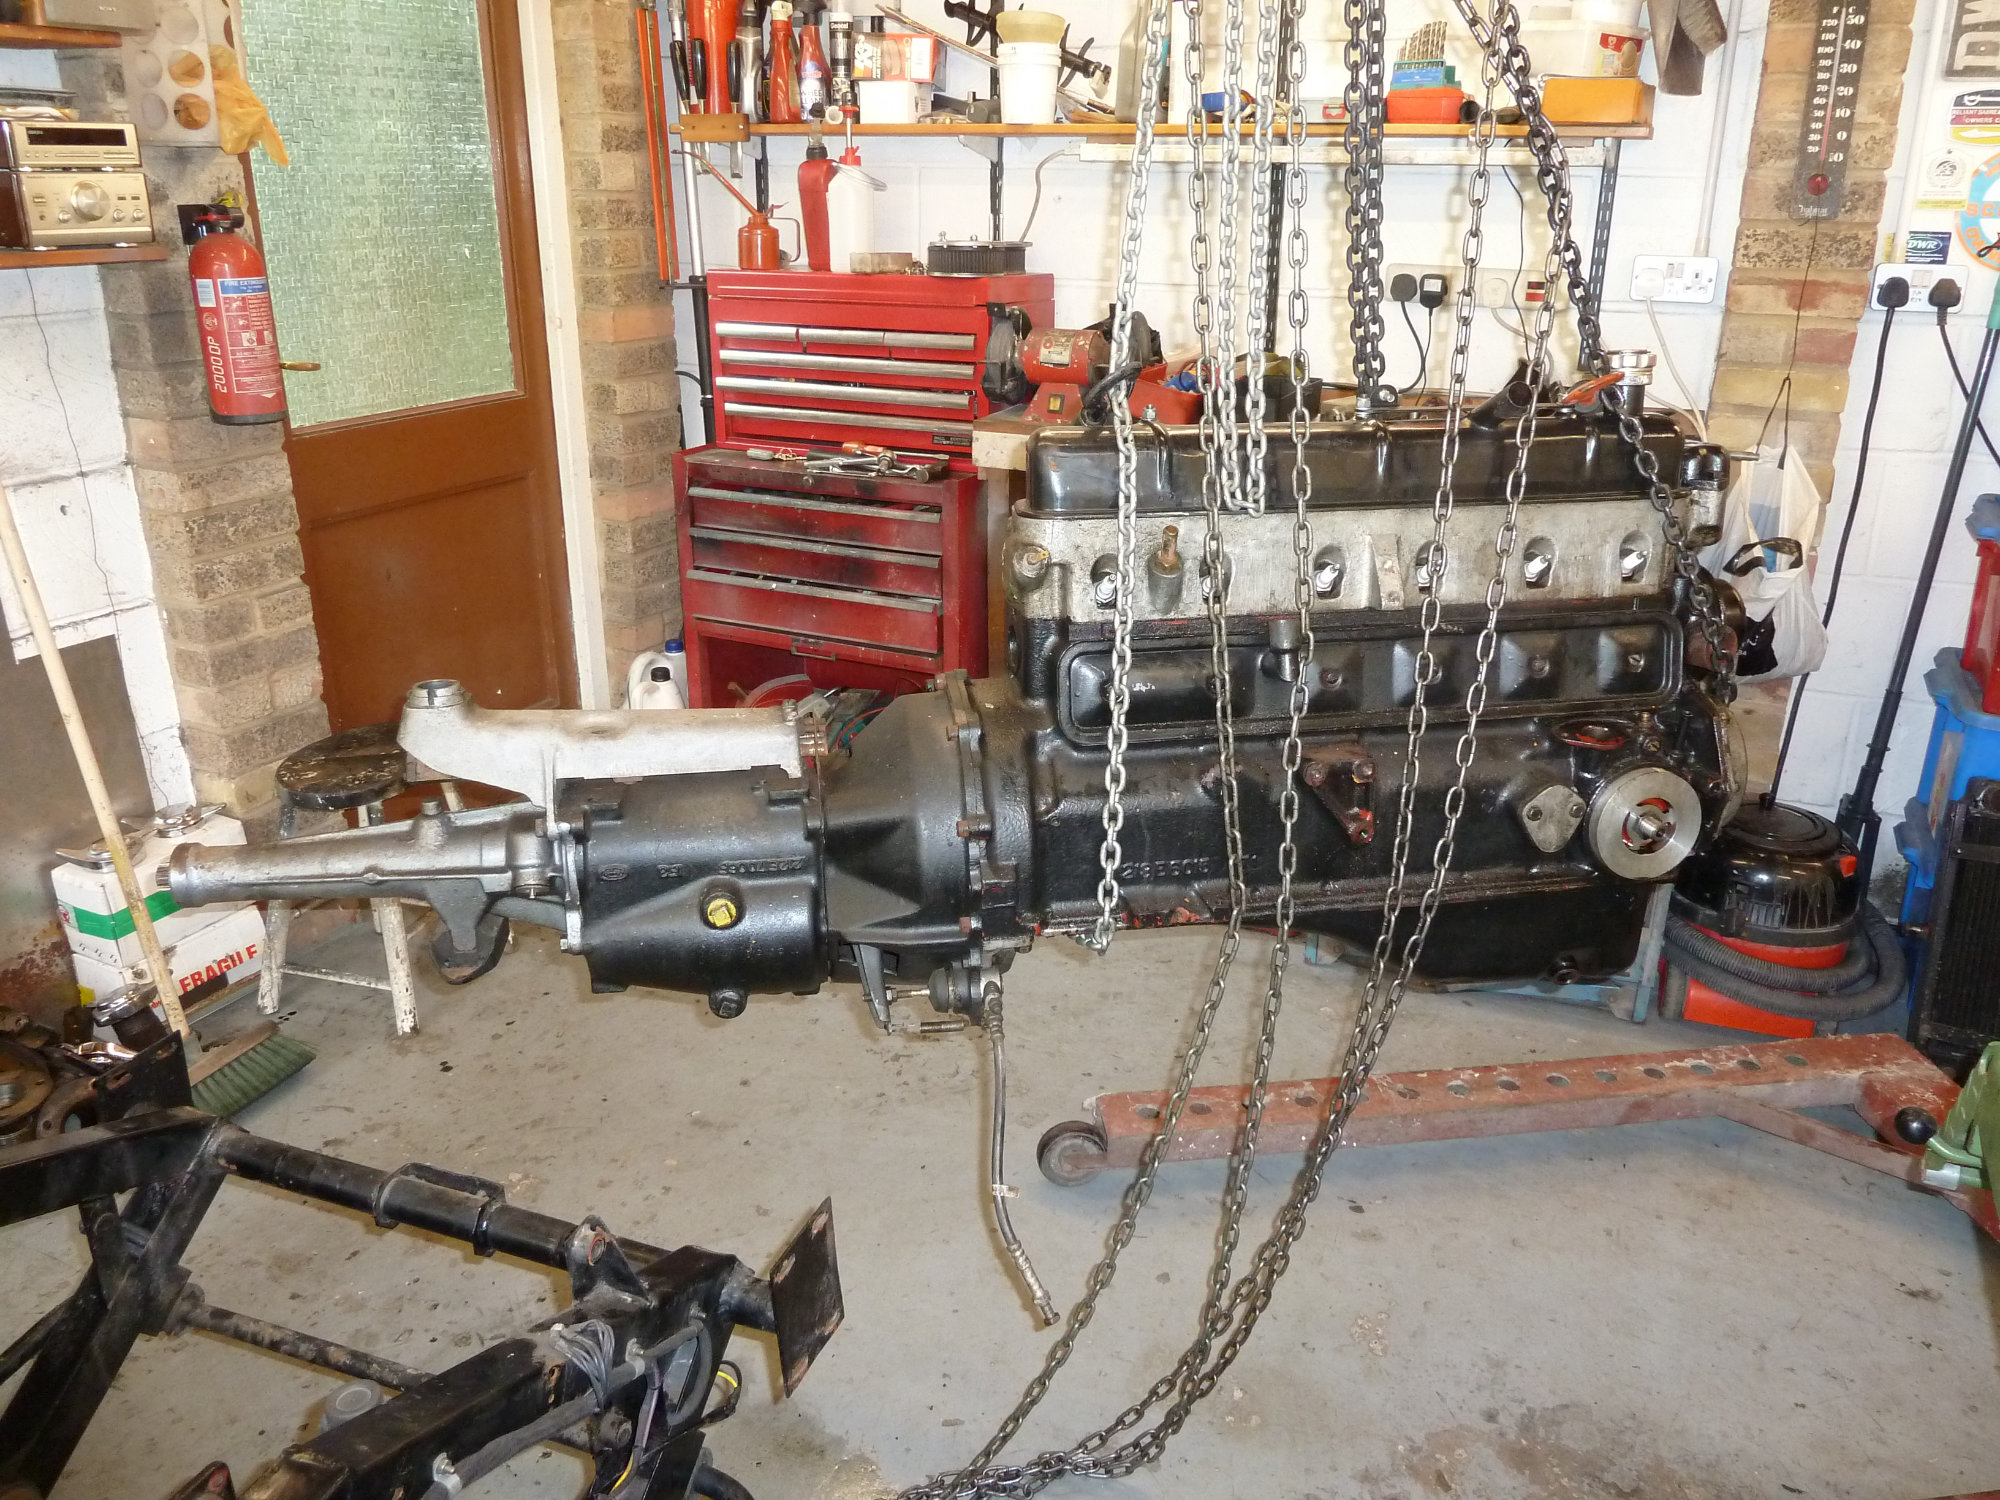
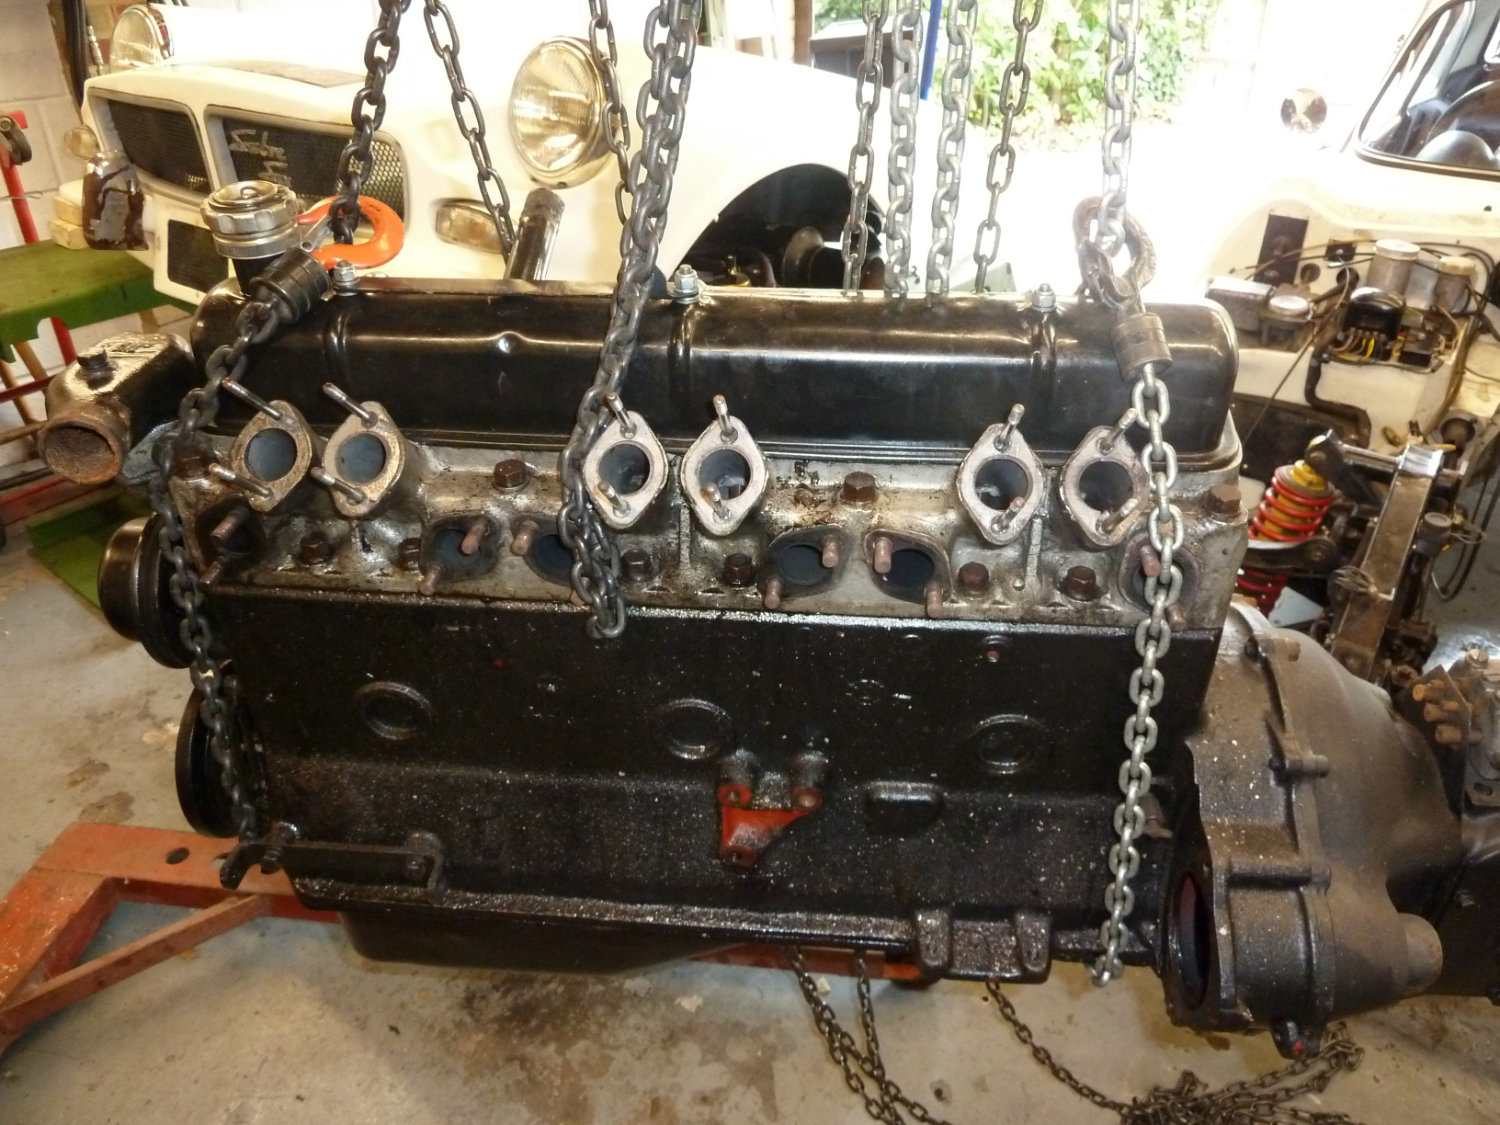
Just over a year of ownership and we decided to remove the engine and dispatch it to Sabre expert Iain Daniels Classic Motorsport. Iain soon dismantled the engine for inspection. He found it to be in good condition generally with regard to bearings, bores and pistons. It fact it has been re-built to a good standard at some stage with Volvo pistons, capped centre main bearings, “277” camshaft, balanced crank and pistons, etc. However the head gasket had failed in a few places, the head was warped and it had incorrect, ill fitting inlet valves. These issues would certainly account for the engine’s poor performance. So the engine was rebuilt, retaining the good bits but replacing or reconditioning the bad bits.
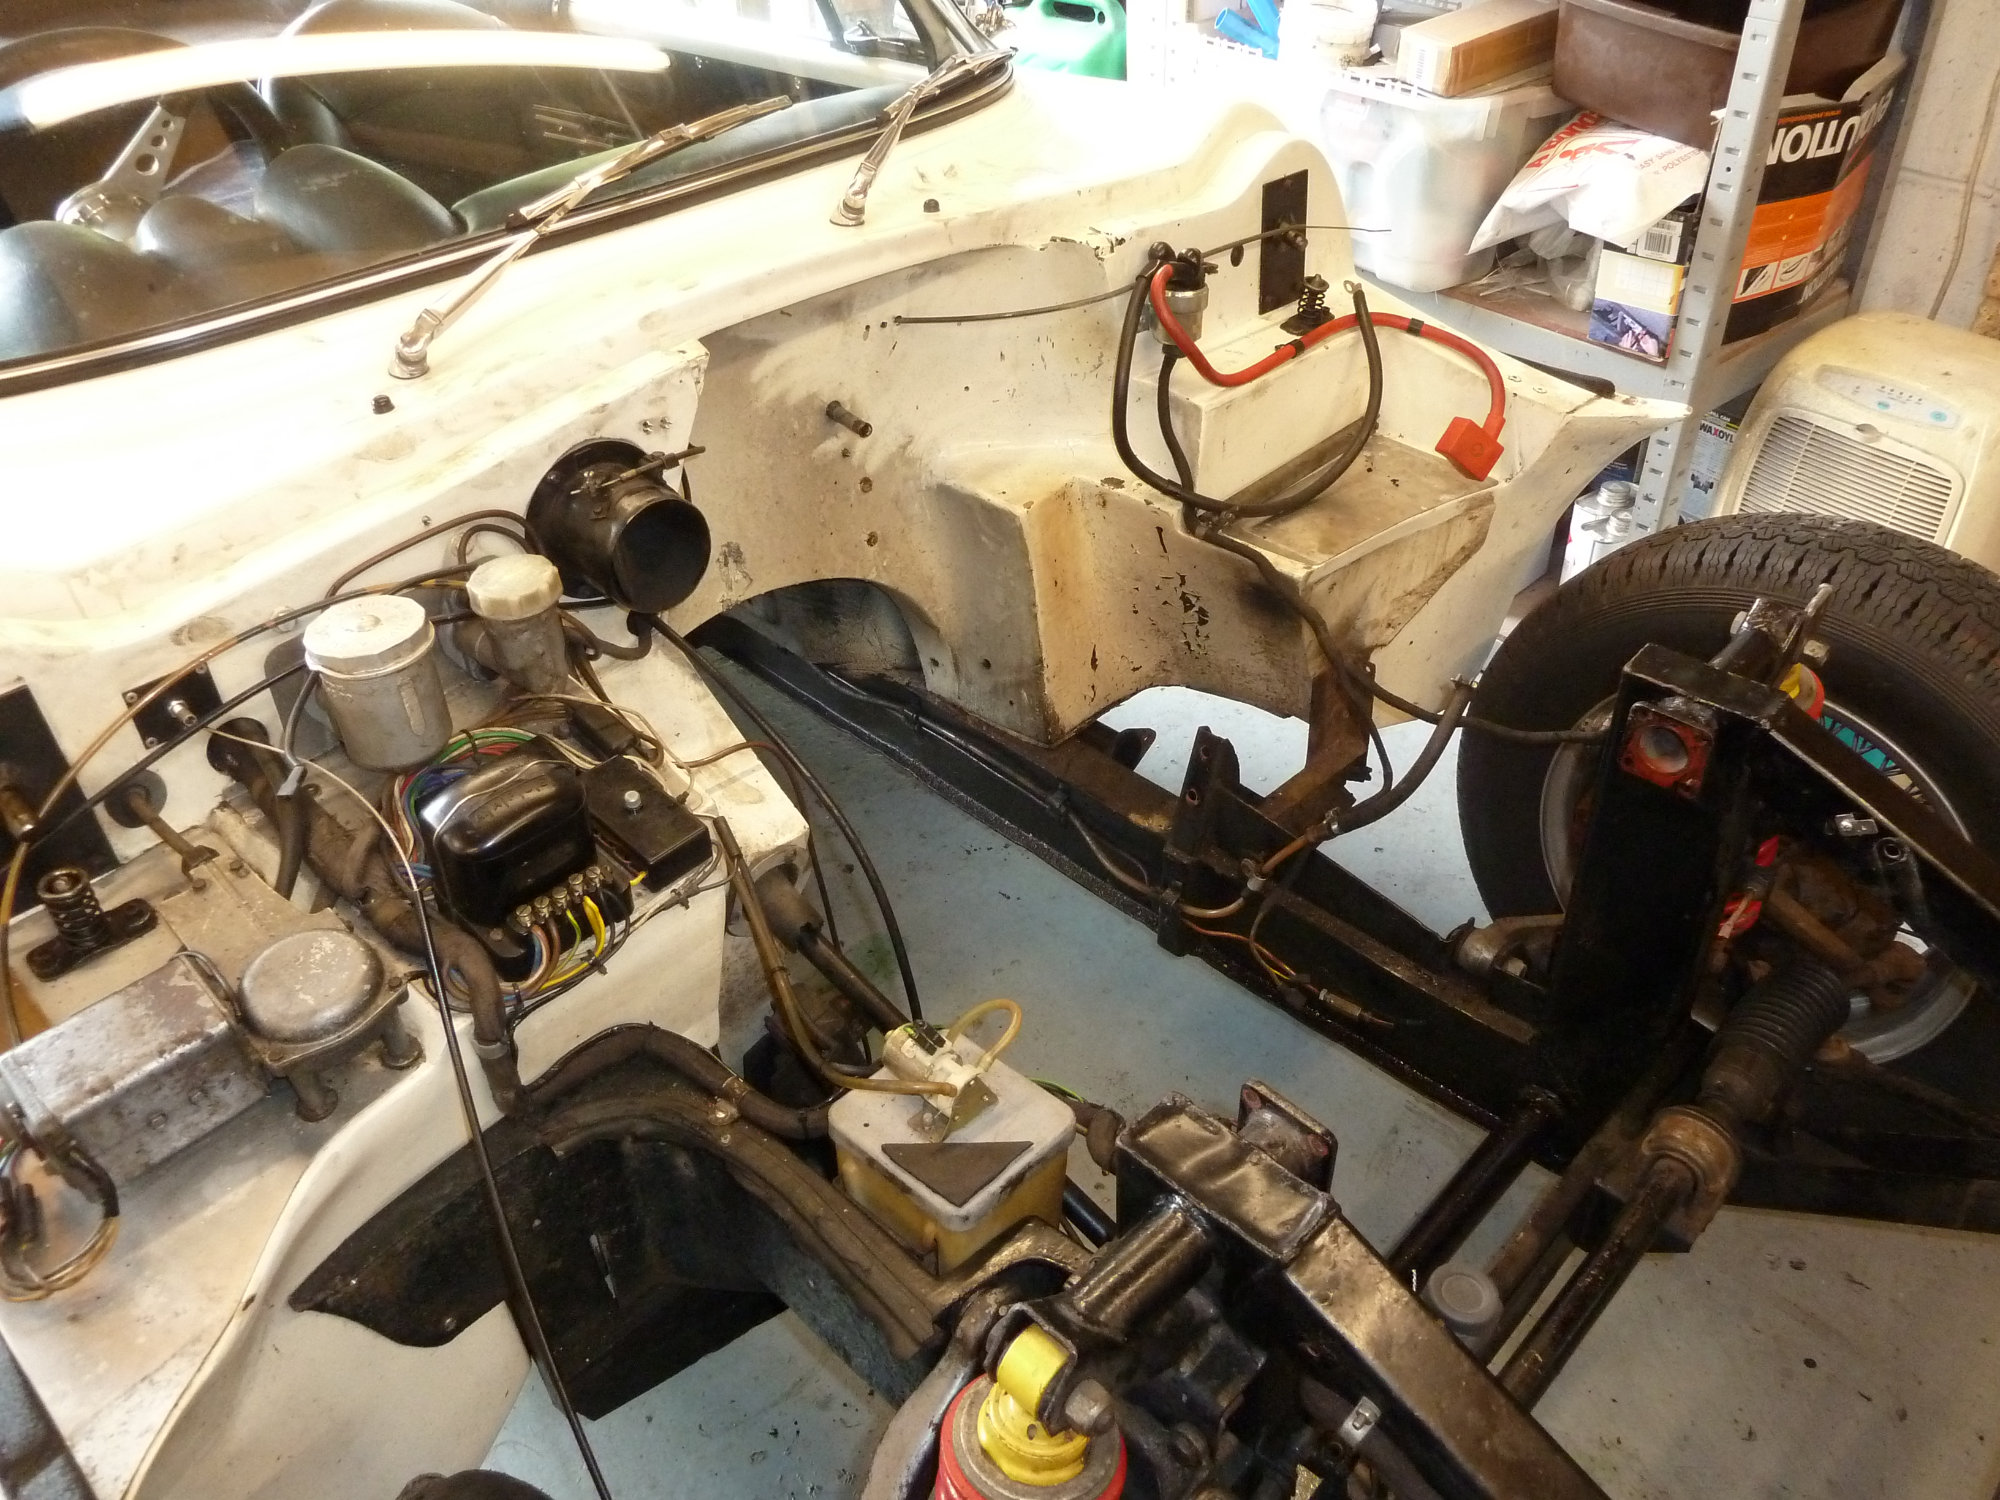
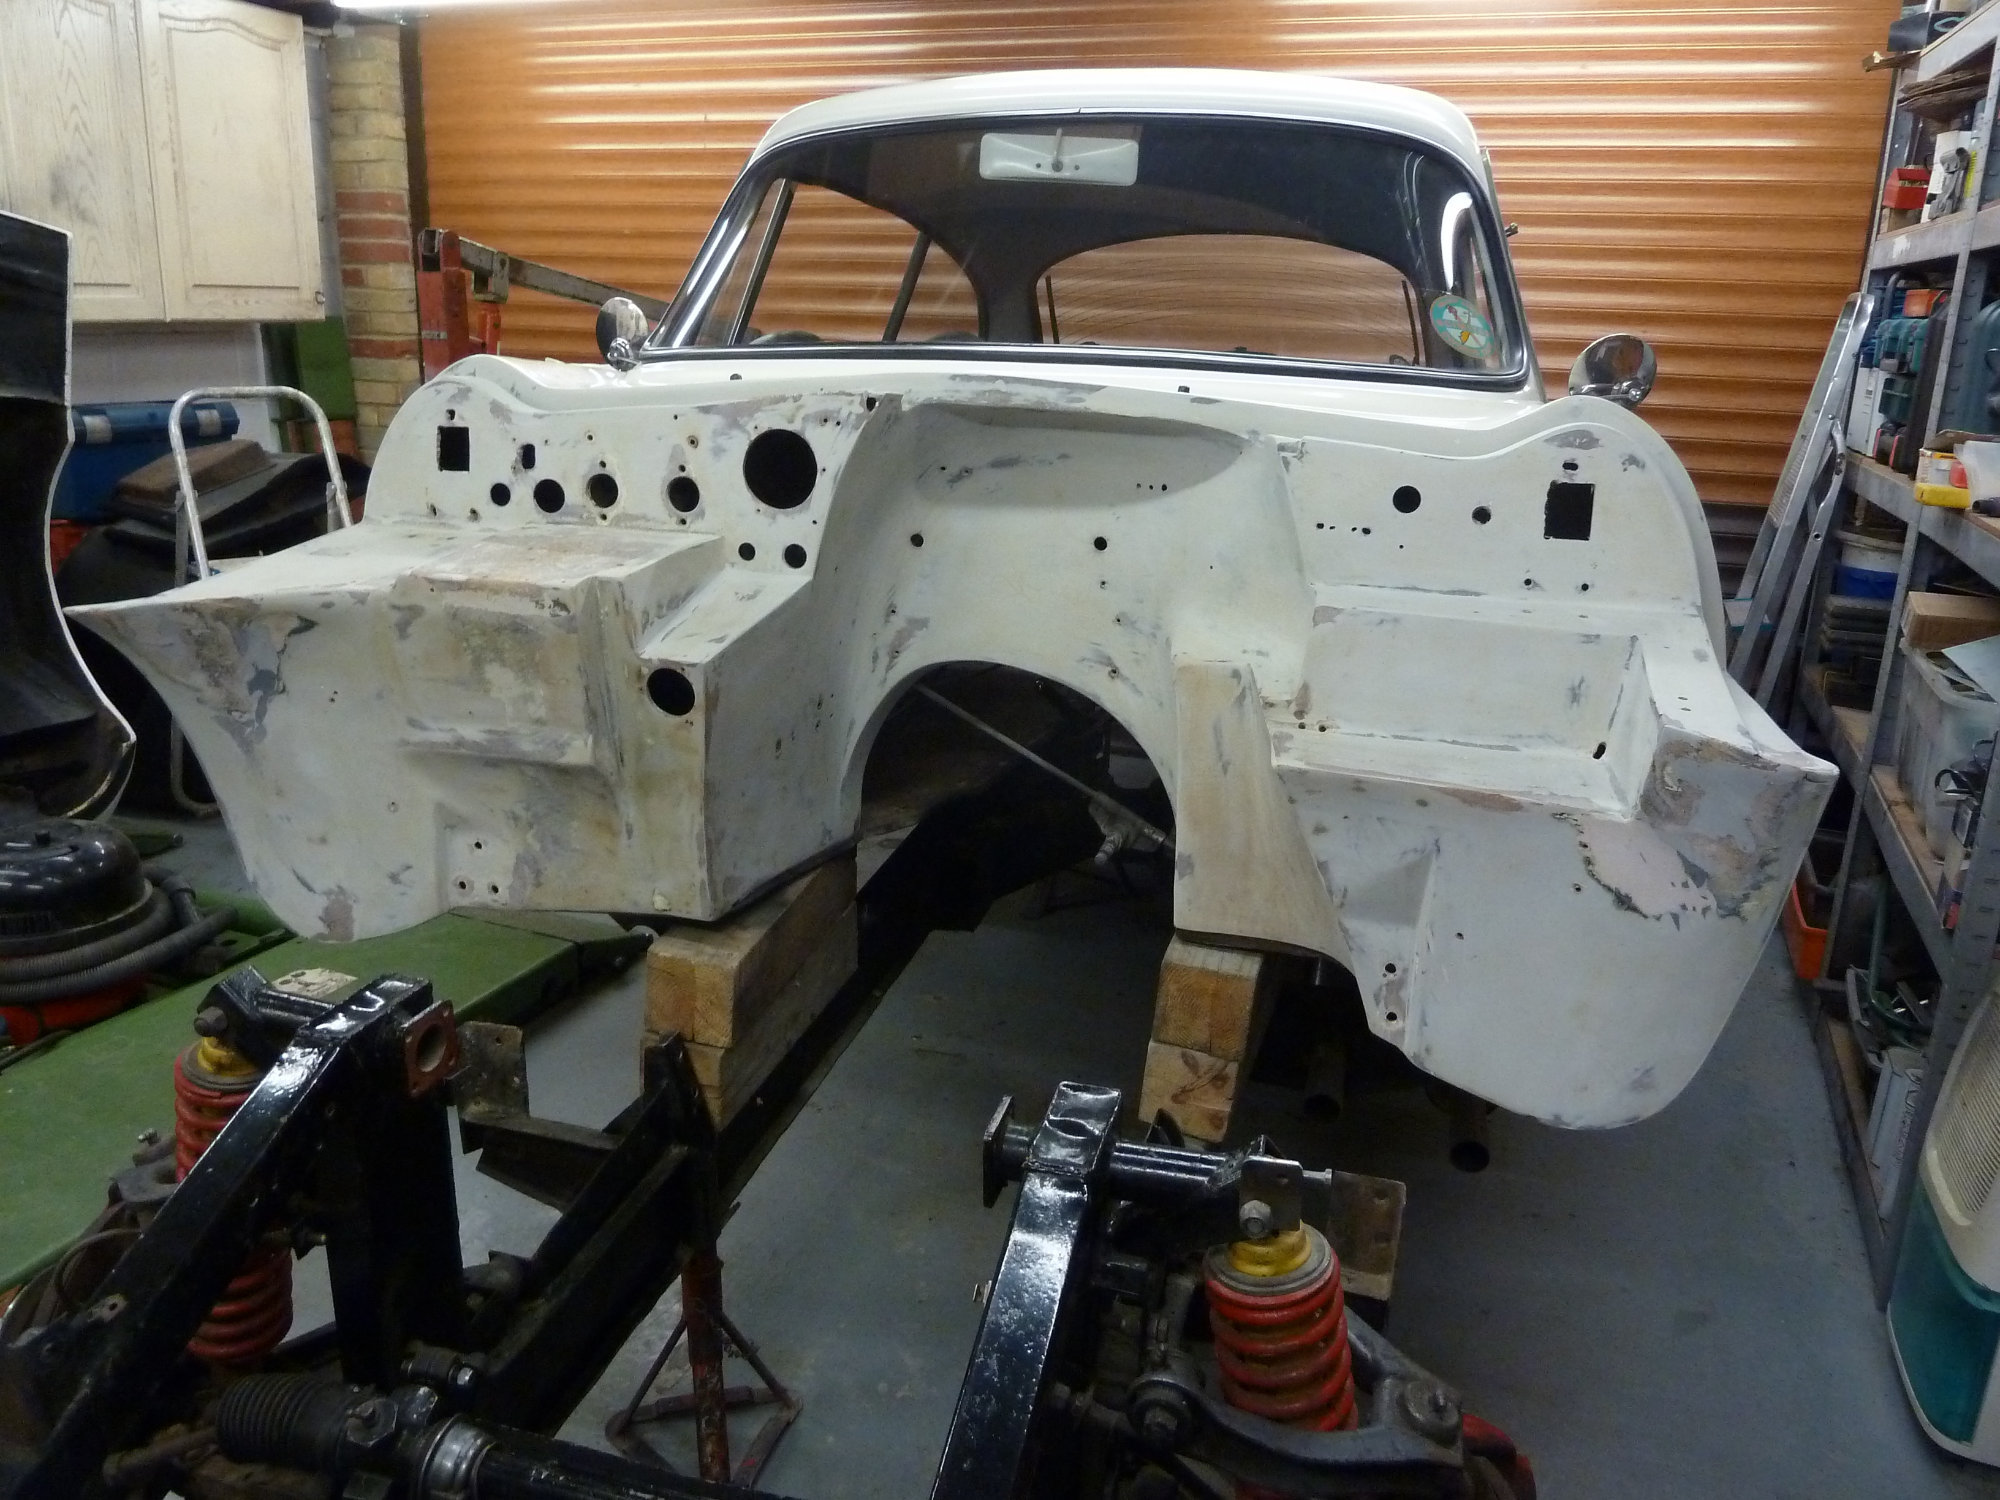
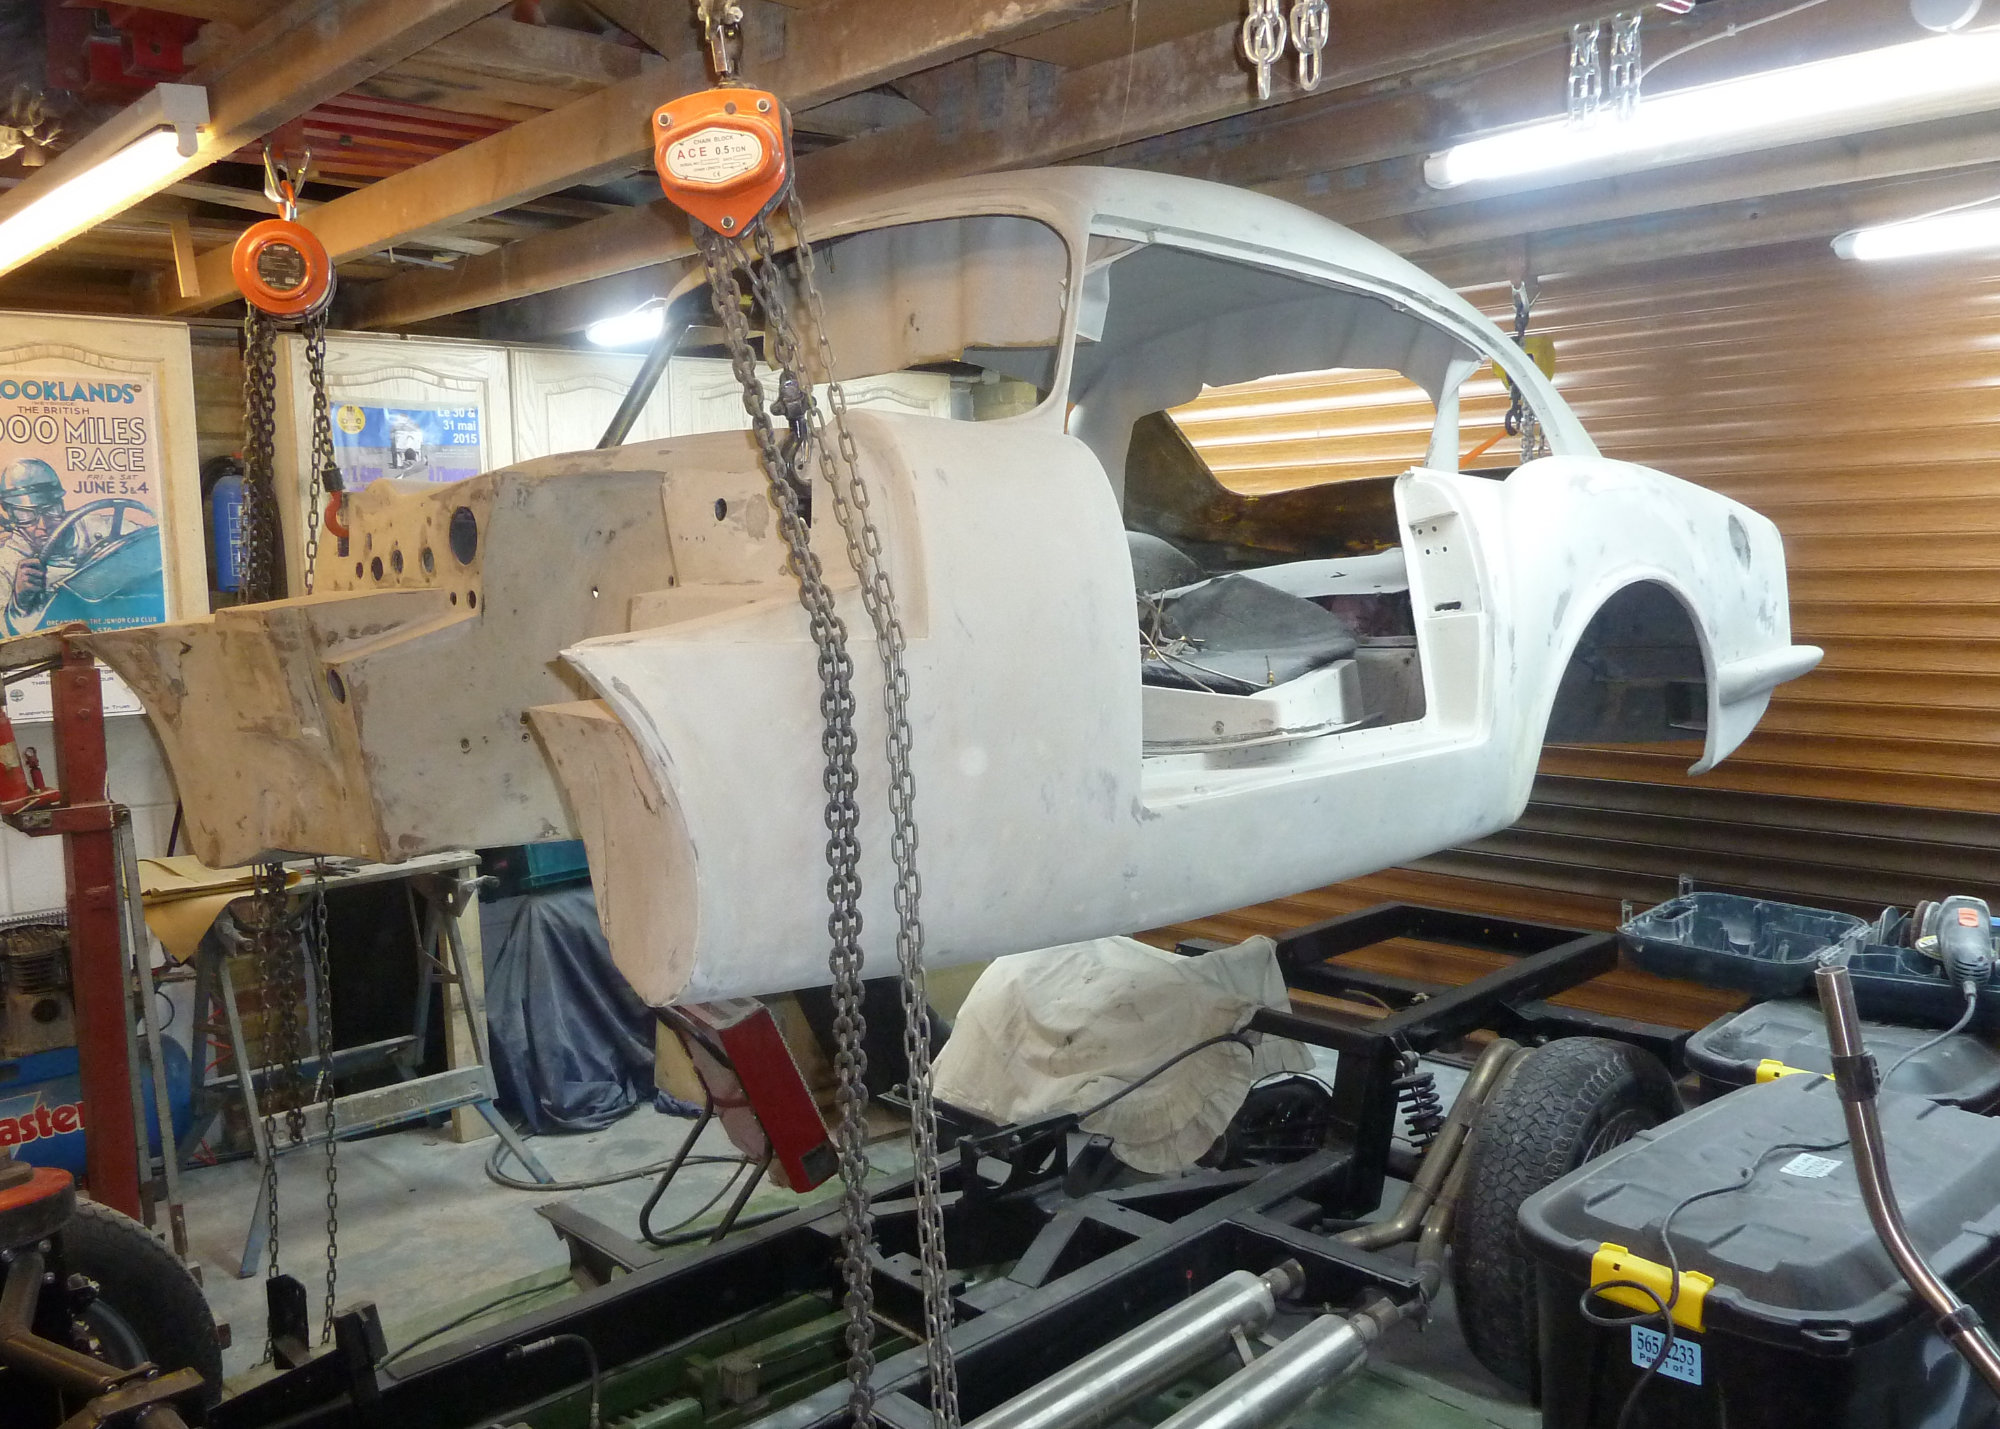
With the engine away I thought I would strip and re-paint the engine bay. I also raised the body from the chassis by a few inches so that I could see the condition of the chassis and could replace all the rusty body to chassis fixings. The chassis seemed to be in very sound condition albeit with some surface rust. I now realised that I wasn’t going to get away with a limited refresh of the car and that a full respray, amongst other things was the way I would be going.
February 2019
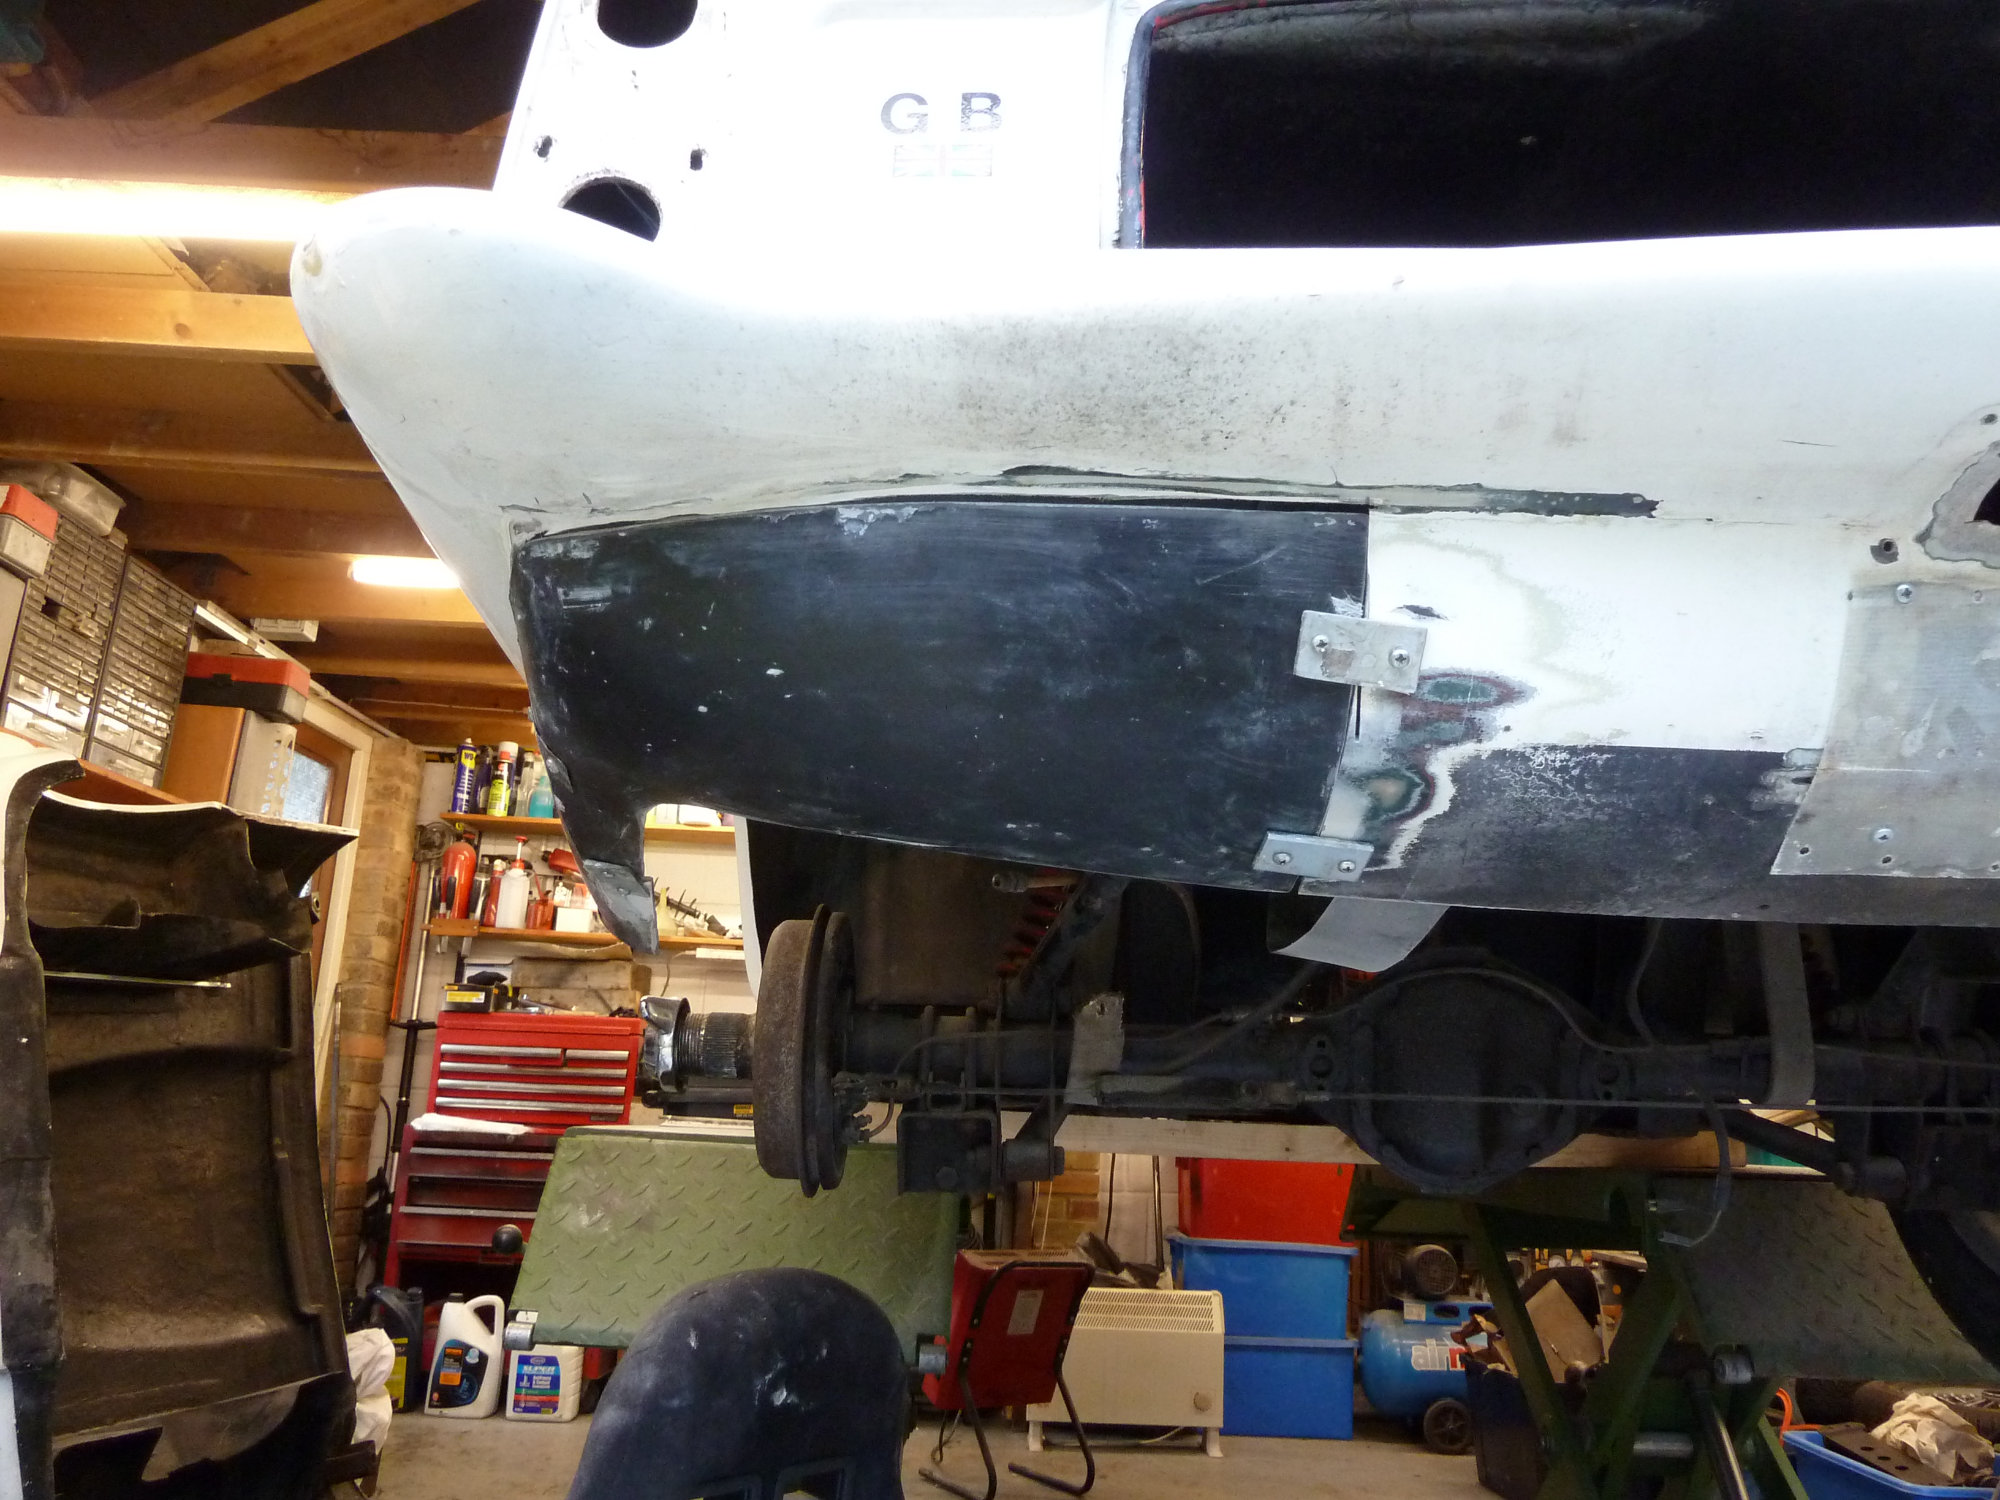
The fuel tank had been replaced at some time in the past with a new painted mild steel tank. When removed it could be seen to be in very sound condition. However it was not quite the correct shape and to make it fit a previous owner had crudely cut and patched the rear valence. I considered getting a new tank made. This would have cost several hundred pounds, so I went for plan B, that was to modify the rear valence to make it slightly “fatter”. The tank now fits fine and the difference in the valence is imperceptible in my opinion.
Cold winter days are not the best times to be doing glass fibre work. However, I have found that using a radiant infra-red electric heater deals with the temperature issue very well. Such a device warms the section being worked on without the need to heat the whole workshop. It's even effective outside.
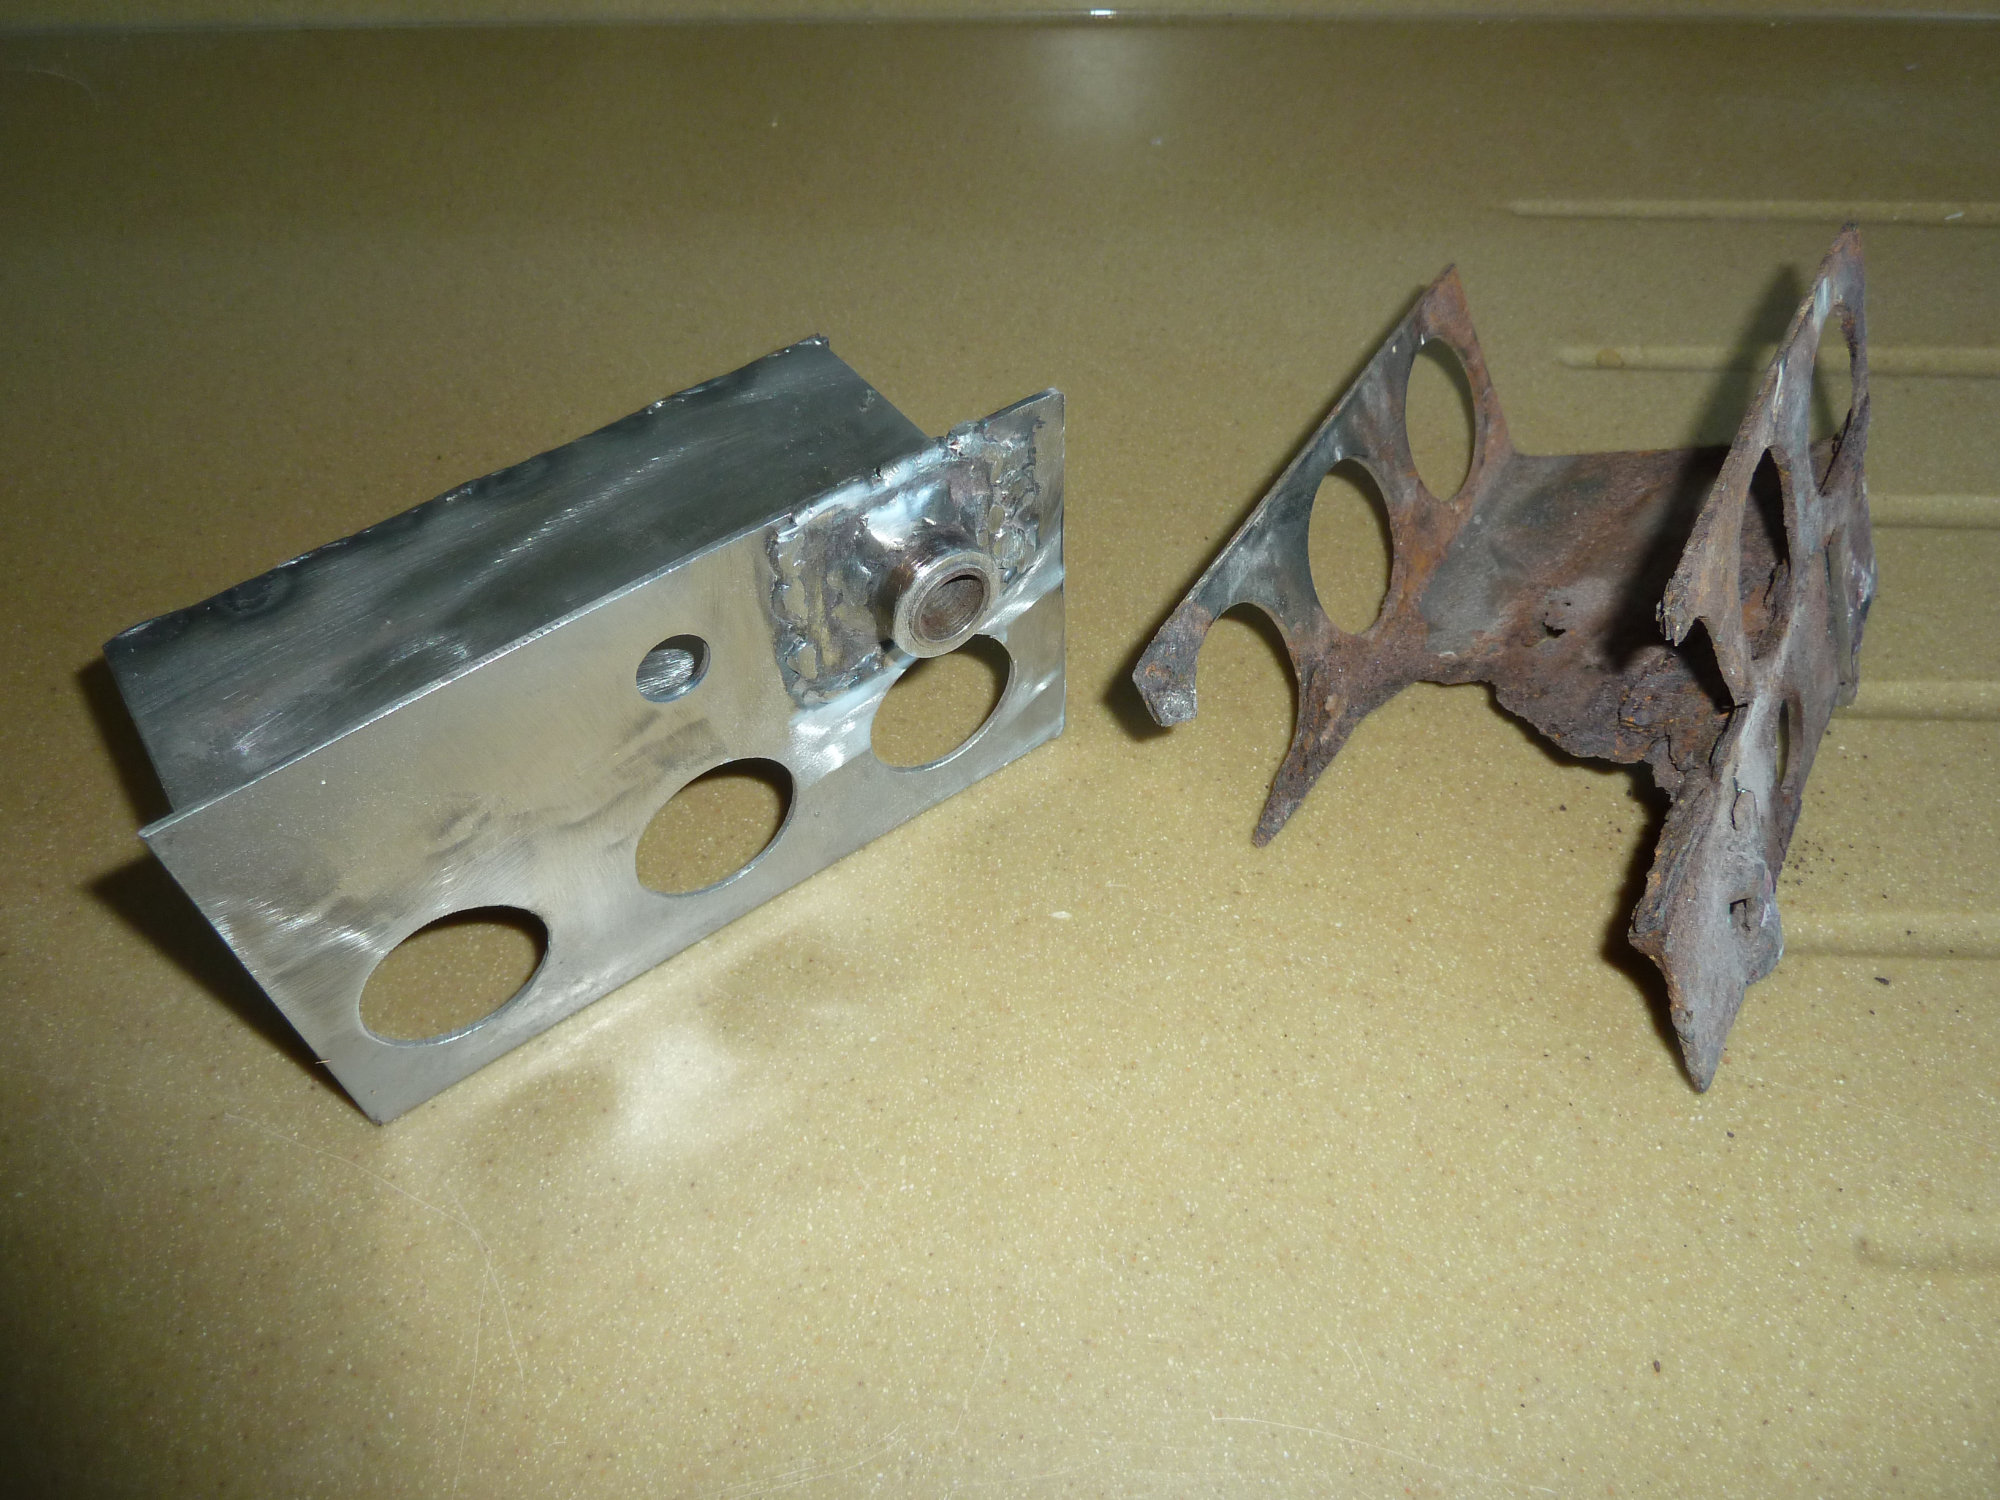
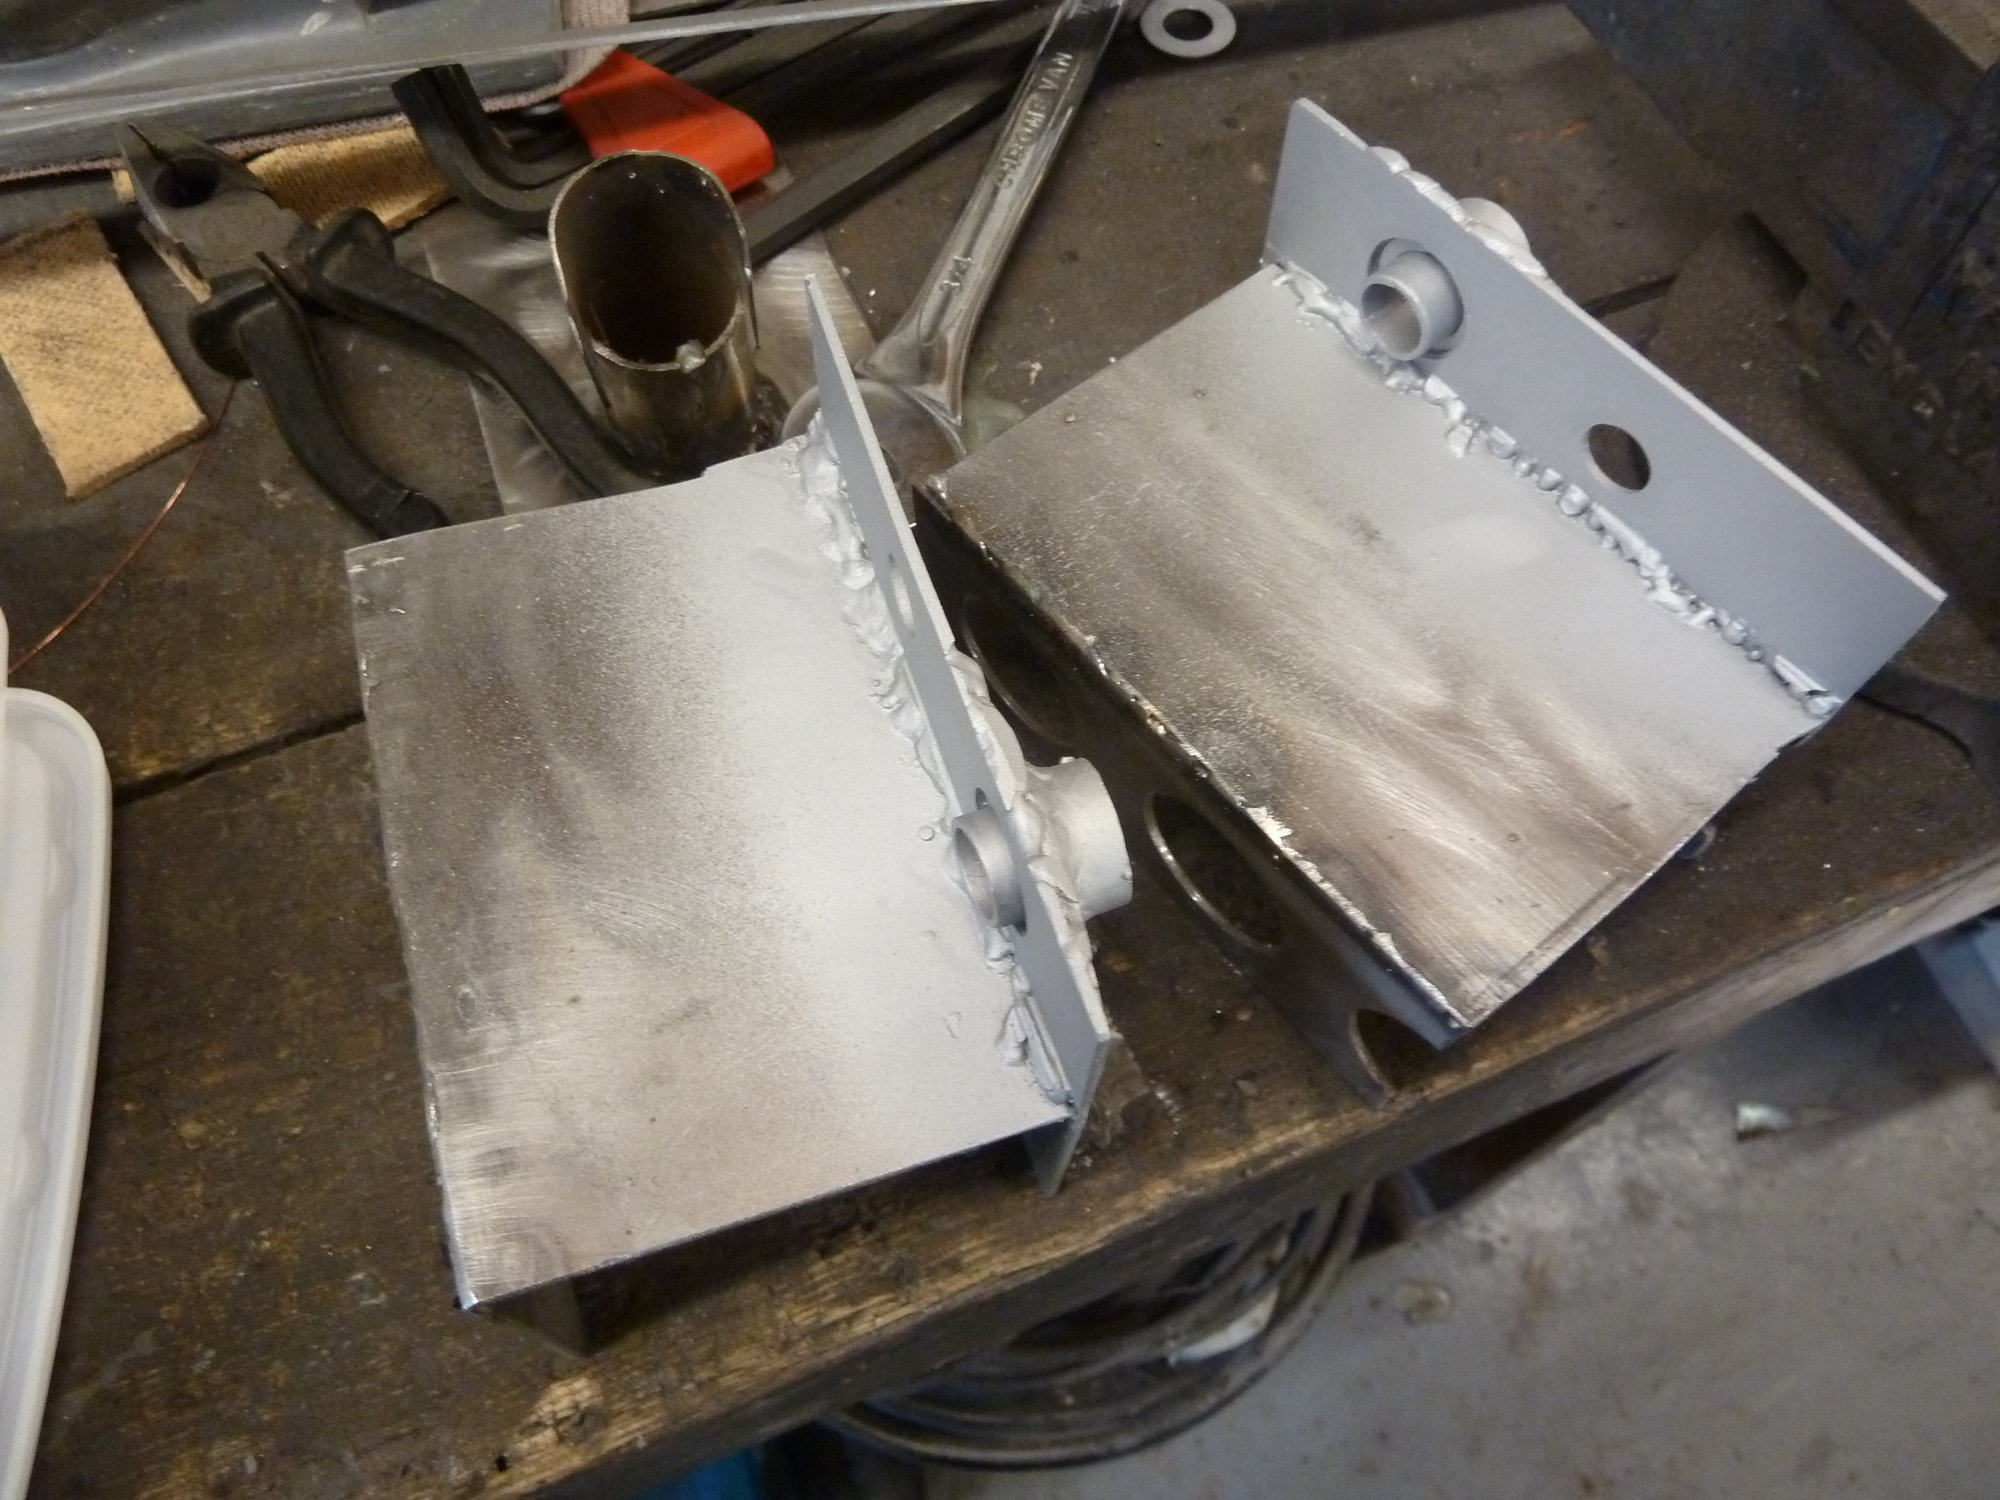
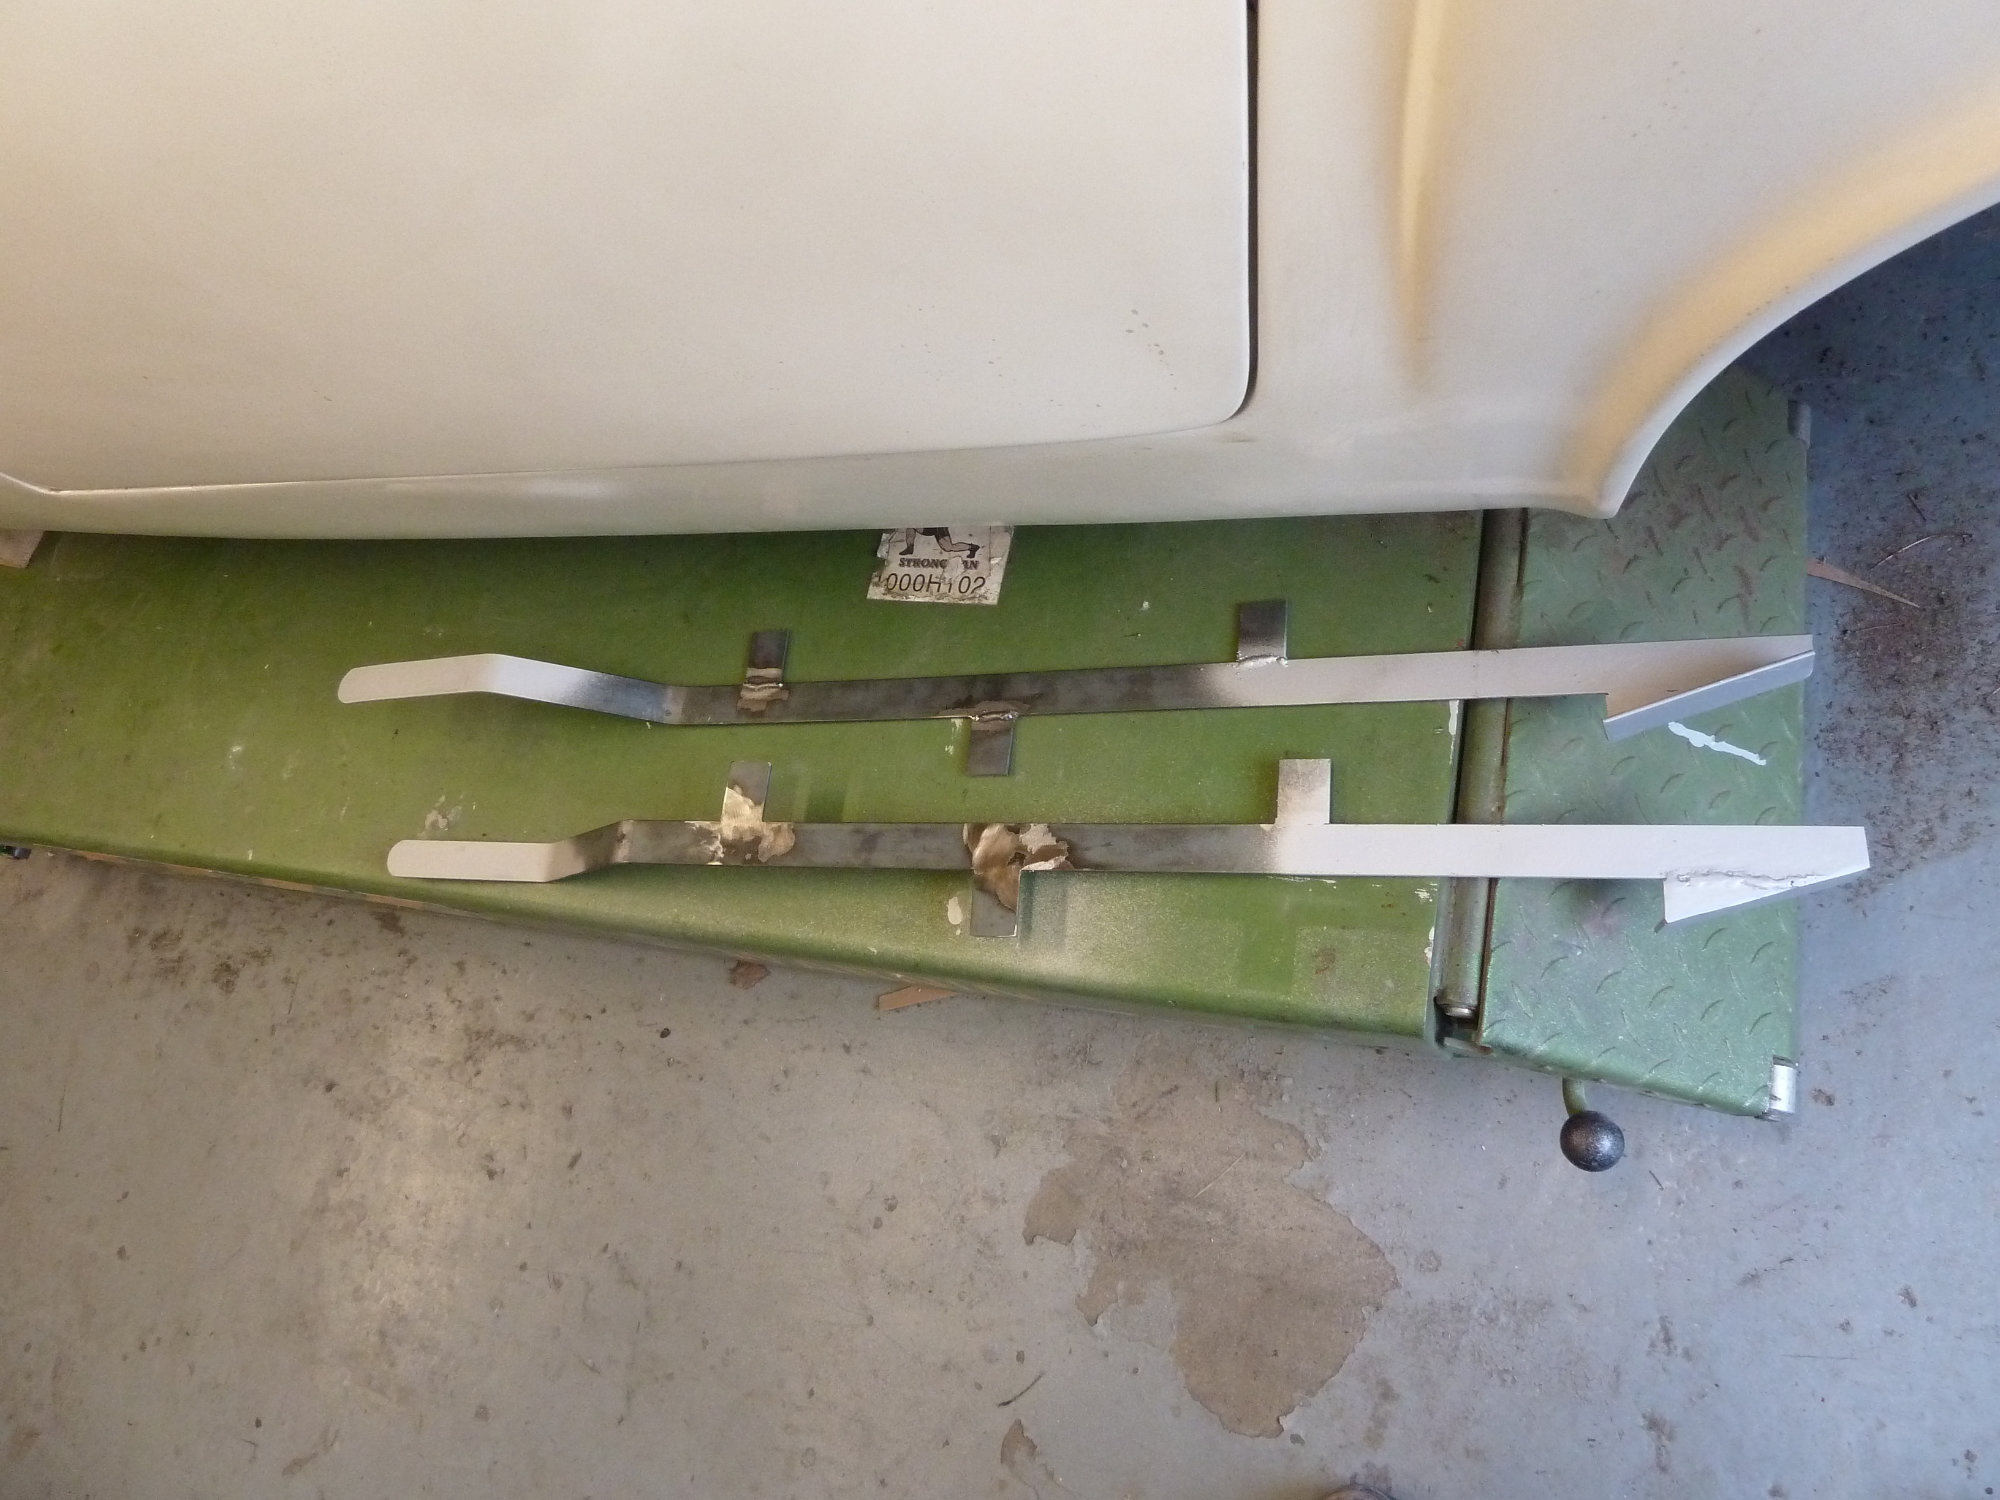
I then set about remaking various metal brackets to replace rusted originals. These included the bonded in bonnet hinge brackets, the rear cross-member to rear wing brackets and the straps that connect the “B” post seat belt mount to the rear chassis cross-member (the car appeard never to have been fitted with seat belts but our plan is to add them).
March 2019
I decided to replace all the rusty nuts and bolts fixing the body to the chassis. The chassis was found to be in sound condition but had some areas of surface rust. After some deliberation I decided to get it, together wilh numerous suspension components and brackets, shot blasted and powder coated. Other parts I prepared and hand painted with POR15.
April 2019
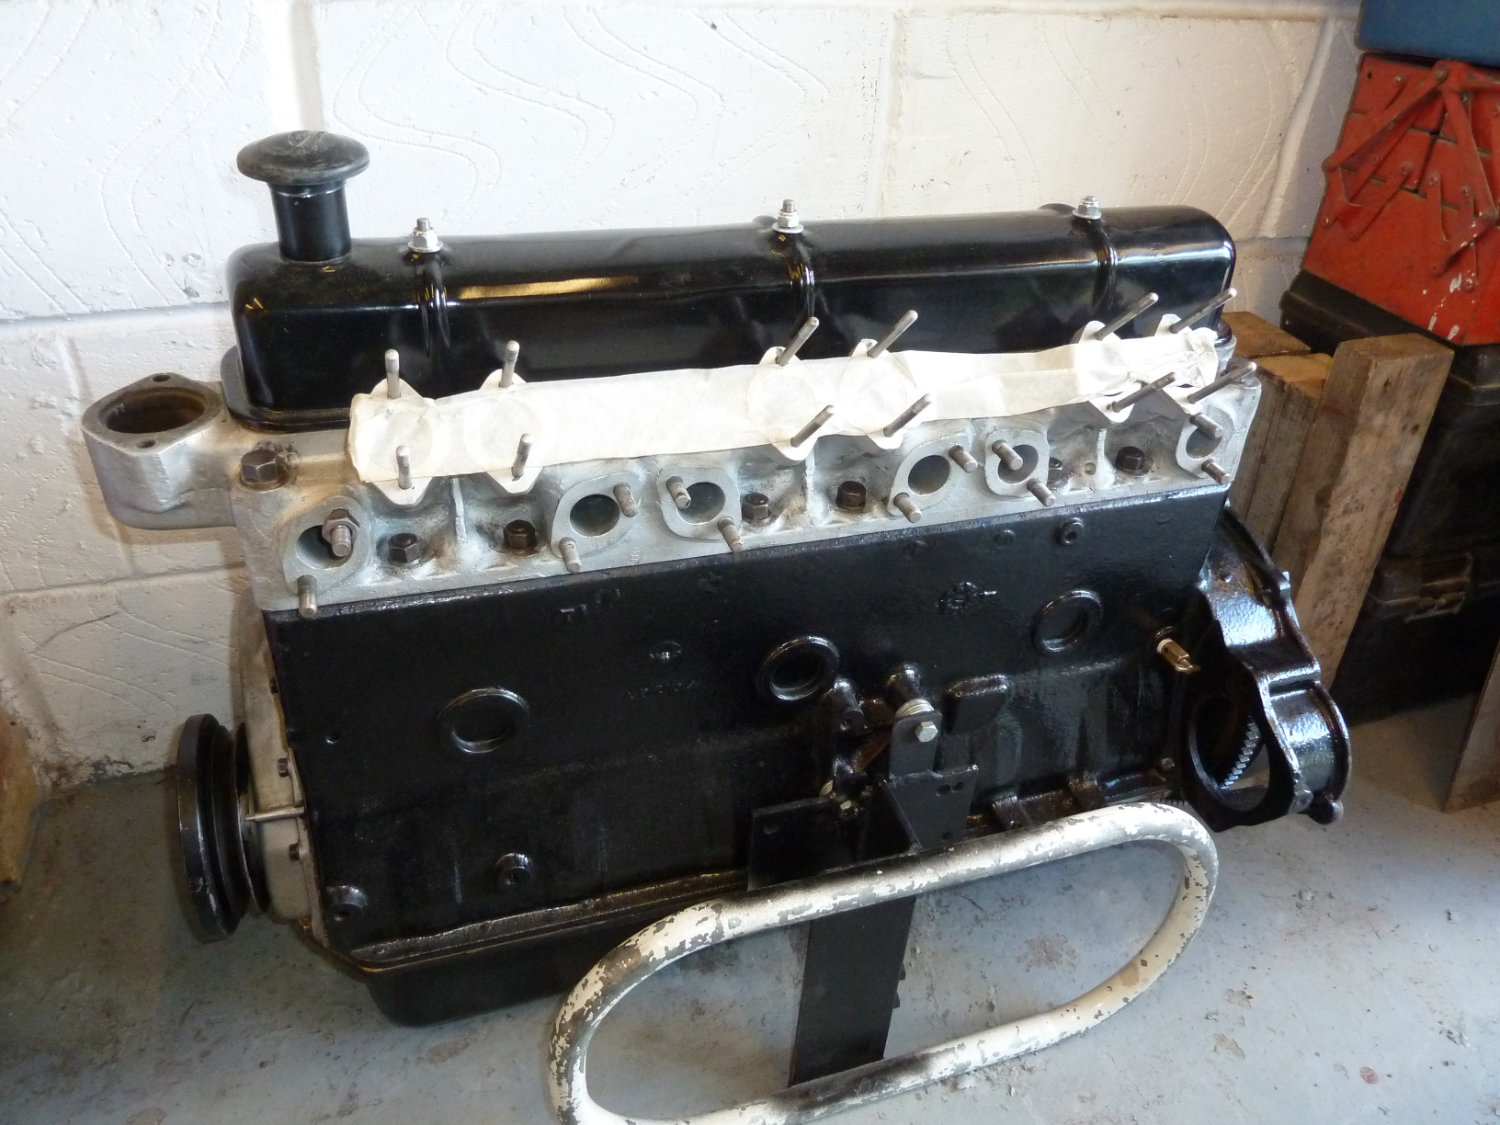
The engine’s rebuild by Iain Daniels Classic Motorsport is now complete and it is now returned to our garage.
June 2019
On inspecting the dismantled front suspension I noticed that one of the lower wishbones was slightly bent. With the help of a friend and his giant vice, this was easily corrected. However, when I came to reassemble the suspension I realised that one of the lower wishbone chassis brackets was positioned about 4mm too far forward. It seems that someone had relocated the bracket, perhaps after an accident, to suit the bent wishbone! I managed to fabricate a new bracket and got a local welder to stitch it into place.
September 2019
The chrome over-bumpers fitted originally to the Sabre models are one of the most difficult items to obtain, to such an extent that most owners don’t bother with them. They are only thin gauge covers that go over the glass fibre body and provide little or no protection. It is quite possible to paint the bumper shaped bodywork silver in this area and this can look quite a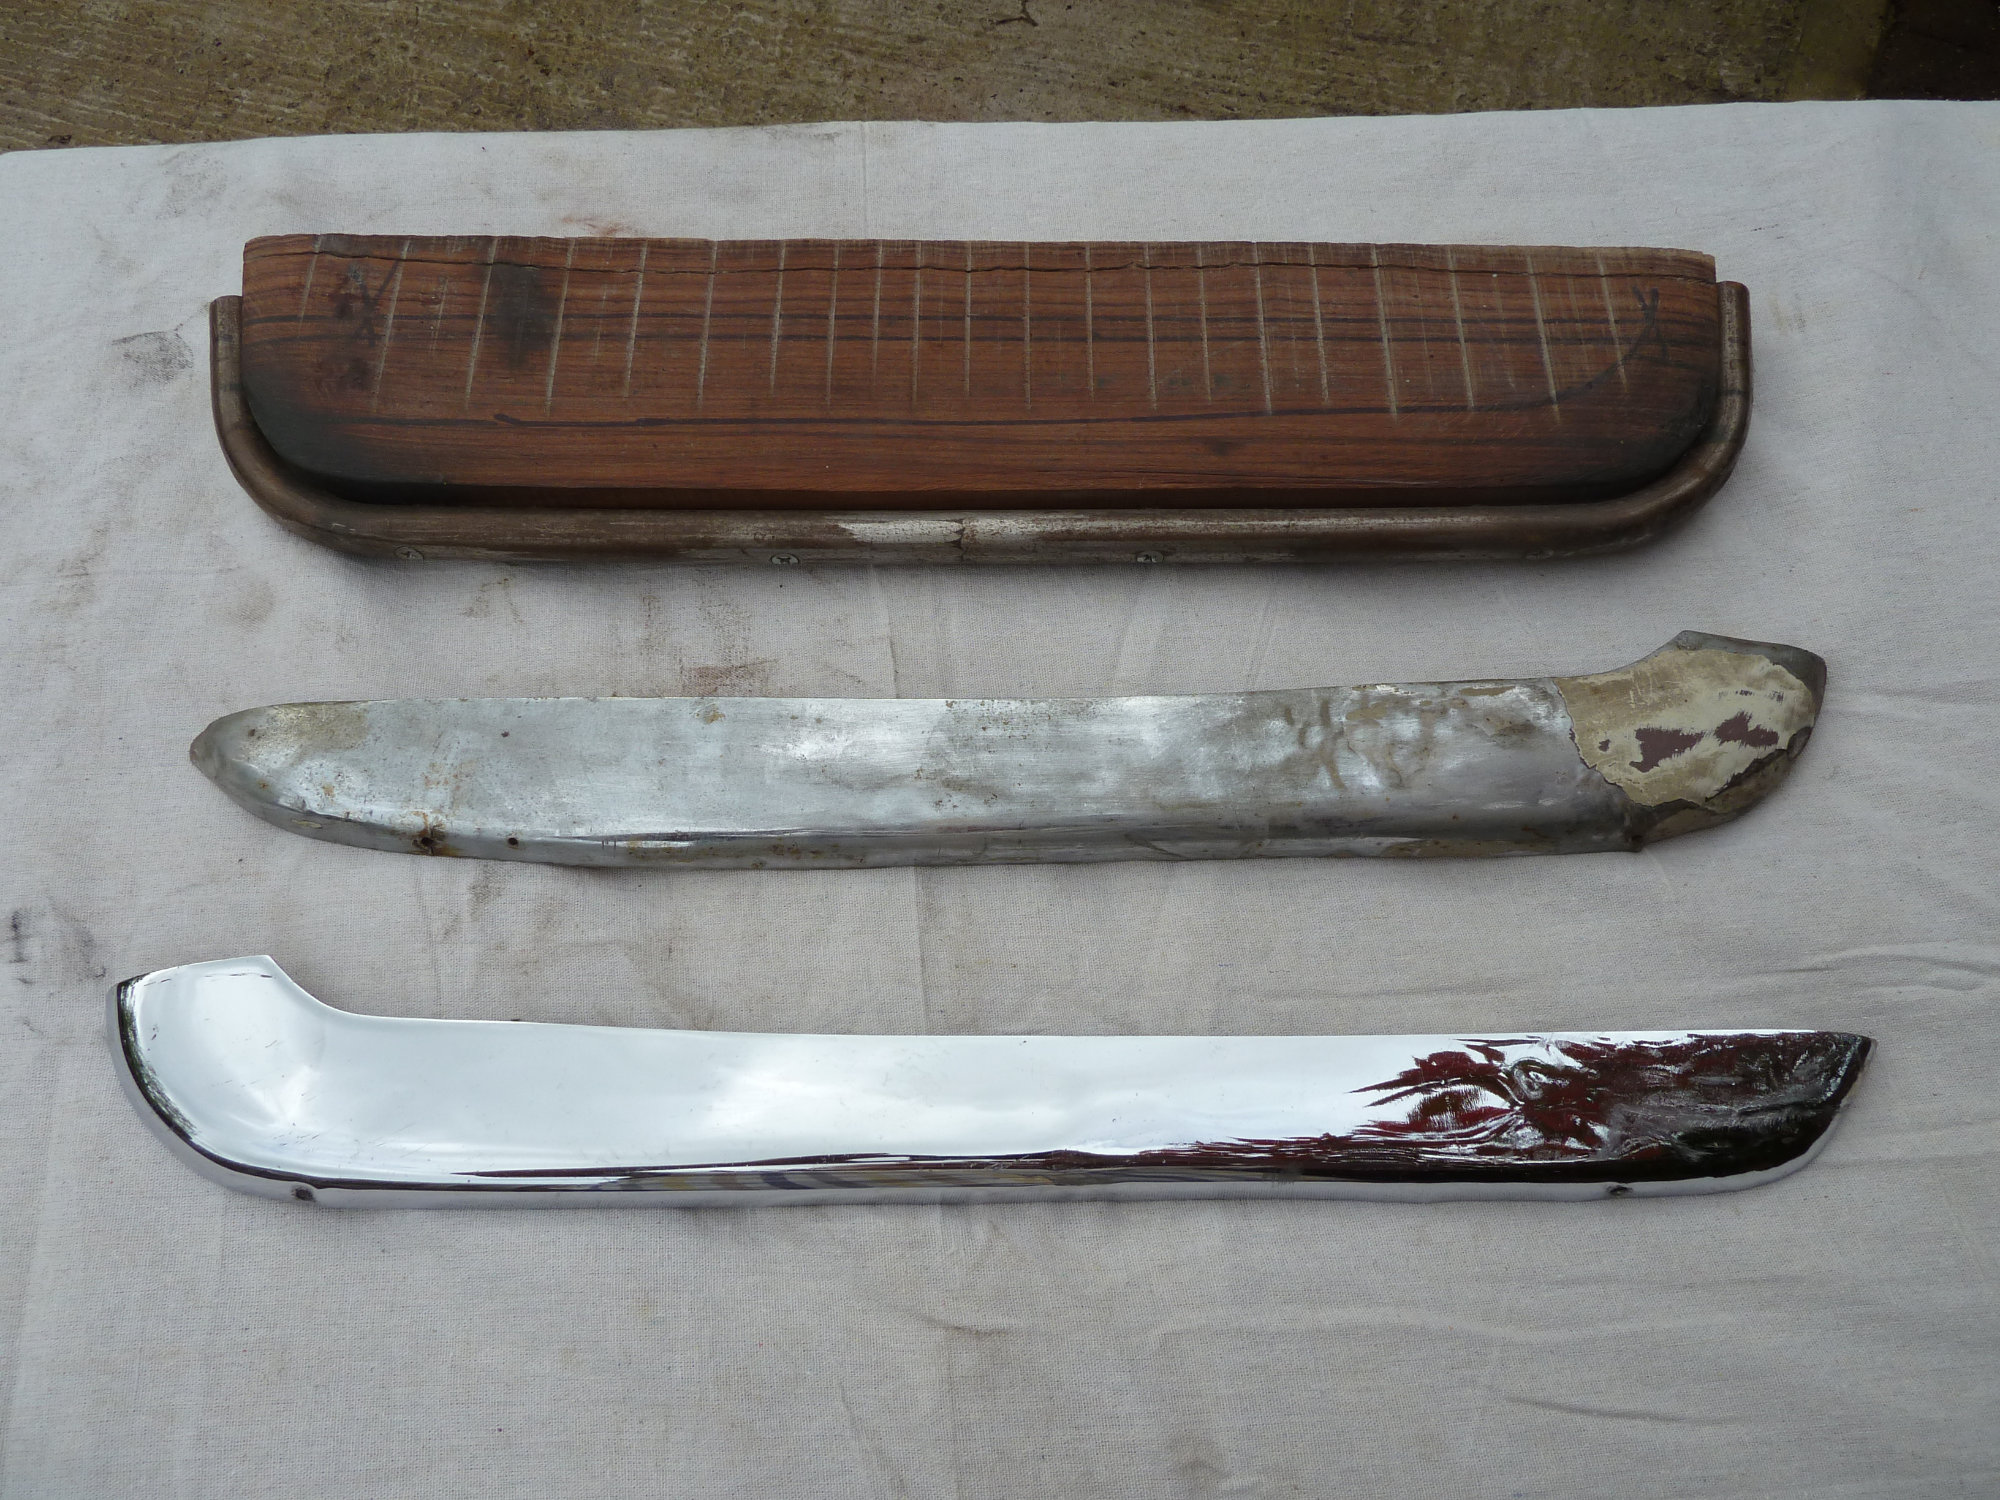 cceptable. Another difficulty is that the bumpers are different for different Sabre models. The original long nose Sabre four is clearly very different to the short nose front fitted to some late Sabre Fours and all Sabre Sixes. But the rear bumpers are also different between the GT and the convertible. These differences make it very difficult, economically, to have a small batch of bumpers made. Several years earlier, for our previous Sabres, I had two sets hand-made by a small panel beating firm based in Leyton, East London and they did an excellent job. Sadly they no longer seemed to exist. For our GT we needed only the two rear side pieces and we found a company in Wakefield that claimed to be able to reproduce them. With a bit of tweaking and once chromed, they look good.
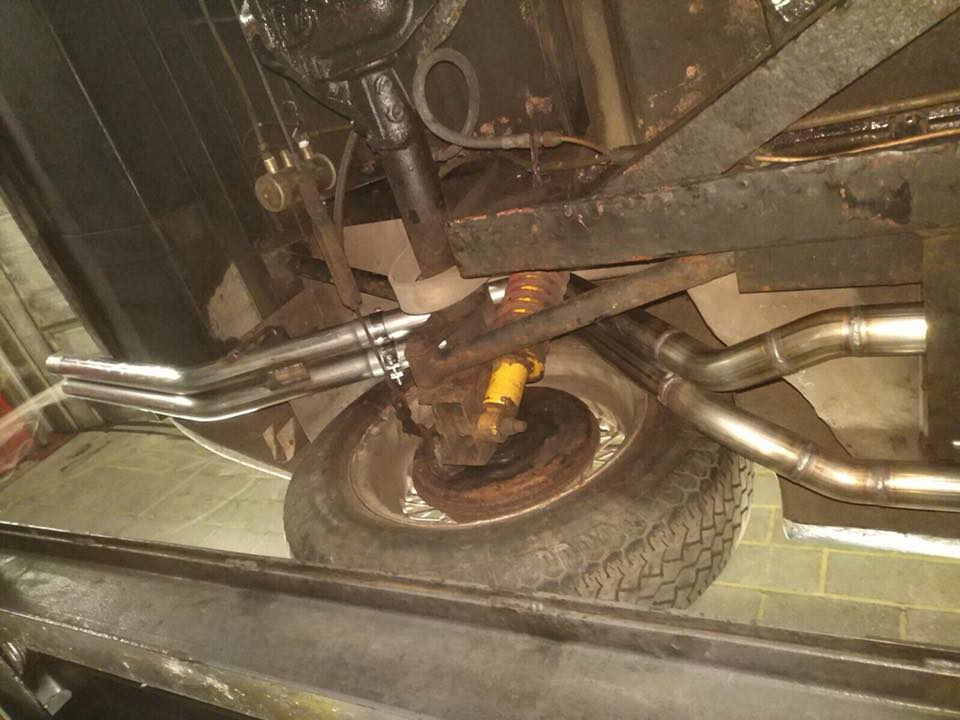
In some ways Sabres are cursed by their more numerous ascendants. Every Sabre that we have owned and enjoyed has been afflicted by the Scimitar damper syndrome. Sabre dampers should be 14.5 inches free length. But Scimitars (the SE5/a model) use 15.5 free length dampers. It seems that the market for Sabre and Scimitar dampers is dominated by the much more common model. So previous owners of our cars have been persuaded that Scimitar dampers are OK. Removing and fitting over-length dampers is a pain, particularly at the rear where the rotation of the rear axle due to the leading and trailing radius arm geometry means that the bottom fixing is at an extreme angle to the horizontal on full rebound.
October 2019
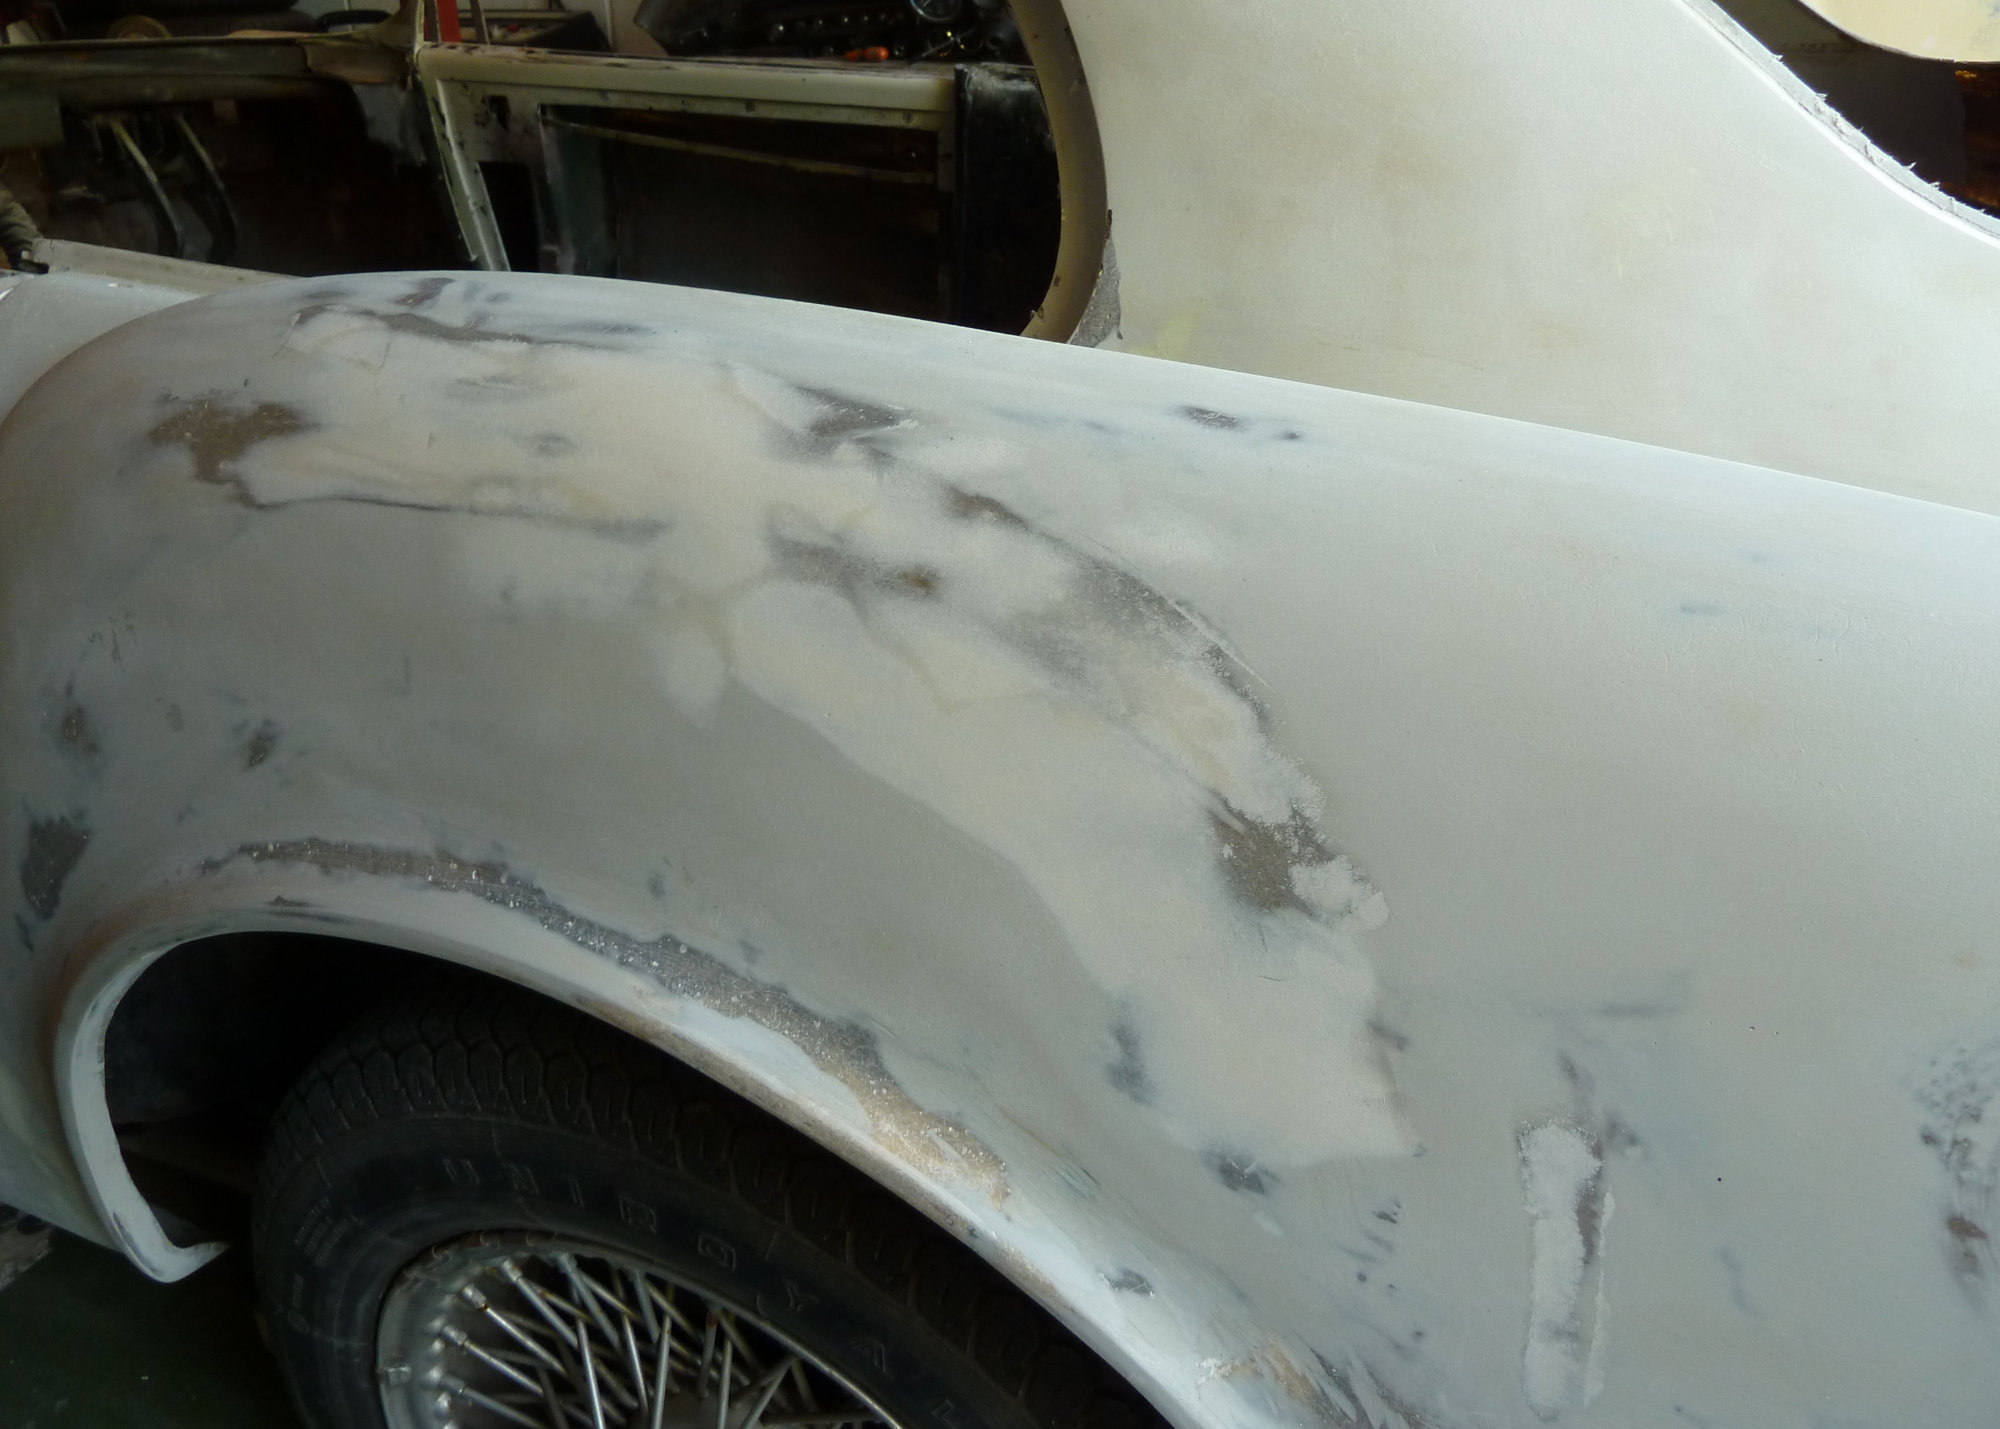
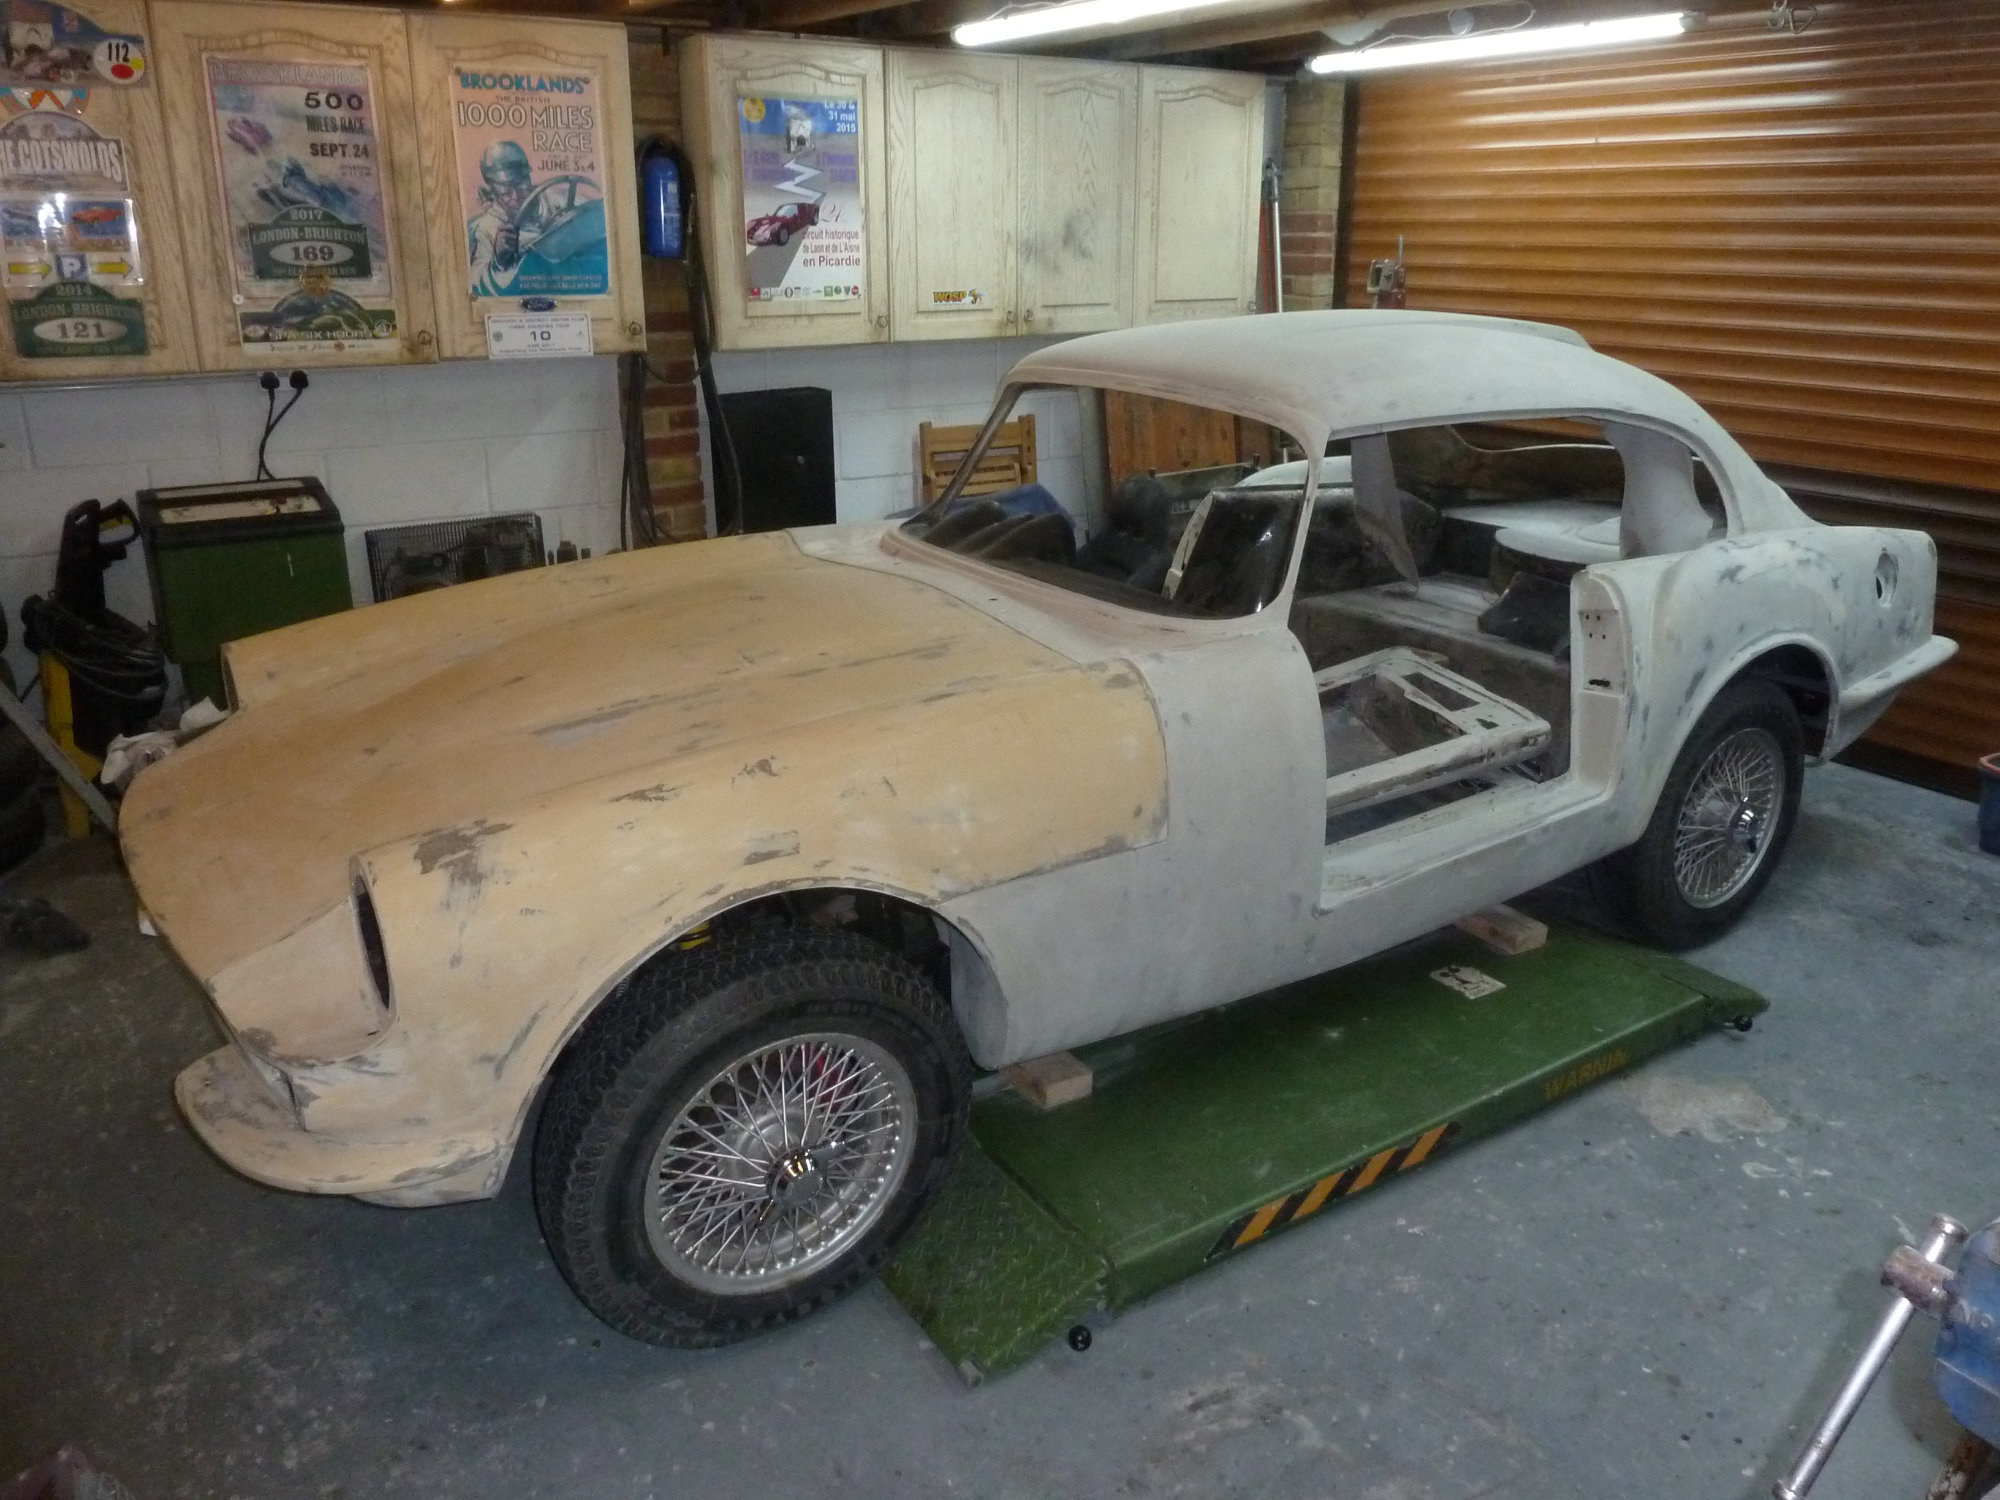
At this stage I had completely separated the body from the chassis and had decided to undertake a full respray. So I then turned my attention to preparation of the body for painting. Most of the glass fibre repairs had been completed and I starting to remove the balance of the old paint. Unlike our previous cars, NRE has only been repainted once, so there were not numerous old layers of paint to be removed. Having tried chemical strippers (very messy) and soda blasting (too brutal) in the past I chose to use a professional quality orbital sander (attached to a vacuum cleaner to gather most of the dust). This proved to be an effective, relatively quick and clean technique.
The car was originally “British Racing Green” but was repainted white at some time in its history, I suspect at least 20 years earlier. Stripping the paint down to the gel coat can reveal a lot about a car’s history. I found that most of the original green paint had been removed as part of the previous re-spray and it looked as if the body had been removed from the chassis at this time. However, awkward areas such as the lowest part of the sills and front and rear valences still had the green under the newer white. Generally the exercise showed that the car has never suffered serious accident damage, which is good. There were however a number of areas of gel coat cracking which had simply been painted over. Interestingly none of these cracks had shown through the paint in its long life. However I decided to carry out “proper” repairs. After more than 40 years of owning and repairing Scimitars and Sabres I follow the techniques described in Miles Wilkins’ book “How to Restore Fibreglass Bodywork”. This excellent book was first published in 1984 but is still available. This technique comprises carefully grinding away the cracked gelcoat (checking that the cracking has not extended into the base glassfibre), applying a layer of glass tissue with resin and then skimming with filler to get back to the original body profile. On larger areas I did this in a number of smaller sections to ensure that the original profile was not lost. What fun!
November 2019
Over the years the doors have suffered from “sag syndrome”. This seems to afflict so many Sabres and Scimitars. To address this I separated the outer door skins from the door shells and re-set them to give the correct alignment with the main body.
December 2019
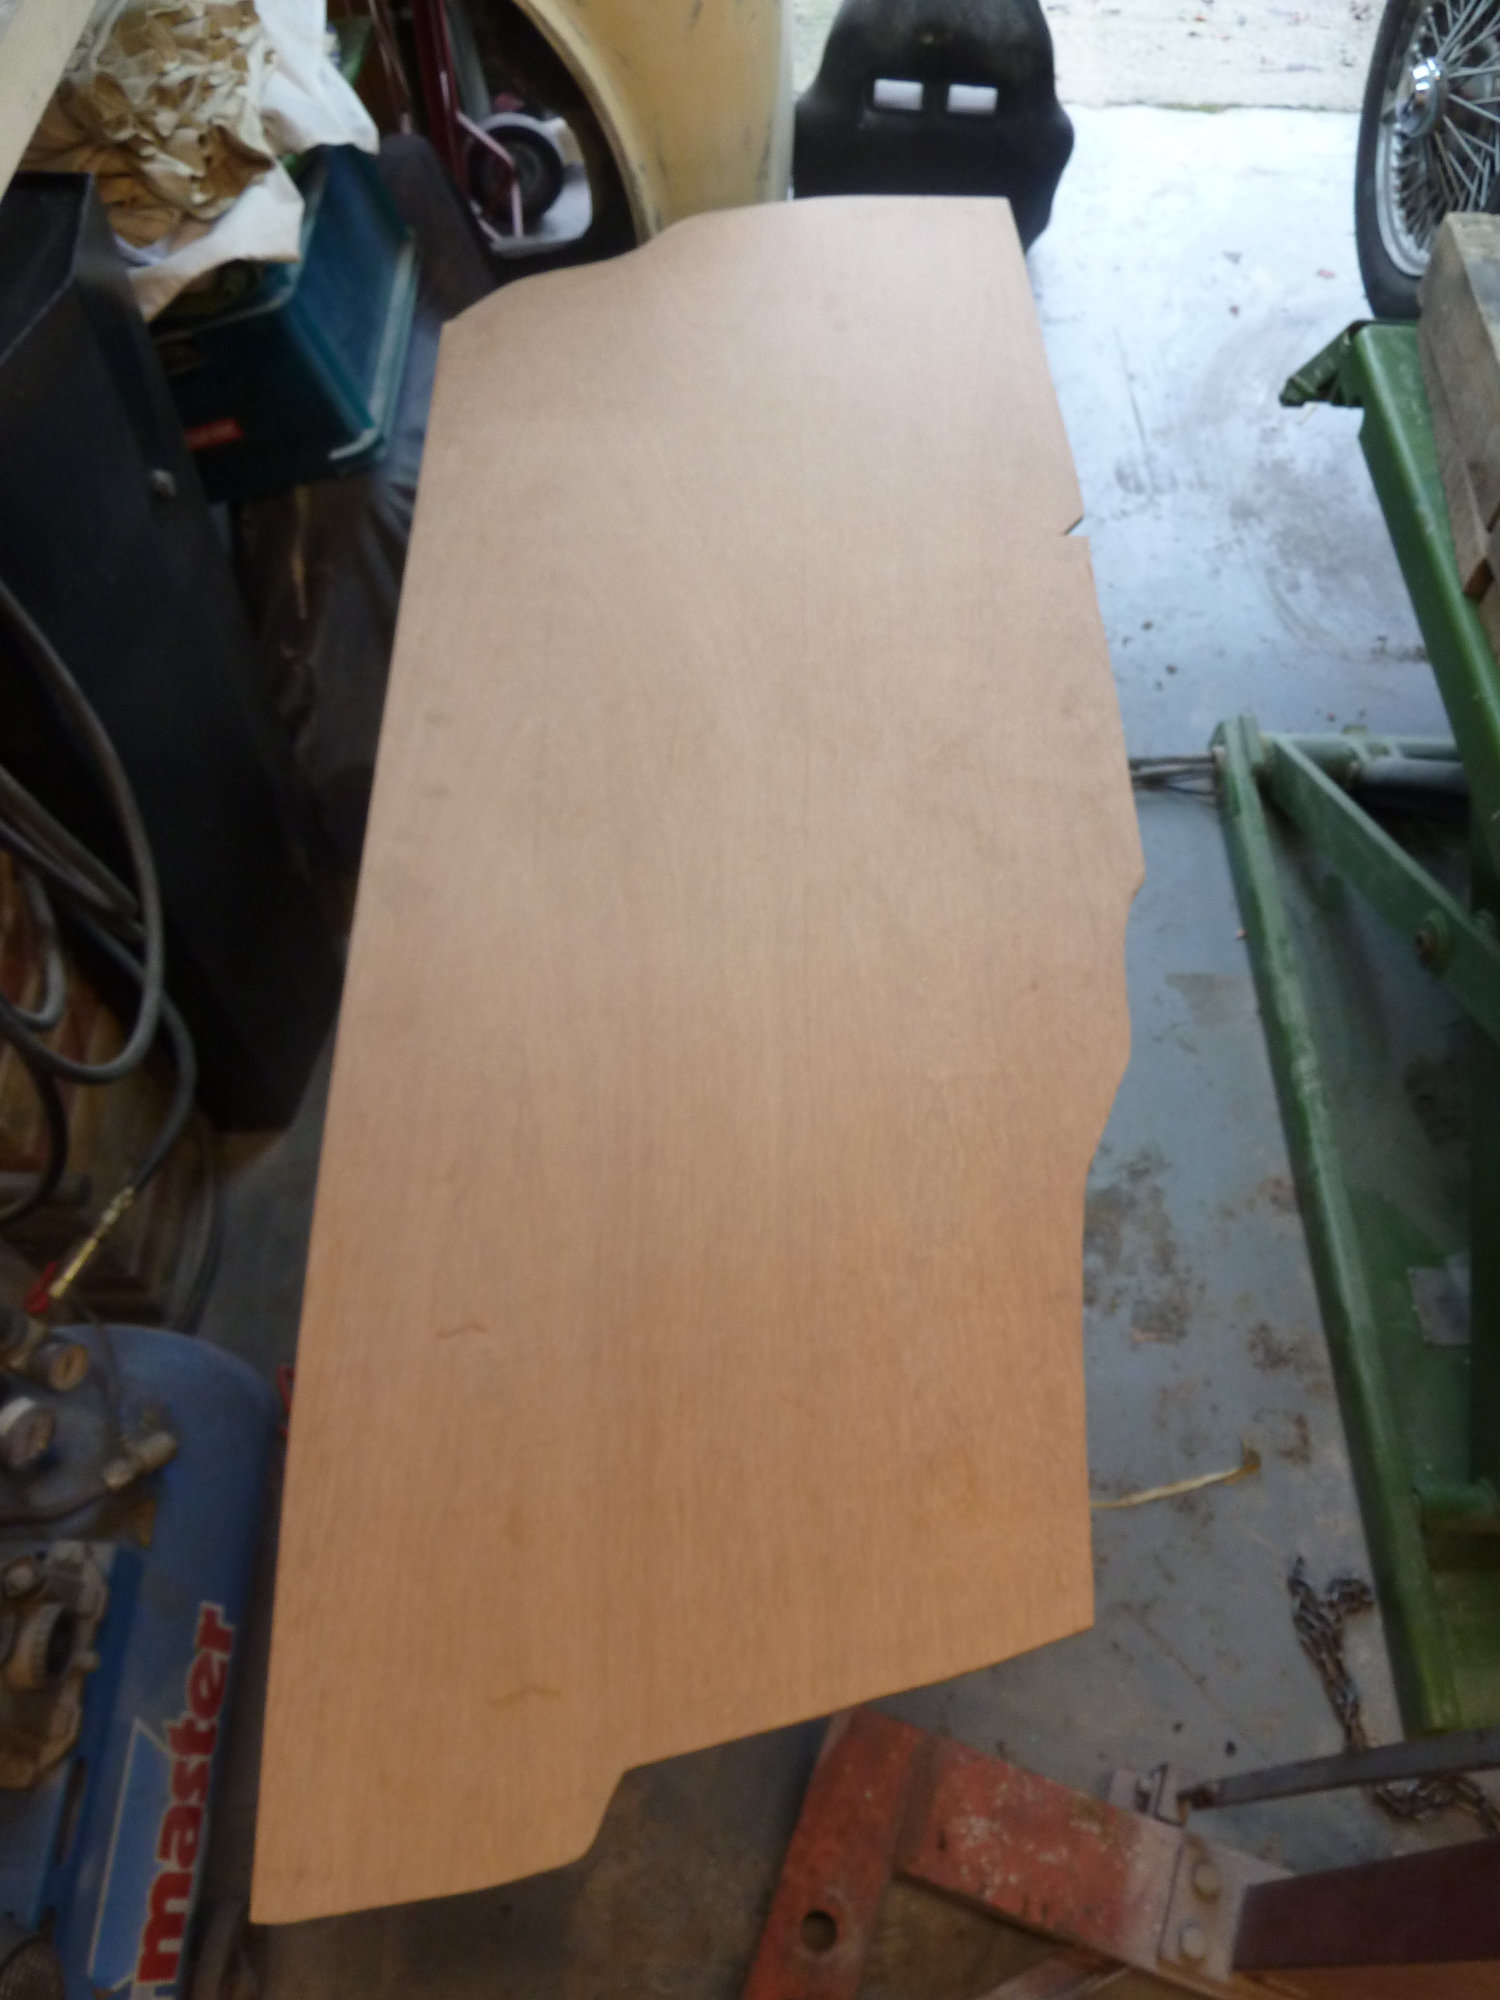
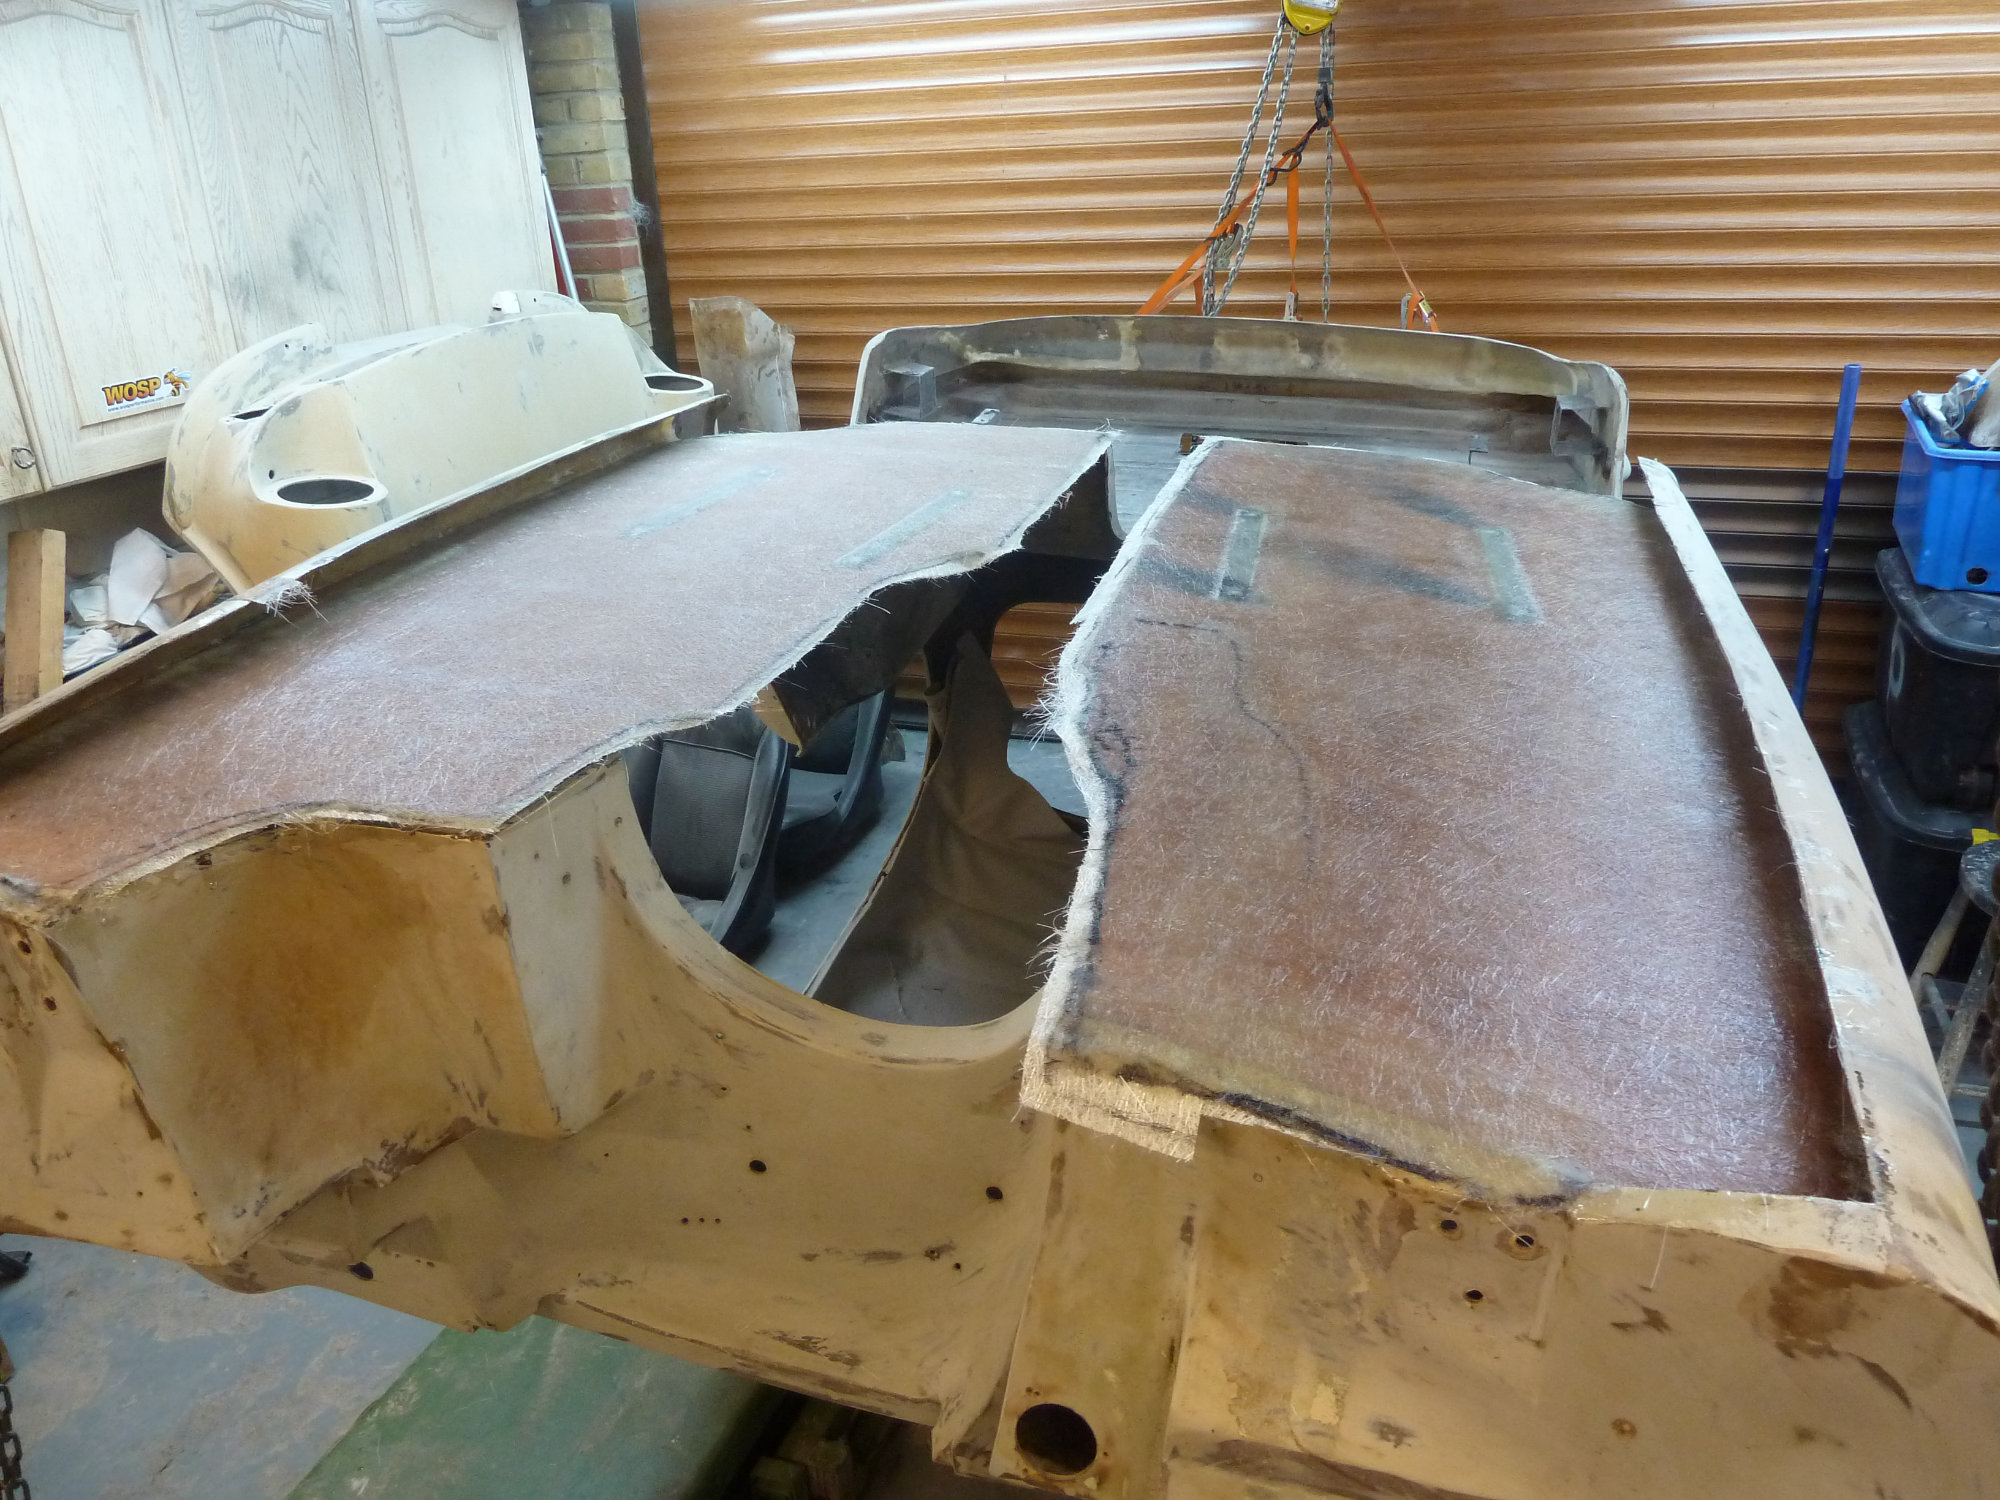
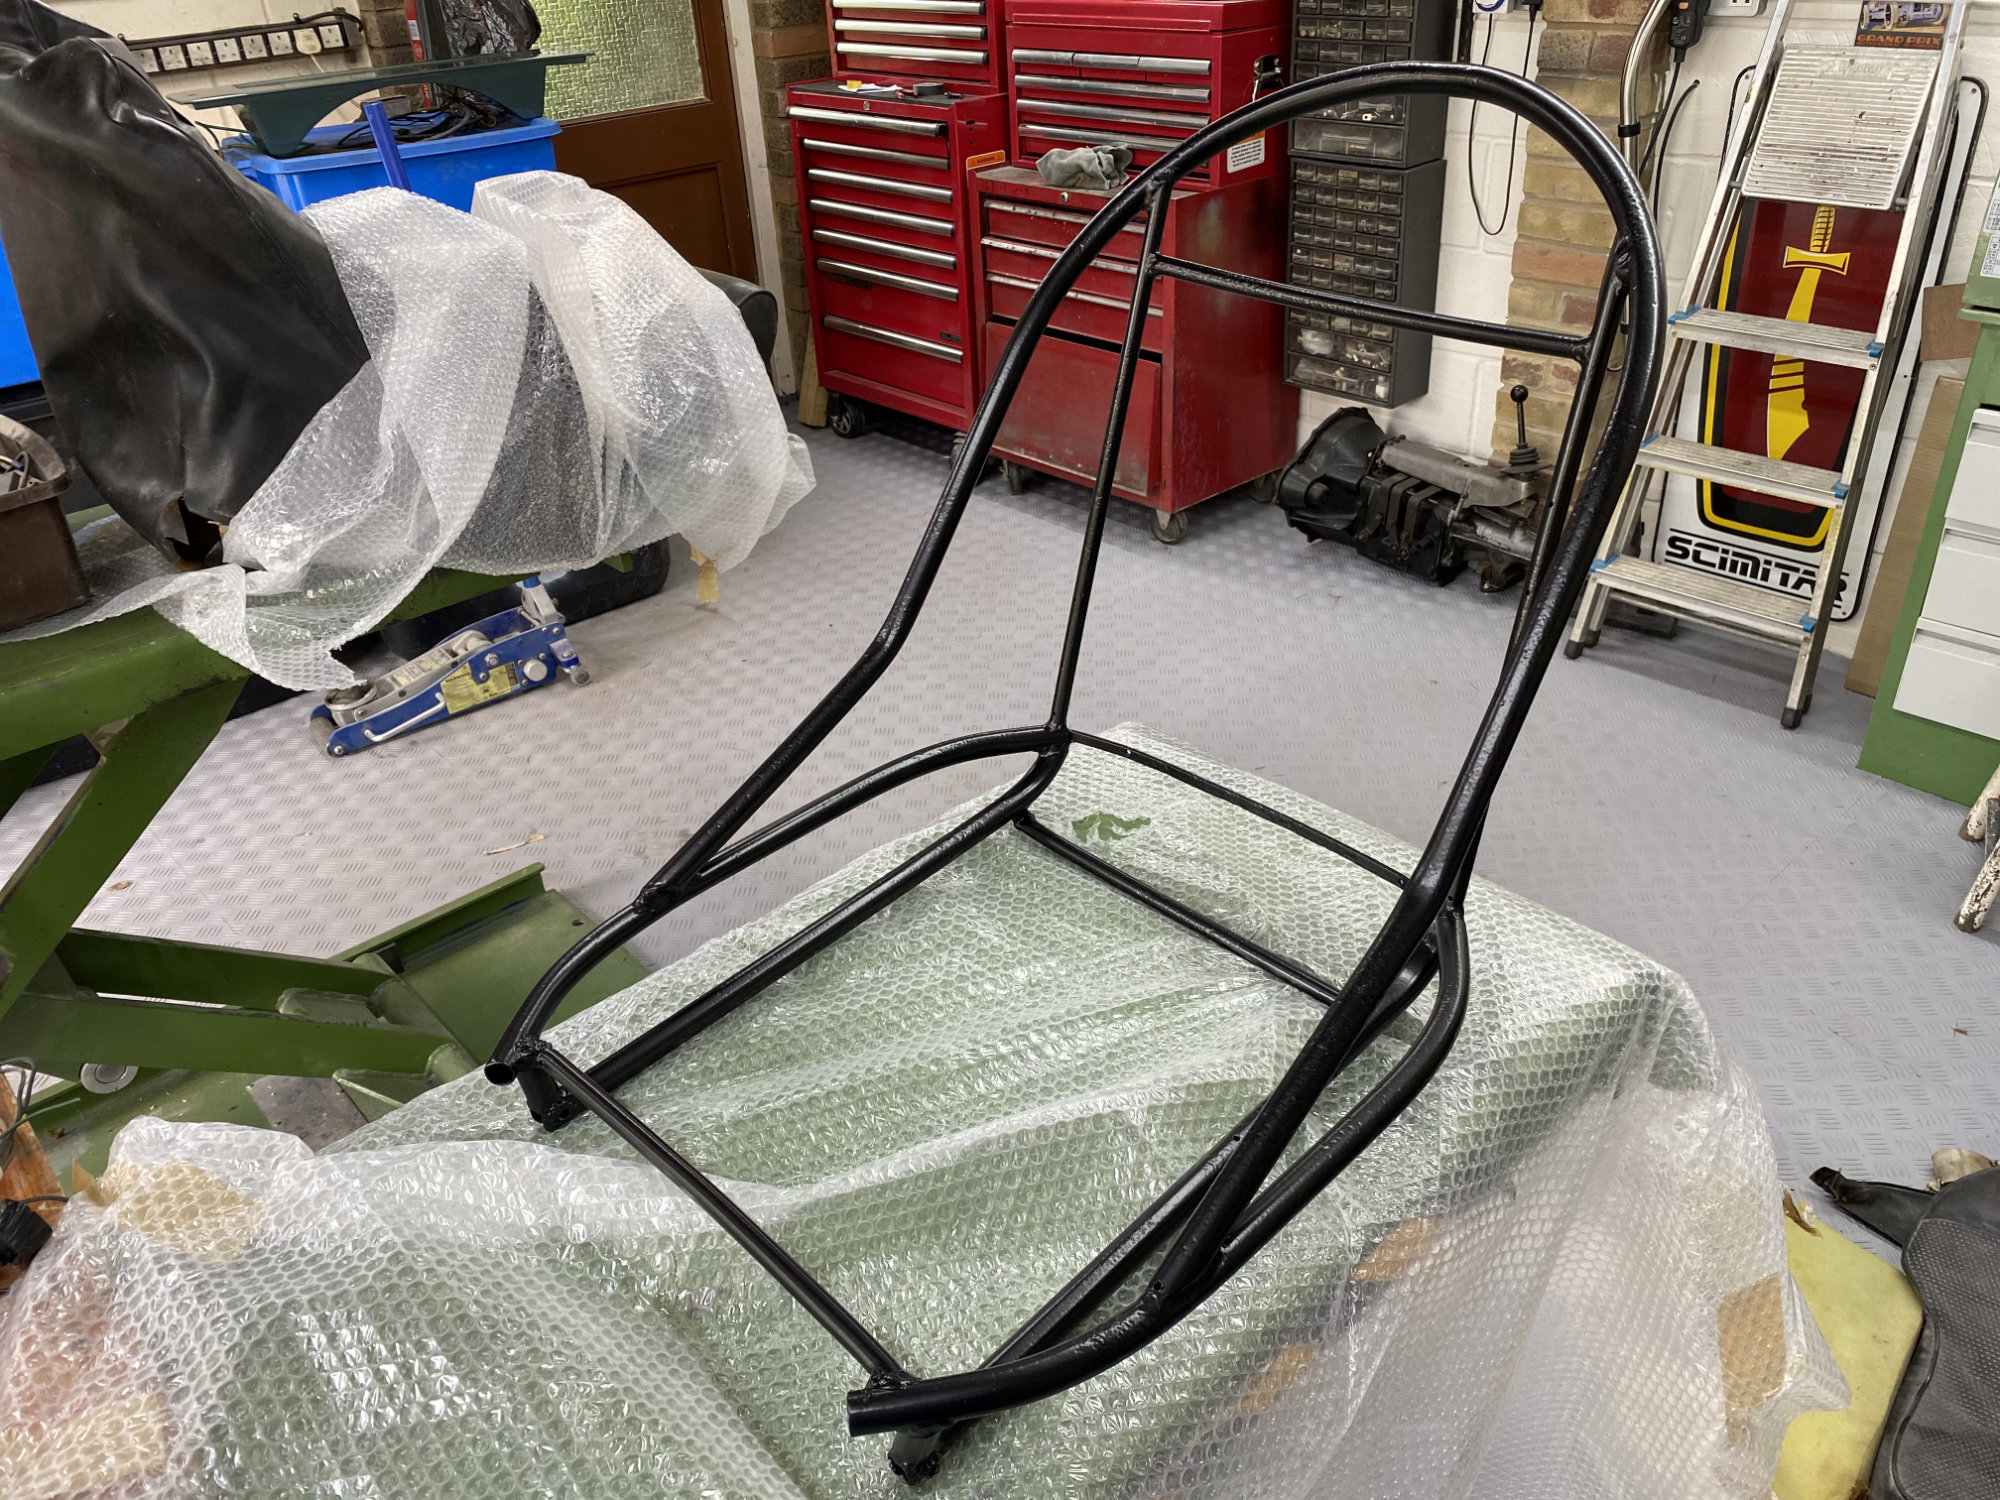
Sabre floors are made of 1/2in plywood encapsulated with glassfibre. It is in two parts, one either side of the transmission tunnel. It’s common, after almost 60 years, to find that the plywood has rotted in places but being encapsulated this is not always easy to see. As I stripped the car it became apparent that large areas were rotten. So I cut out the old floor sections completely and replaced them with new marine ply covered with glassfibre top and bottom. The two floor parts could be cut from a single 2400 by 1200 sheet. Laying up the glassfibre on the underside of the floor was going to be difficult. Gravity is an enemy in this situation, so I decided it would be easier if the body tub were to be inverted. After a bit of head scratching I managed to do this single handed using various chain blocks and ratchet straps with the body tub suspended from my, fortunately strong, garage roof structure. With the body inverted I couldn’t resist the temptation to paint the underside. I coated the new glassfibre with grey “flowcoat” and the rest, including the rear wheel arches, with household external paint. With the floors complete the body tub was sat back on the chassis.
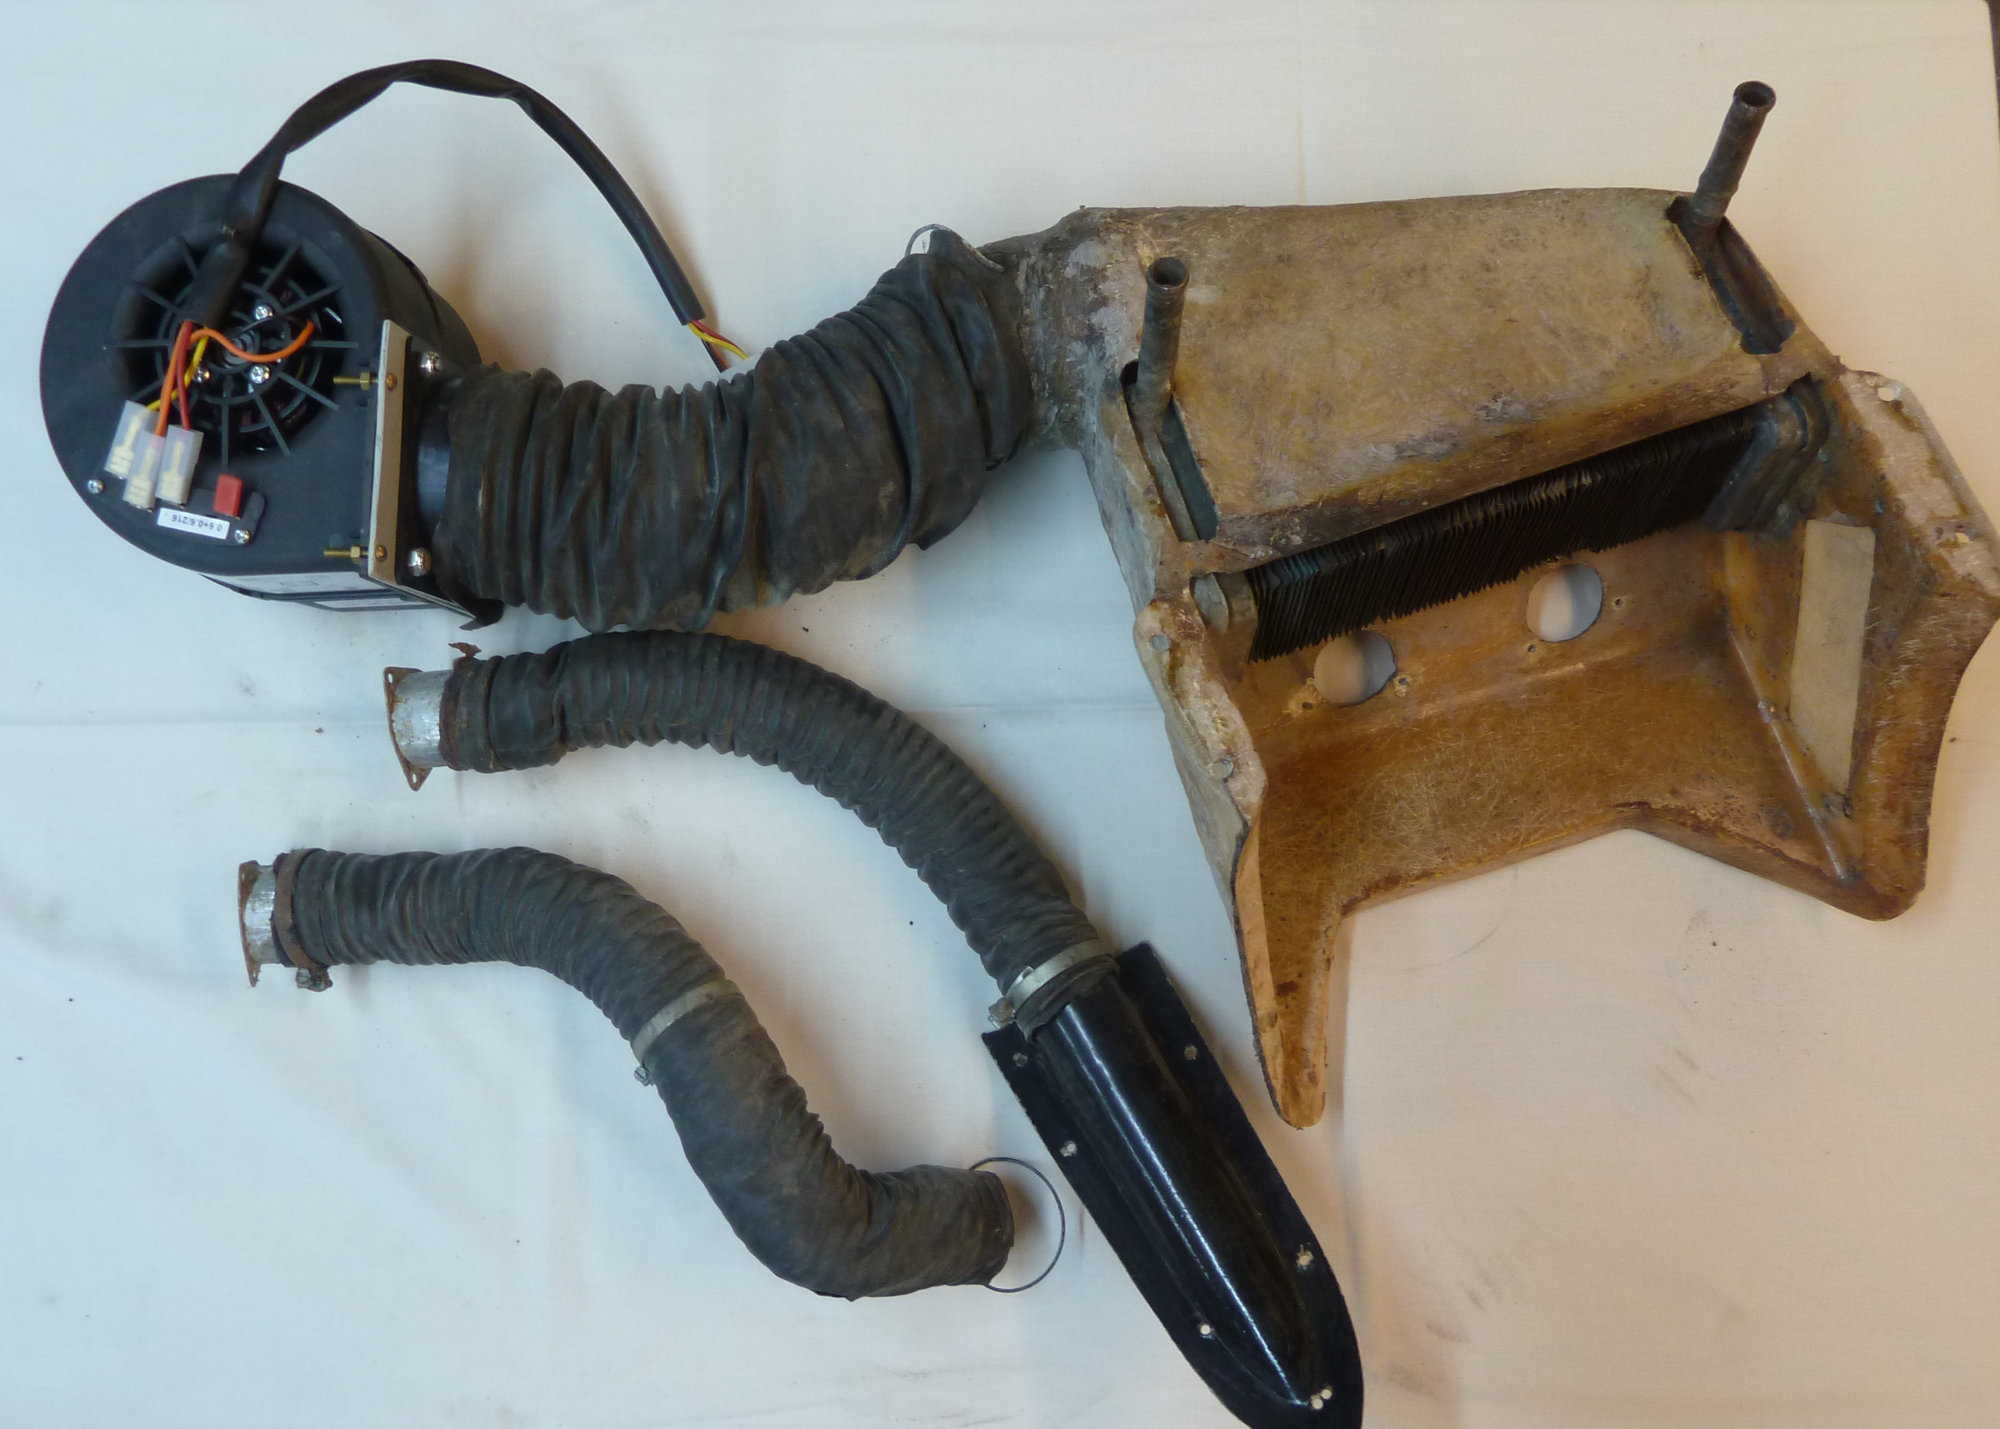
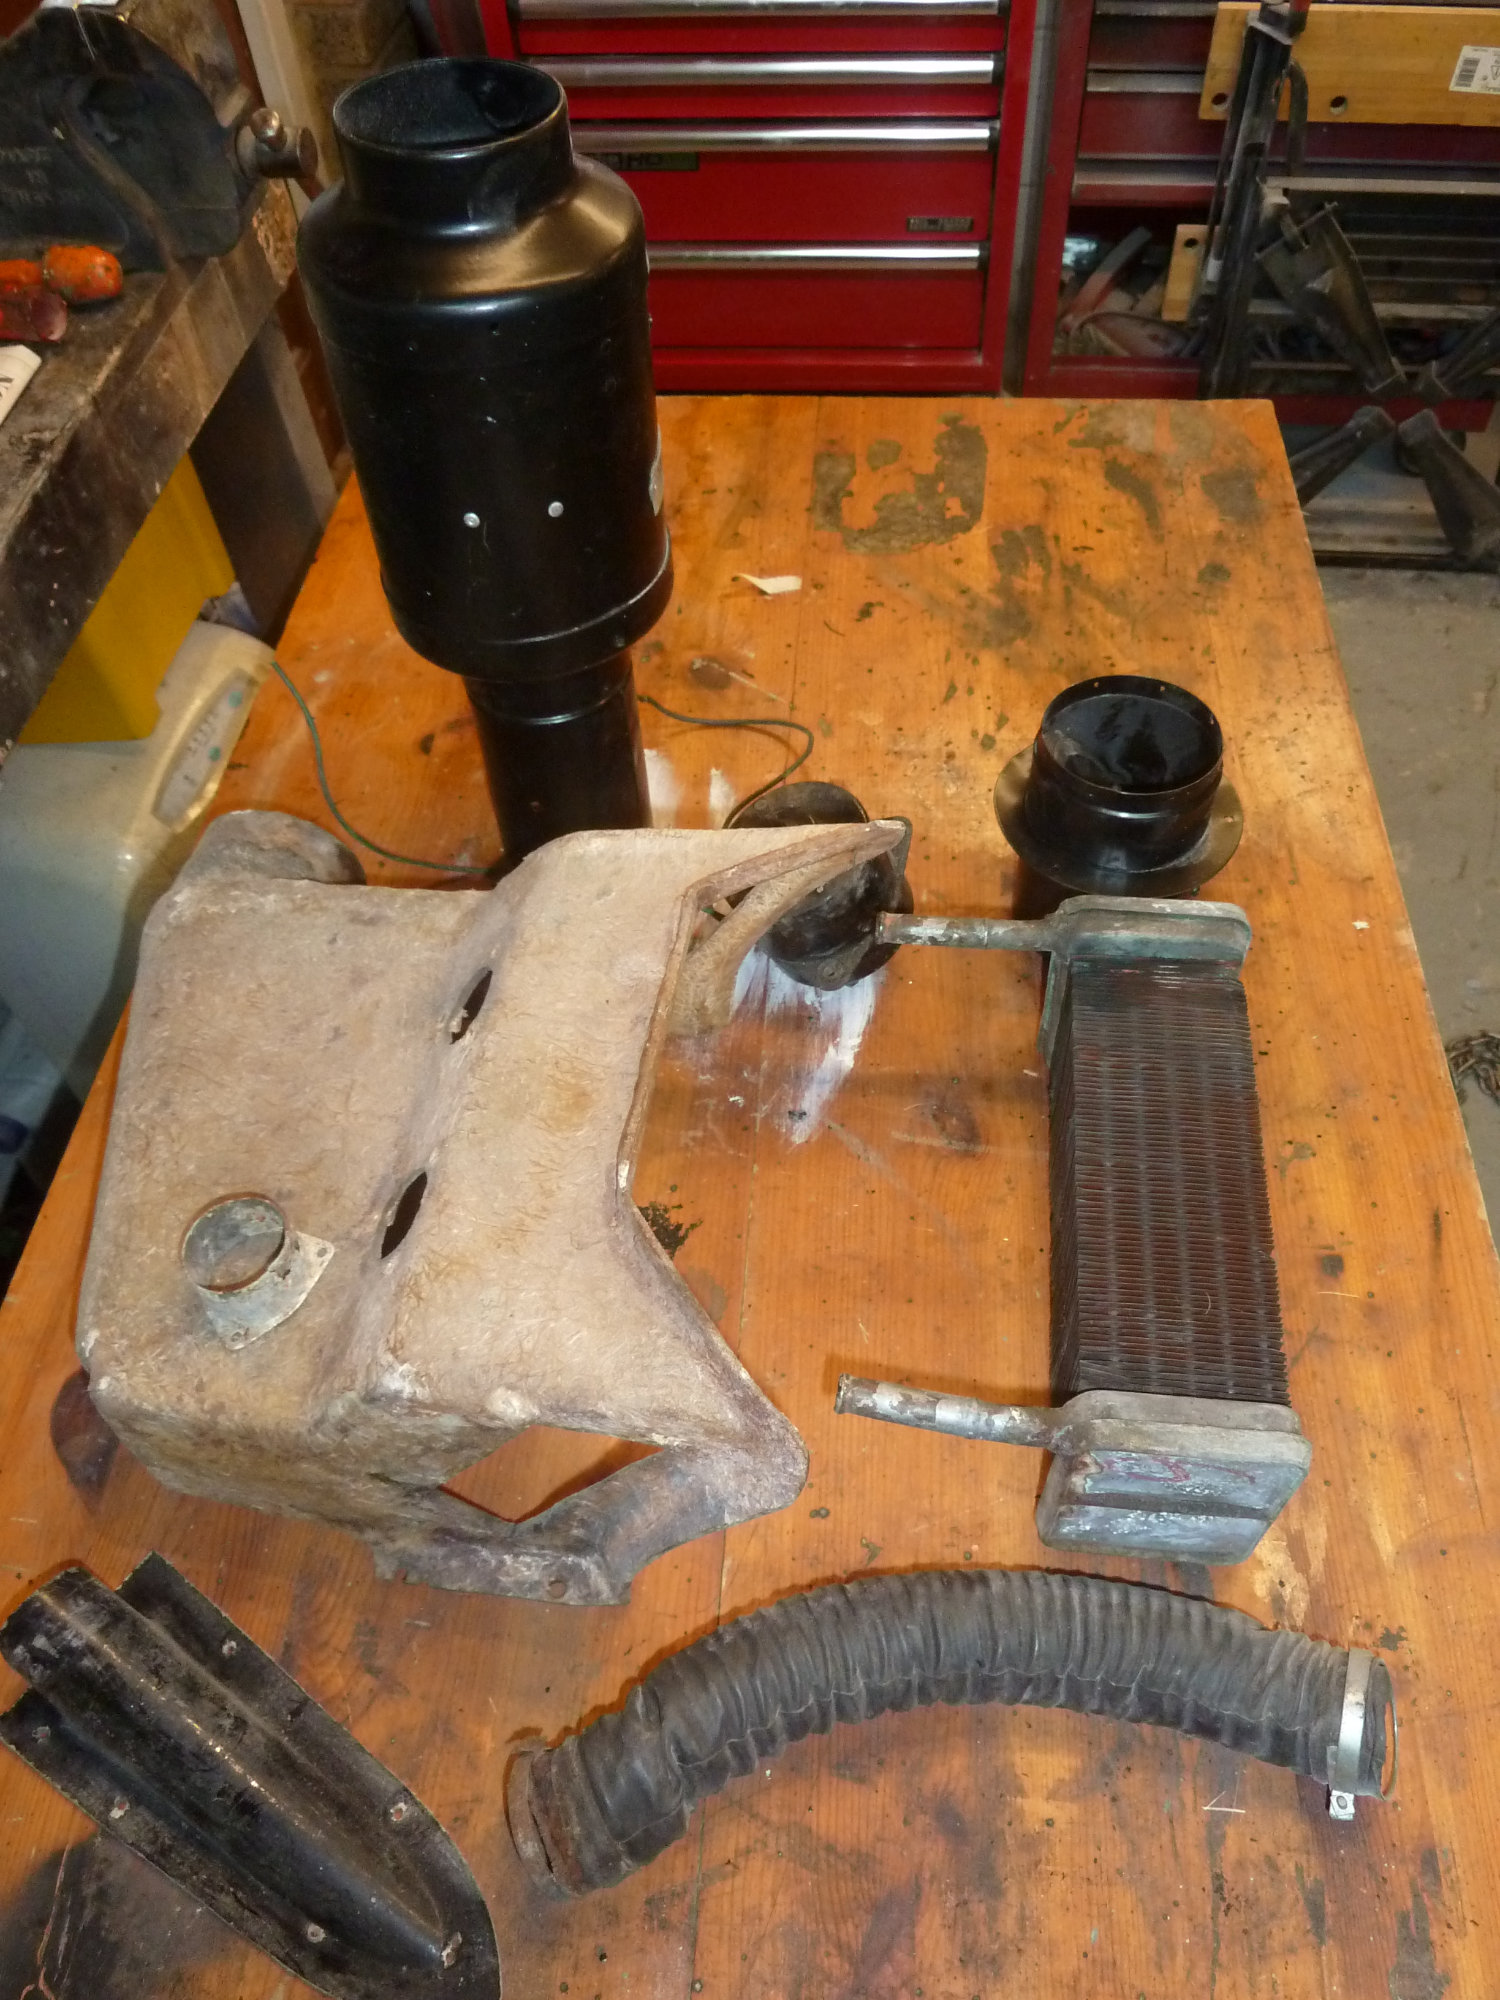
In my experience Sabre Six heaters are pretty useless. We use our Sabres as often as possible through the winter and don’t like being cold, so this is a problem for us. The standard heater system comprises a heat exchanger located in a glassfibre housing mounted over the transmission tunnel under the dasboard. Fresh air is supplied to this by an axial fan located in the engine compartment, connected by 80mm flexible hose. The fan is weak and there are many opportunities for the air that it does supply to leak away before it gets to the heat exchanger and into the car. However the heat exchanger itself looks plenty man enough for the job. I decided to abandon the existing fan and leaky ducting and replace it with a completely different centrifugal fan located out of sight under the passenger side of the dashboard. This will blow directly into the existing heater unit. There is no fresh air component but, as the car is generally very leaky, air-wise, I don’t think we will be in danger of suffocating. I have retained the existing fan and ductwork so the engine compartment looks original and the modification is easily reversible.
June 2020
The body was now ready for painting but I decided to trial fitting things like bumpers, radiator grille and door furniture. I didon’t want there to be any issues with fitting these items after the car was painted.
 restoration. The Sabre is a very simple car but that doesn’t mean that it is easy or cheap to restore. Restoring an E-Type, for example, is arguably easier and in some respects cheaper. All you have to do is decide what part you need and then choose one of a number of suppliers of such part. The radiator grille is an example. I’m not even sure exactly what it was originally made of or how it was fixed. For each Sabre I have looked at there has been different arrangements. I think it was originally made of diamond pattern expanded aluminium bonded to the openings in the bonnet front. I decided to use polished stainless woven steel mesh fixed to brackets bonded to the openings in the bonnet.
During an previous visit to Mech-Spray we noticed a Jaguar C-Type that had just been painted metallic green. We liked the colour very much and decided to choose it for our Sabre. After almost 3 months NRE came back from the spray shop. The paint job looked superb in my opinion. My task then was to bolt all the bits back on without damaging the new paint. I started with the many bits and pieces on the outside such as bumpers, door handles and lights plus most of the engine bay components.
A big step was the re-fitting of the engine and gearbox. I checked when I had first removed the engine and, to my amazement, found it was just over 2 years earlier! At that time I remember thinking this was going to be a six month job!
I then set about repairing/remaking the wiring. The loom that I removed was cloth covered and, although electrically sound, the cloth was torn and frayed in many places and looked terrible. Also the wiring was far from original. Instead of just two fuses as standard, a total of 12 had been fitted at some time. I understand the merits of separately fusing all sub-circuits, but it means more cables passing through the bulkhead which cannot neatly be accommodated through the existing bulkhead holes. Further it seemed that colour coding was based on availability rather than the widely accepted Lucas system. The routing of the loom was non-standard and, in my opinion, unsightly and impractical. For example the loom to the rear of the car was routed through the interior of the car hidden under carpets as opposed to under the floor. The loom through the engine compartment was fixed to removable inner wheel arches as opposed to the bulkhead and the chassis. So I decided to revert back to standard fusing, routing and colour coding as far as practicable. I ordered a load of cable and loom tape and remade the loom, virtually from scratch.
February 2021
the wiring loom is now complete and installed. All circuits have been tested and everything seem to work properly.
The re-building of NRE, following its respray, continues. The car, mechanically and electrically, is virtually complete and I hope to get the engine running within the next week or so. The engine was re-built by Iain Daniels Classic Motorsport more than two years ago so it will be interesting to see it running for the first time.
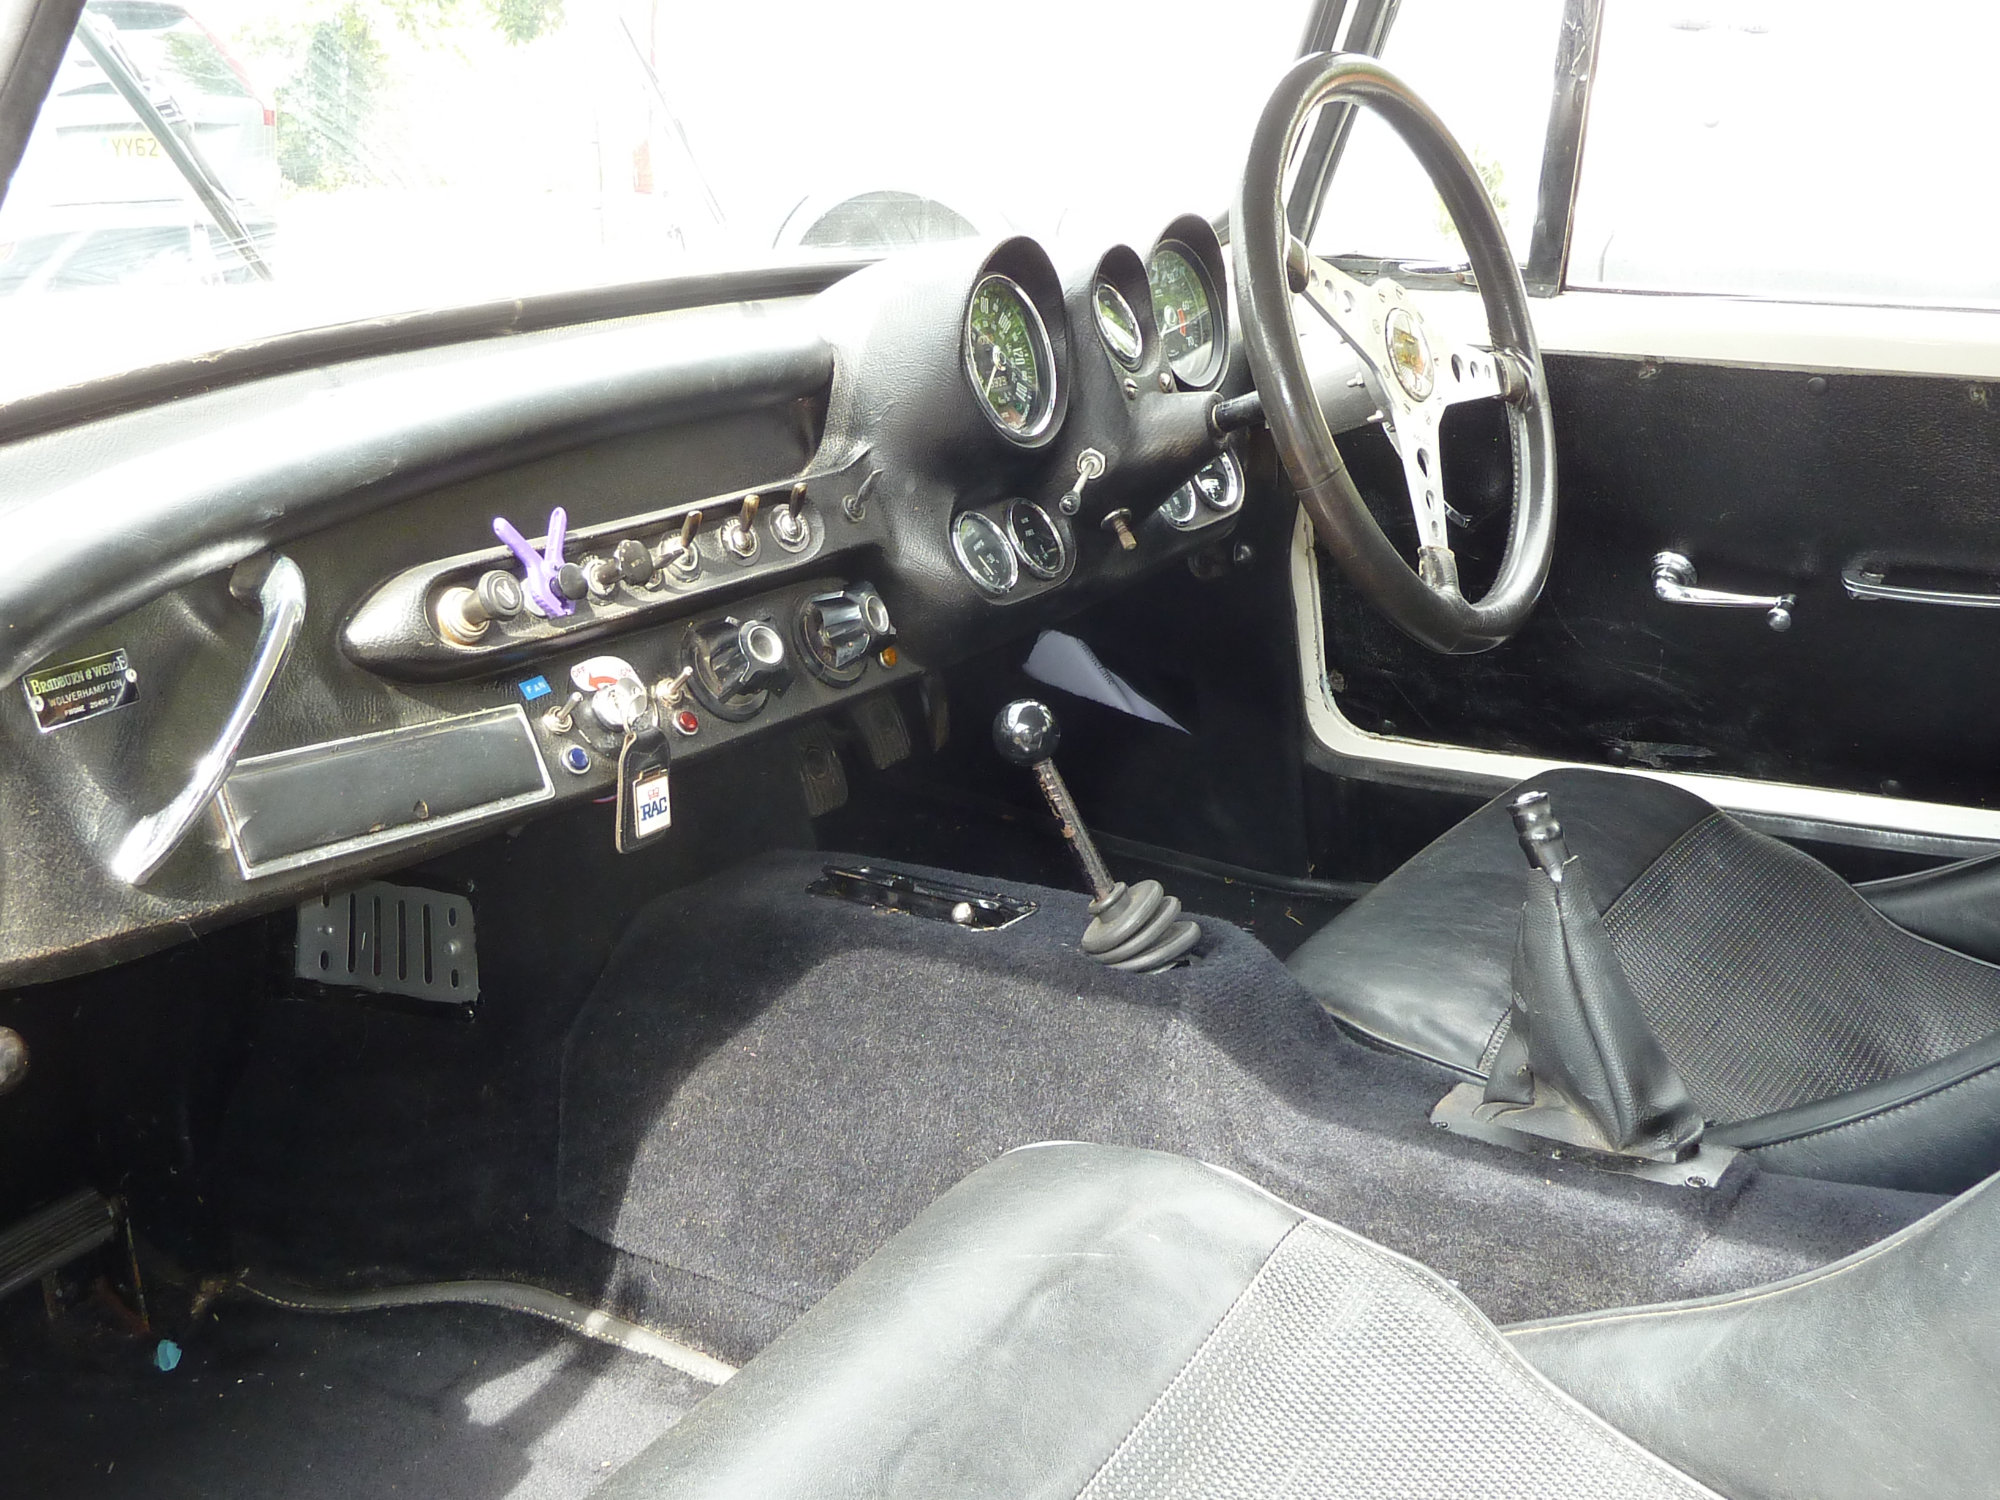
The Sabre’s instruments are very dimly lit, as they are on SE4s and SE5s. 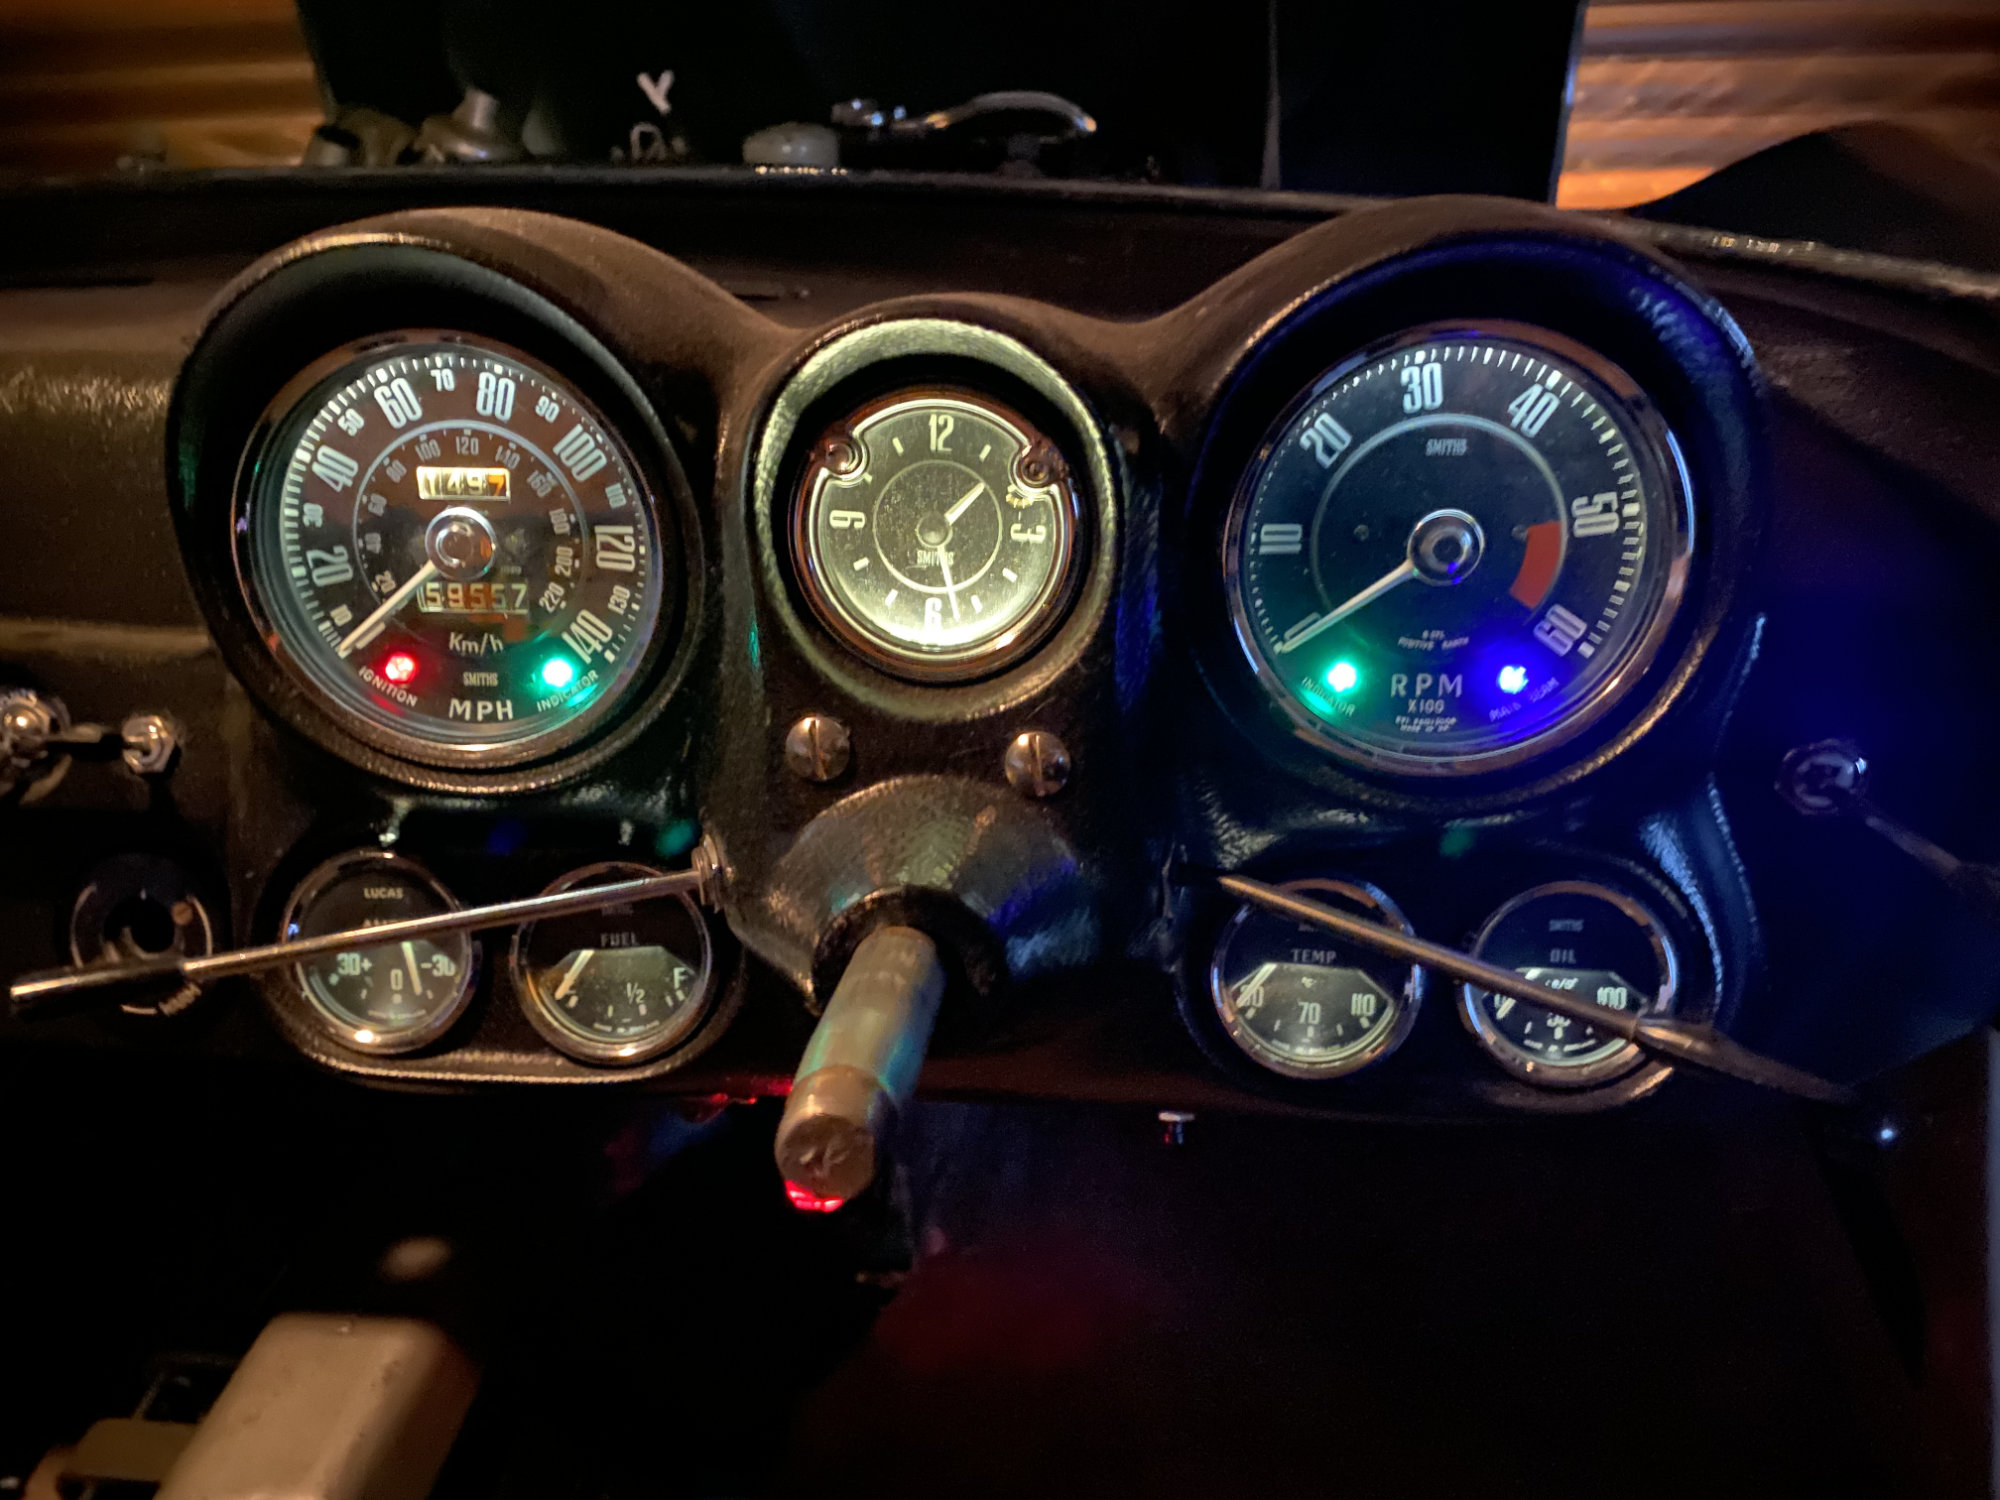 LED bulbs have now come to the rescue and I have fitted a set to NRE’s instruments. I’ve gone for warm whites generally but, apparently, coloured lights such as the high beam and indicator warning lights should use the appropriate colour bulbs behind the coloured lenses. The effect is impressive. Note that the ignition warning light should not be changed to LED as the current taken would be insufficient to trigger the alternator.
Brake and clutch hydraulics were also re-fitted at this stage together with all the other bits and pieces.
April 2021
After more that 2 years the engine was started and ran well, apart from a few oil and water leaks.
The front and rear screens were temporarily fitted at this stage so that I could drive the car to the trimmers - the next big job.
March 2021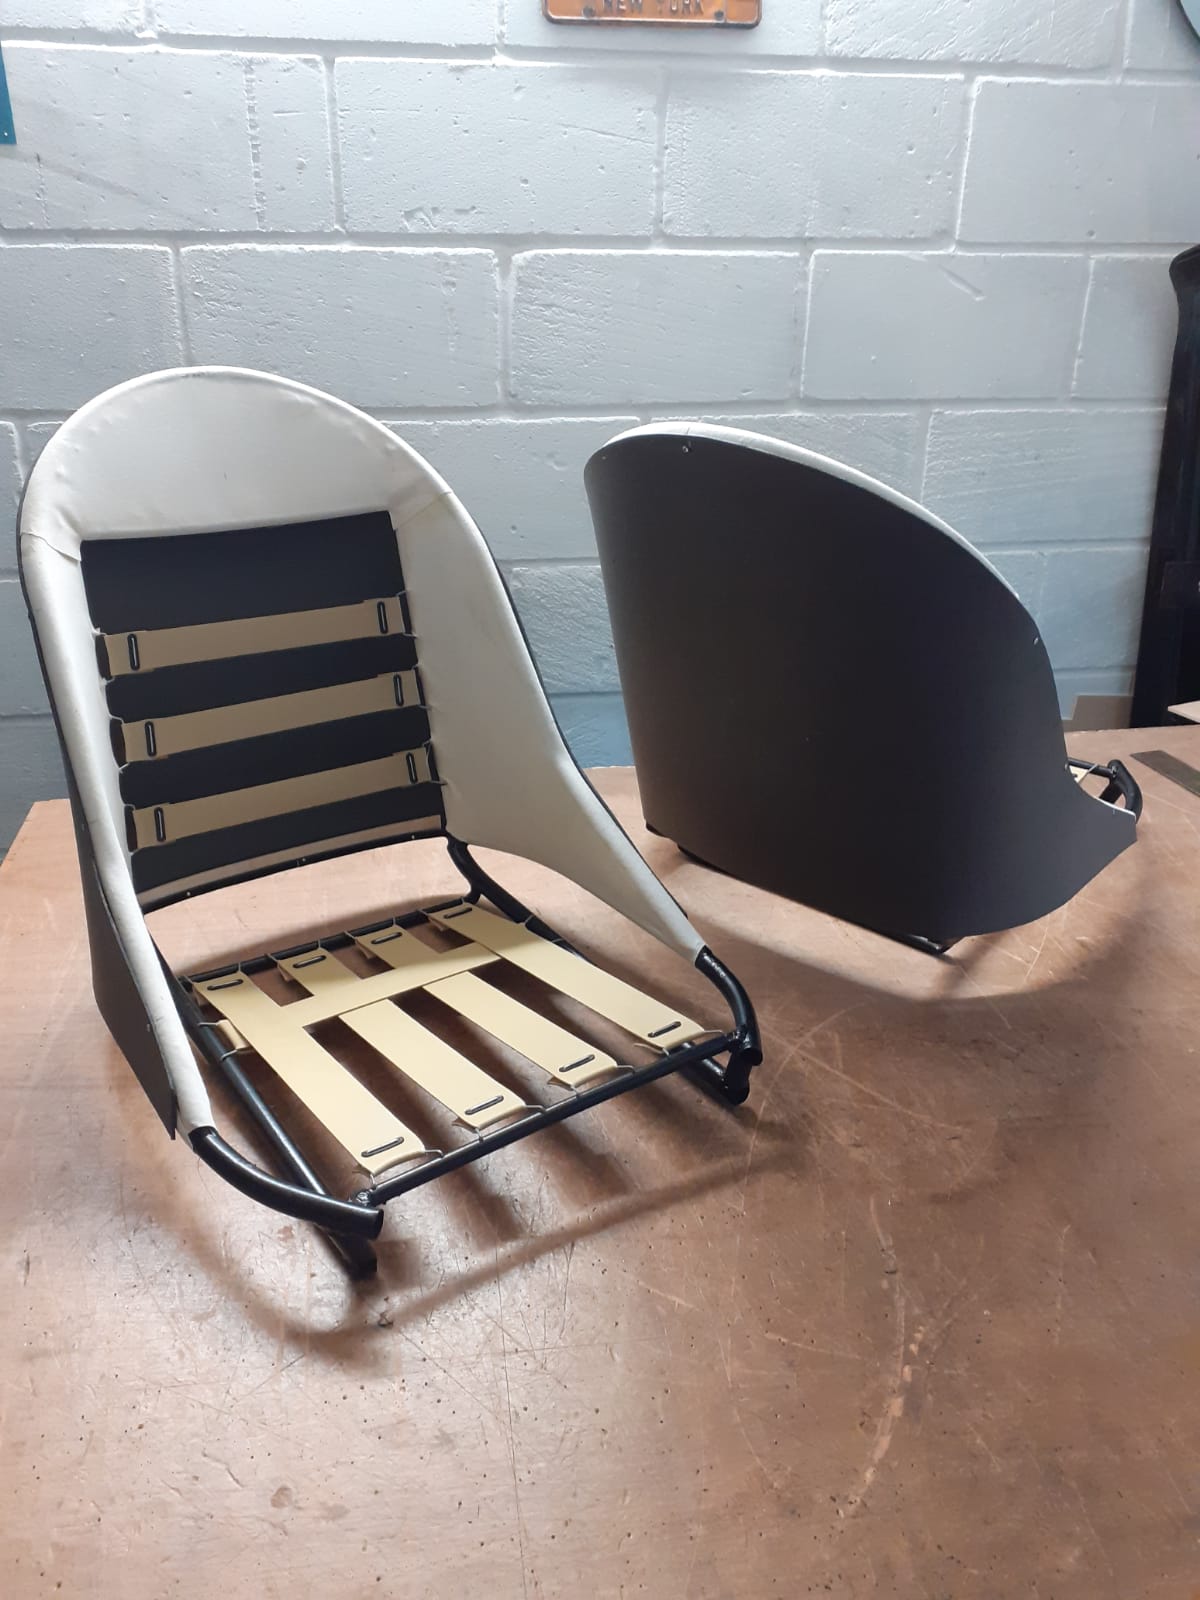
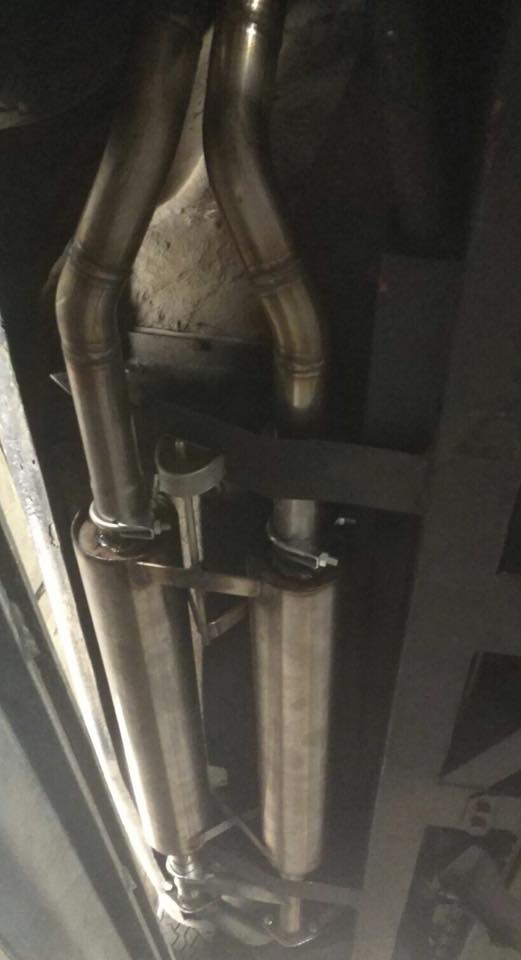
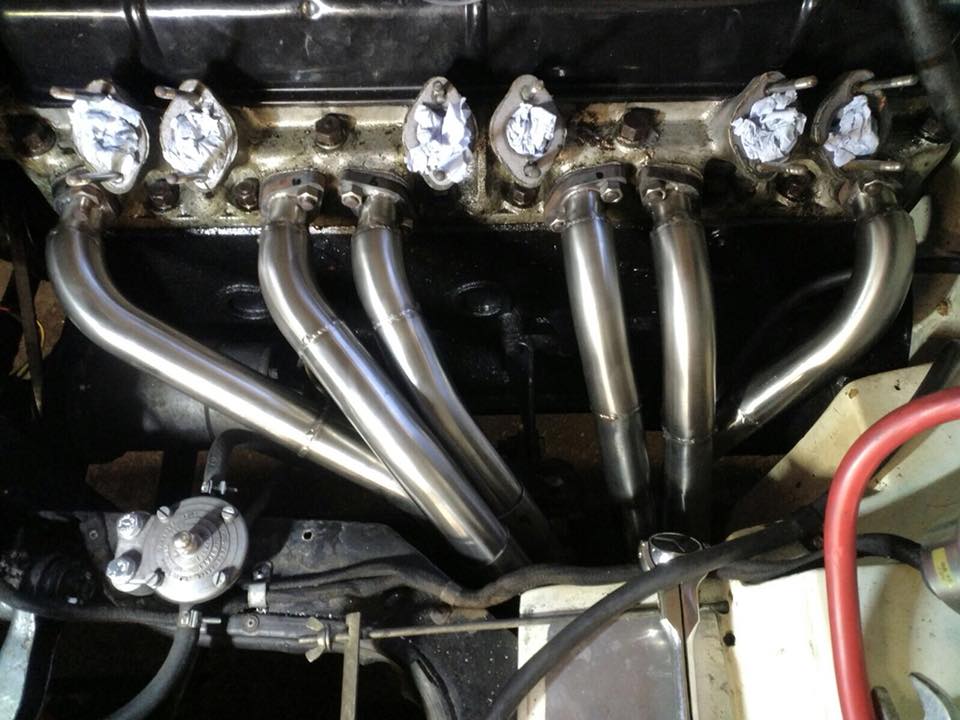
Numerous, seemingly minor, jobs have taken an inordinate amount of time, not helped by periods of inclement weather. The exhaust system has been fitted. Since dismantling the car more than two years earlier I had lost the exhaust manifold gaskets. I couldn’t even remember having them. Such gaskets for the Mays Head are not easy to find. I decided to buy a sheet of metal sandwich exhaust gasket material and try and make some myself. The exhaust ports on the Mk1 Mays head are very small at just over 1” diameter and using tin snips to cut the holes proved impossible. I then tried hole punches but the material was too tough. I then tried metal hole cutters but this caused the material to delaminate before cutting through. I ended up using the hole cutters but clamped the material tightly between two sheets of hardwood. I was able to use tin snips to cut the overall shape of the gaskets and was reasonably happy with the end results.
The Sabre came to us with Koni dampers that appeared to be in fair condition but as reported earlier, they were about 1” too long, making them very difficult to fit. In fact the front bottom mounting brackets had been “butchered” to accommodate the extra length. So I decided to replace them with new GAZ units. This is the third set I have bought from GAZ. They can supply them with Polybush top mounts and spherical bearing bottom mounts to better accommodate the angular rotation of the rear bottom mounts peculiar to the Sabre’s rear suspension.
Earlier I boldly stated that I expected to get the engine running “within the next week or so”. It actually took about 4 weeks. The engine had stood idle since its rebuild over two years ago. I took the plugs out and cranked the engine over on the starter motor to build up a bit of oil pressure, but there was none! There are only so many times you can do this without starting to worry. A bit of head scratching and a few conversations with friends and experts and I decided to squirt oil through the oil pressure gauge tapping in the block to try and prime the oil pump. This worked a treat – oil pressure at last.
I had fitted previously Powerspark electronic ignition but it proved impossible to set the timing statically so I re-fitted the original points and used a test lamp to set the timing. The engine then started first turn which was quite pleasing.
So now the engine runs but that has highlighted water leaks from both the radiator and the heater matrix. So they are now away for repair.
June 2021
Back in March 2020 I agreed to purchase an ex-SE6a gearbox and overdrive from a long time RSSOC member who lives near Norwich. It took until April 2021 before we felt happy enough to go and collect it. This unit is destined to go into NRE but during the 13 month delay the car’s restoration has moved on so changing the gearbox will be a future sub-project. The Sabre Six and many of the later Scimitar models use, what is virtually, the same Ford Type F gearbox. The SE6a ‘box has the same splined output shaft so is a relatively easy fit in a Sabre Six. The later ‘box has a better (higher) second gear ratio and comes with a Laycock J Type overdrive. Some fettling is necessary including:-
-
Fit a bush to the flywheel to accept a smaller diameter input shaft
-
Modify the gearbox mount cross member – the mount is about 25mm further to the rear of the car.
-
Adapt the Sabre gear change mechanism to facilitate secure attachment to the ‘box. A better option is to use the similar gear change mechanism from a straight six coupé, but these are in the “hens’ teeth” category of availability. Fortunately a few enquiries led to me obtaining such a unit from Josh Oakes – a result!
For some inexplicable reason NRE’s steering column was about 40mm too long resulting in the wheel being too close and there was an ugly exposed length of column between the dashboard and the steering wheel boss. An engineer friend offered to shorten it for me and made an excellent job. His technique was to cut out an appropriate length of the solid column, drill 30mm diameter holes axially into the cut ends and insert a tightly fitting pin to re-join and re-align the two parts. The joint was then carefully welded and dressed so that the modification is invisible. Very impressive work. Now the steering wheel is where it should be.
Many little jobs have now been completed and, at last the car is again roadworthy. So far I have put about 100 miles under its belt with no serious problems. The engine starts easily and performs very well. Steering and brakes feel good. The new spring rates are 220lb/in front and 200 lb/in rear and it’s possible that these are a little too stiff, but a bit more time will tell. The outstanding issues to sort are a number of clonks and rattles. Then it’s off to the trimmers for the final lap.
August 2021
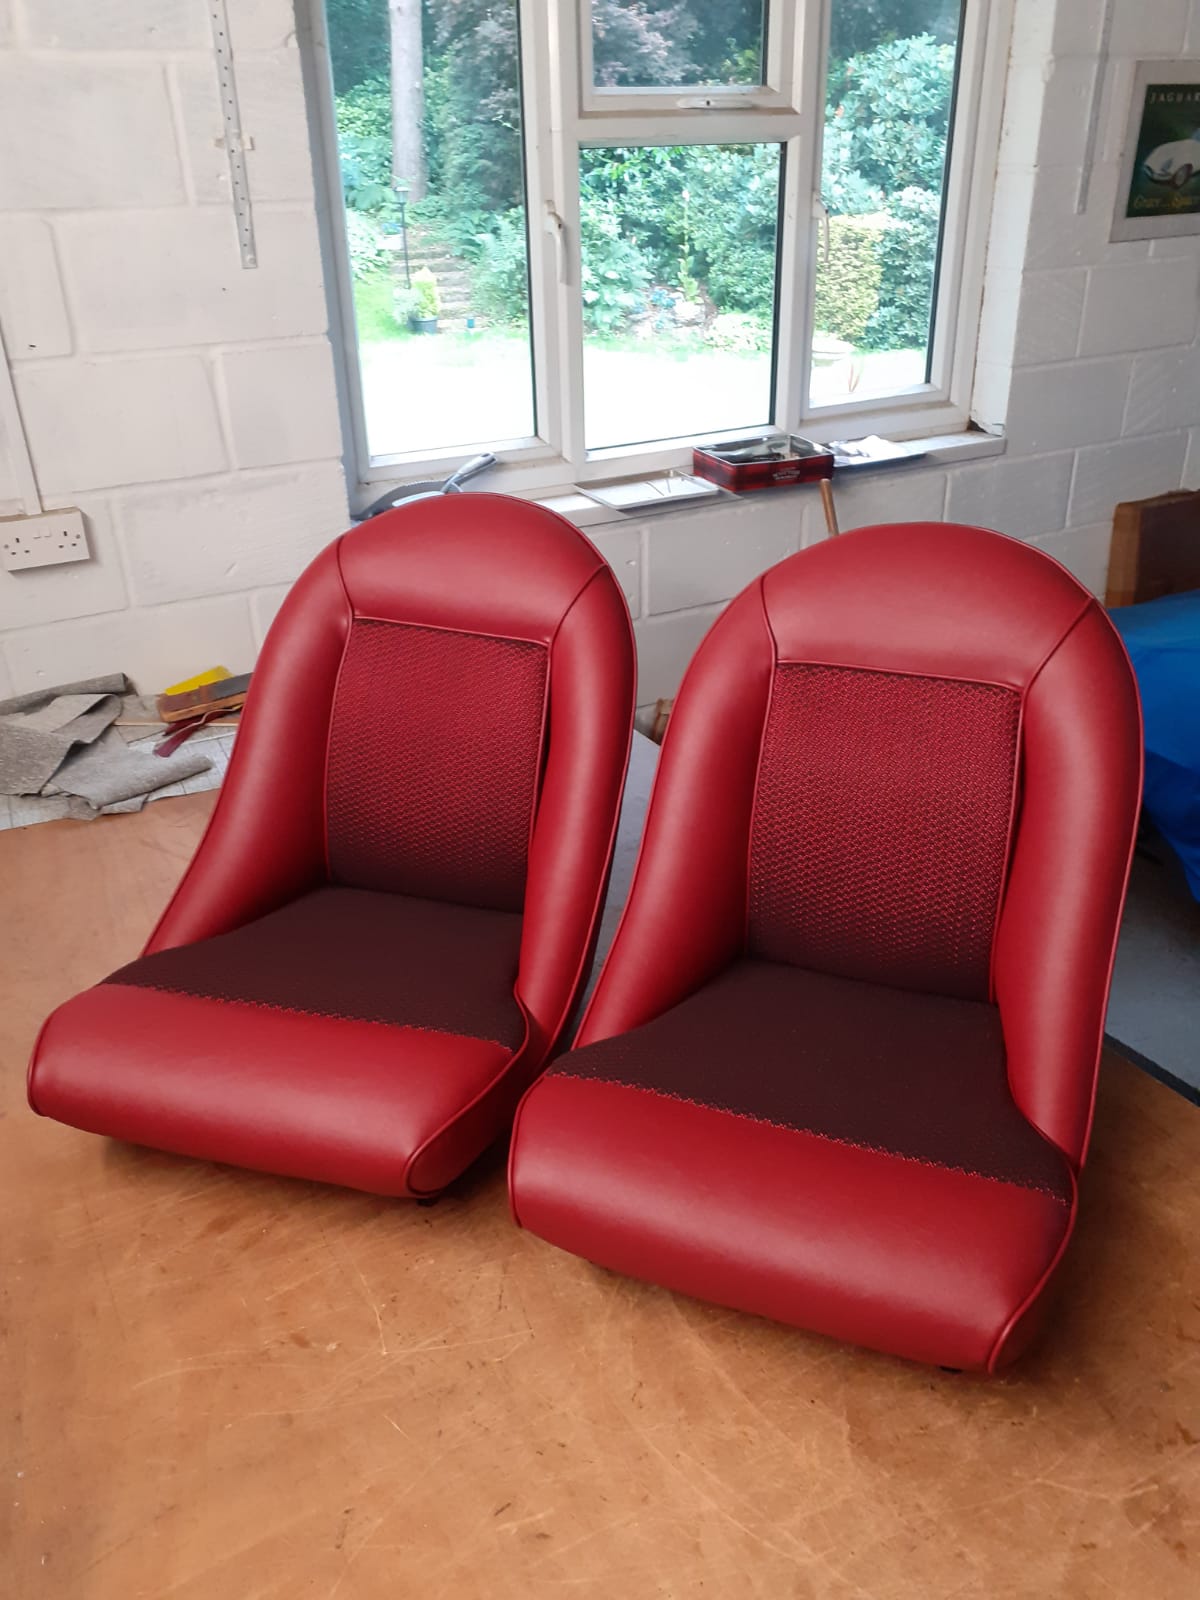
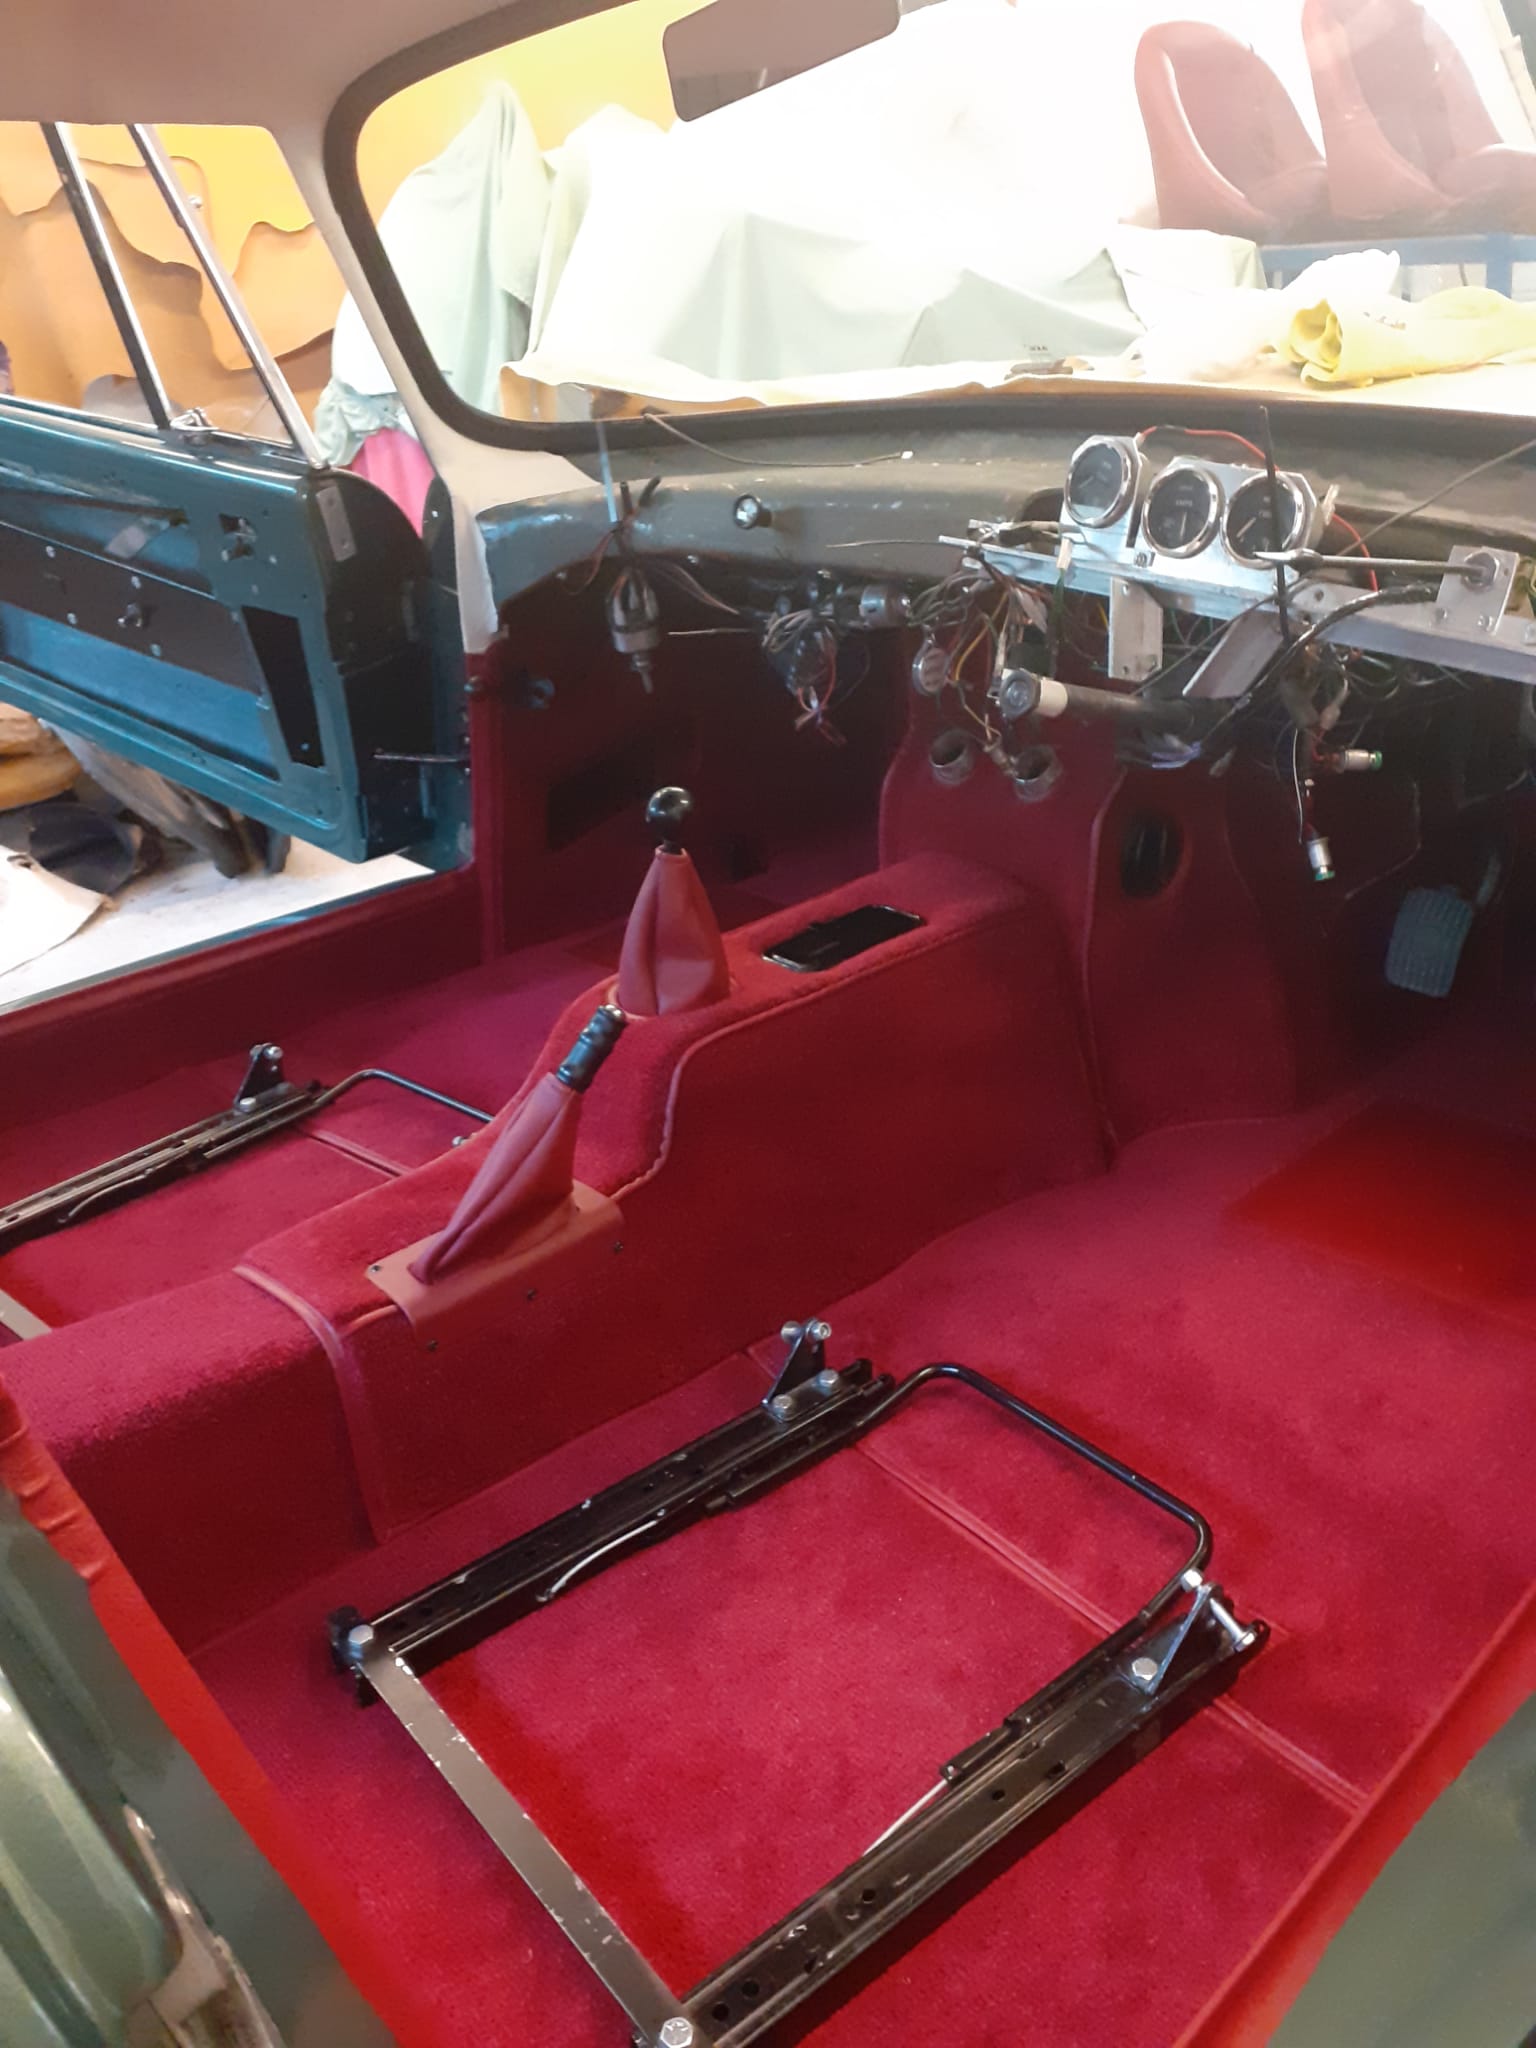
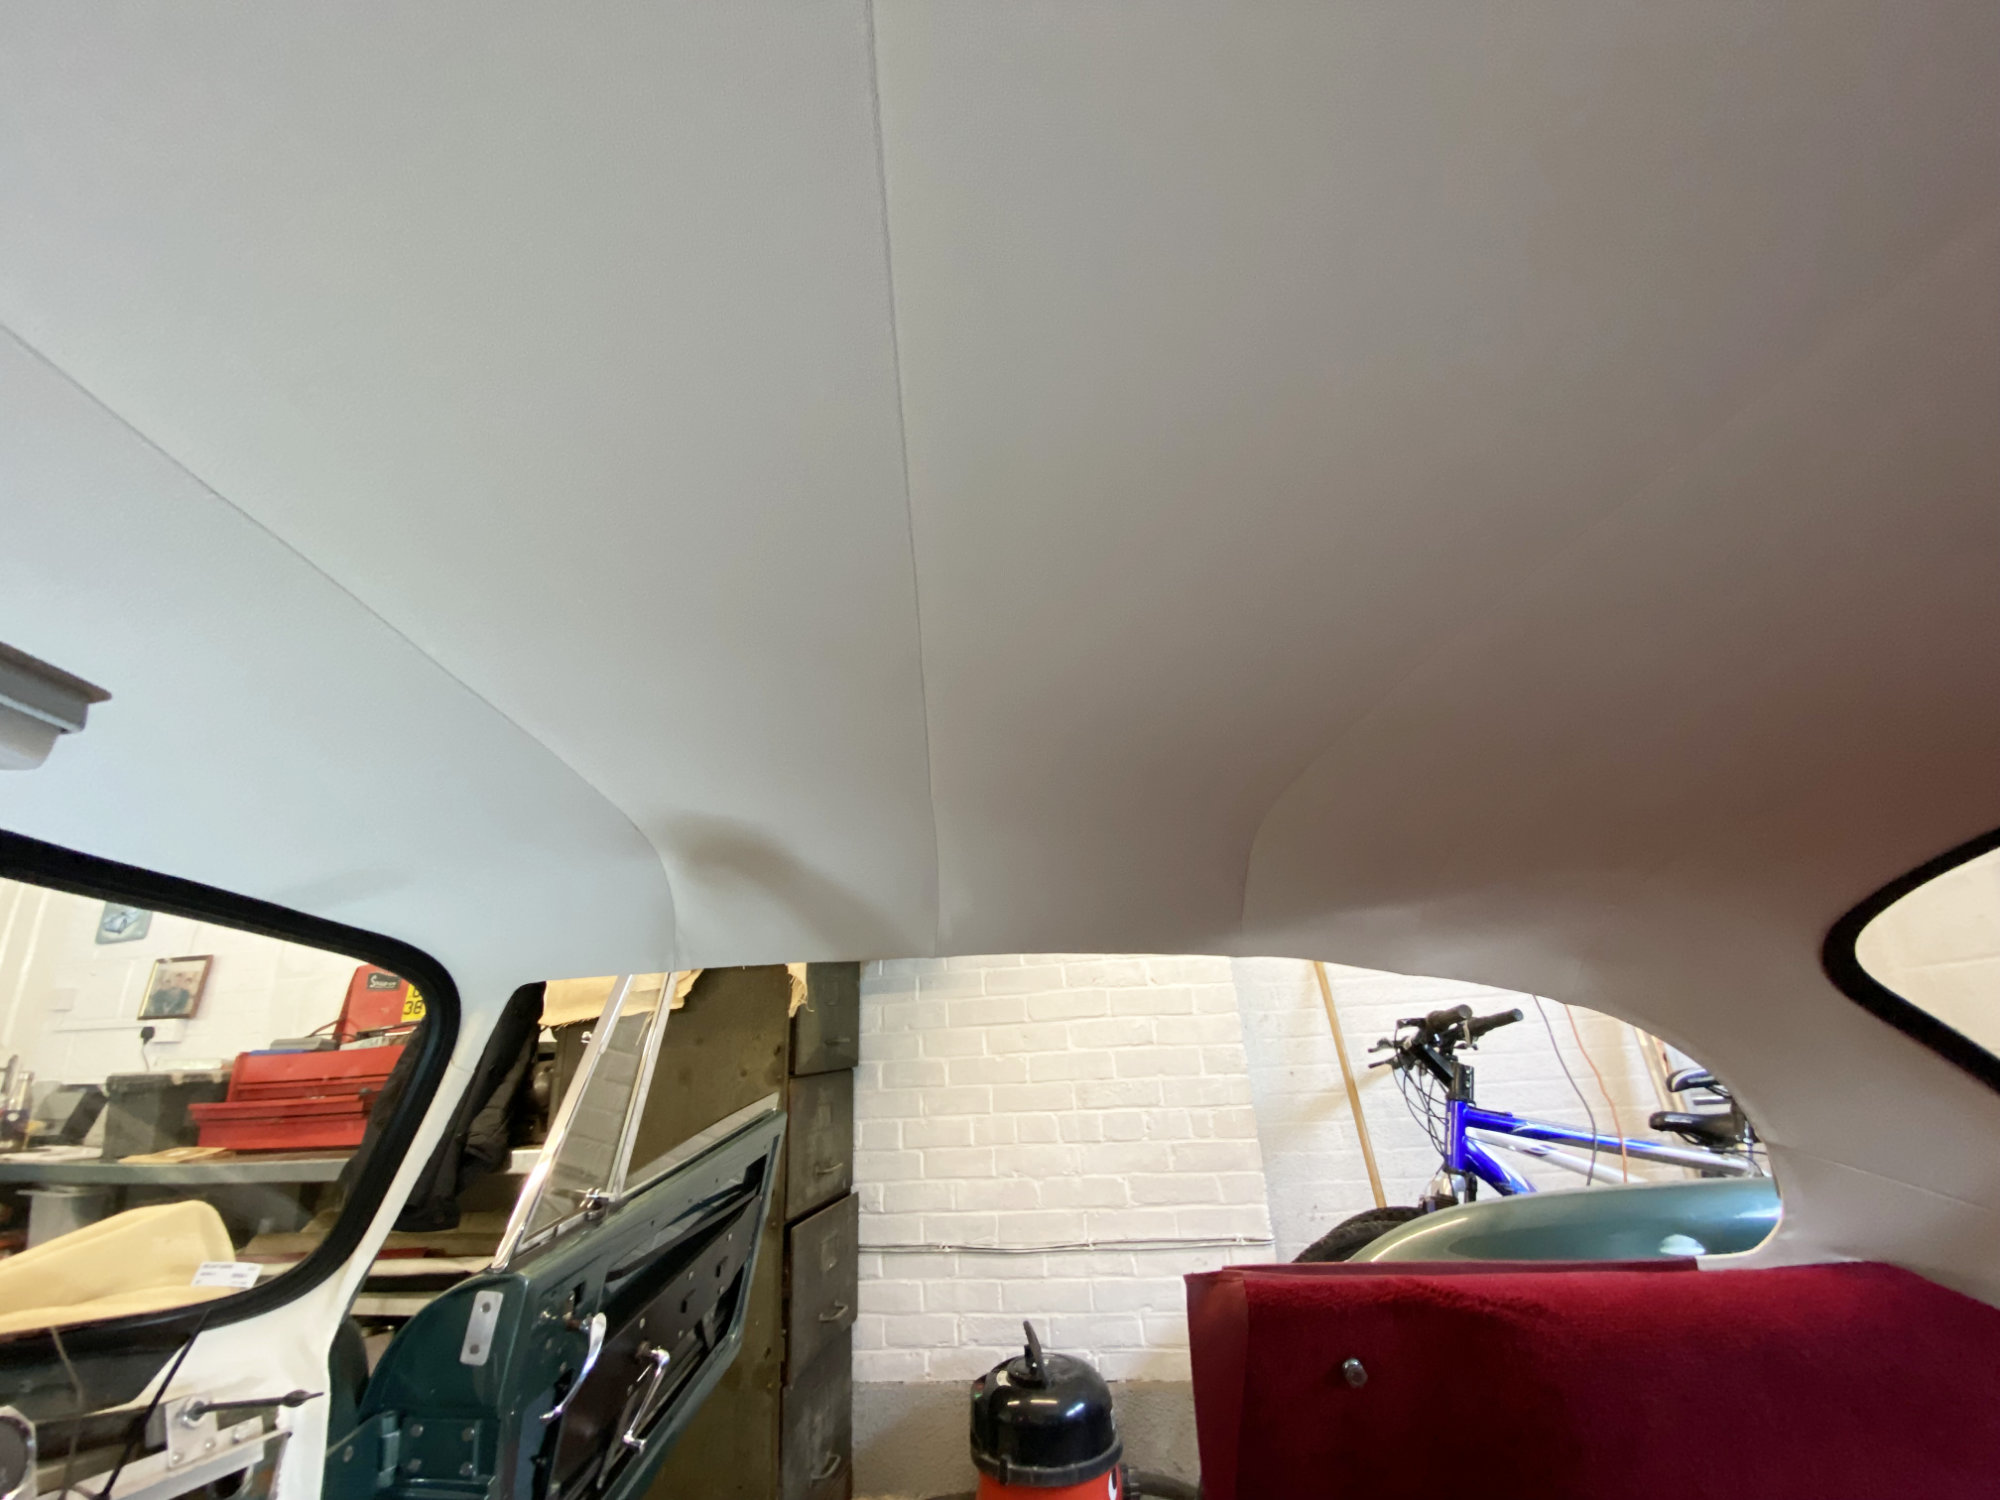
Well, after more than two years NRE is almost there. It’s had new interior, including roof lining, seats, door cards and carpets done by Creech Coach Trimmers, Croydon, and they have done an excellent job. I now have to complete the re-fitting of the dashboard and associated wiring and then it will be finished, subject to the usual shake-down testing period. Photos next time.
September 2021
NRE’s restoration is now finished. I chose 9th September as the official completion date; exactly three years since I started the restoration ball rolling by removing the faulty engine. There are a few minor snags to be dealt with but otherwise the car is good to go. So far, touch wood, it has performed almost faultlessly. Importantly the original poor engine performance has completely gone and the engine runs very well, albeit with a slightly rough and noisy tick over. There are also a few oil leaks to locate and correct.
When Mechspray painted the car they offered to carry out a free machine polish once the car was completed. A year of rebuilding in the garage had resulted in an invisible film on the paint surface which could be felt as a slightly rough surface. So I returned and they were able to bring back the car’s sparkle.
Earlier I described the modifications that I had made to the heater. Now that I have started to use the car and the weather is getting cooler I am happy to confirm that the heater performance is transformed. With the original system air movement at the grilles was barely noticeable both in terms of velocity and temperature. The modified system in NRE blows hot and strong.
The straight six engine originally had a canister type oil filter with replaceable paper element. These are enormous and I have never understood how they ever fitted into a Sabre Six. Today many Sabre owners have fitted adapters to take modern spin-on filters. The normal Essex engine filter attaches to the adaptor OK but is still too bulky to fit and remove easily. The solution I have adopted is to use either a much shorter unit (e.g. Coopersfiamm FT 4739) or a smaller diameter unit (e.g. Ford EFL.600). These fit easily and for the type of driving involved I doubt that their smaller volume is a problem.
A few motorway miles has reminded me of how much I like an overdrive, missing on NRE, so that is the next job I am planning. As previously reported I have obtained a suitable ‘box and overdrive but I might get Iain Daniels to fit it.
I’m having trouble with my spare wheel. It will not easily fit in its allotted slot, even if the tyre is deflated. If I were to force it in I fear that I would not then be able to remove it easily in a “real life” situation – dark, wet night on the M25 for example. I thought of getting a narrower wheel/tyre combinations as a spare but this wouldn’t really solve the problem as I would still have to house a full size tyre in the event of a puncture. Perhaps I will have to resort to an emergency repair/ pump kit as per our everyday modern car.
January 2022
The ashtray is in poor condition. For years I have being trying to find a good match. No one seems to know the source of this item. I thought I had succeeded when I saw a Triumph TR4 ash tray for sale on the internet. This I bought only to find out that it is a few mm smaller in length and width and consequently falls through the hole in the transmission tunnel! Neither of us smoke but an ashtray is a useful place to store small bits and pieces especially as the Sabre doesn’t have a glove box as such.
March 2022
NRE now has an overdrive, courtesy of Iain Daniels Classic Motorsport. This is the Scimitar SE6 series box with Laycock J type overdrive and is a relatively east fit. With better planning on my part it would have been installed during the car’s restoration and not after it. Although I had the car transported to Iain’s place for the work, a 170 mile journey, I decided to drive the car back home, the longest journey by far in our ownership. The gearbox and overdrive performed faultlessly on the drive home which pleased me, bearing in mind that the ‘box has previously languished for 20 years or so on various garage floors. Iain also addressed oil and water leaks from the engine and, again, I was delighted to find no drips of either on the garage floor the next day. This was the first opportunity to check fuel consumption which came out at 21mpg. A little disappointing.
May 2022
On the 170 mile drive back from Iain Daniels’ place I noticed a couple of worrying noises. One was an occasional clatter from the front of the car and the other a persistent, cyclic graunch from the rear. Fortunately the car got me home safely and subsequent investigations revealed that the front brake caliper bolts were not fully tight! In fact one of the calipers was actually loose, hence the occasional clatter. So, embarrassingly, we have to put this down to bad workmanship on my part – confession number 1! A couple of well qualified experts couldn’t nail down the graunch from the rear. So I decided to have the rear axle reconditioned by Hardy Engineering Transmissions in Leatherhead. They confirmed my suspicion that the axle was fitted with an LSD but couldn’t find any other serious problems. Nevertheless I asked them to rebuild the axle with new bearings and seals (the pinion seal had been leaking). They used SKF Speedi-Sleeves to address the slight shaft wear that they found. The axle is now back in the car and I am happy to confirm that the graunch has disappeared. However, here comes confession number 2. Thinking back to when I removed the brake shoes before taking the axle out of the car, I remembered that one of the shoe retaining clips had come adrift. The pin had vanished and the metal clip was squashed and jammed between the shoe and the back-plate. I now suspect that this had allowed the shoe to move and rub against the drum causing the graunch!! Hey-ho. It’s only money!! As an aside – Whilst removing and replacing the axle I was reminded as to how short the Sabre Six prop-shaft is. Would this win the shortest ever prop-shaft competition?
July 2022
I have been carrying out a few post restoration shake-down jobs:-
- The clutch was heavy. The car came to us with a ¾” master cylinder, so I changed this to 5/8” and this has reduced the pedal pressure significantly
- The speedometer was fluctuating wildly. This could have been either the cable or the instrument itself. Whilst I could see no damage to the cable, I decided to replace it anyway with a new one from Speedy Cables. Another satisfactory conclusion – the speedo now has a steady needle.
- The tachometer stopped working shortly after getting the car back on the road. After checking all the connections I concluded that the instrument itself was to blame. I had previously fitted and RVI-RVC conversion kit from Spiyda and decided to replace this. The gauge is now working but I think I need to revisit its calibration.
- The full size spare wheel (15” by 5” rim with 165 tyre) doesn’t fit in the spare wheel slot for some reason. I happened to have another wheel and tyre and noticed that its rim was narrower at 4.5” asopposed to 5”and this just fits, so problem solved, sort of. There is still the problem of accommodating a full sized wheel in the event of a puncture, but I’ll live with that if and when the time comes.